01A · The foundation
Building a Fashion Visual Language
Write a detailed fashion brief and generate a photograph from it. This workflow turns text into an image in five stages: load the models, encode the brief, generate, decode, save.
Every later local workflow on this site reuses these same models and stages, and only explains what it adds. Read this page first. Setup and model downloads are covered in Getting Started.
- You’ll learn
- How to direct an image from a written brief, and what each stage of generation does: the three models, the latent, the seed, guidance, sampler, steps, image size, decoding and saving.
What goes in, what comes out
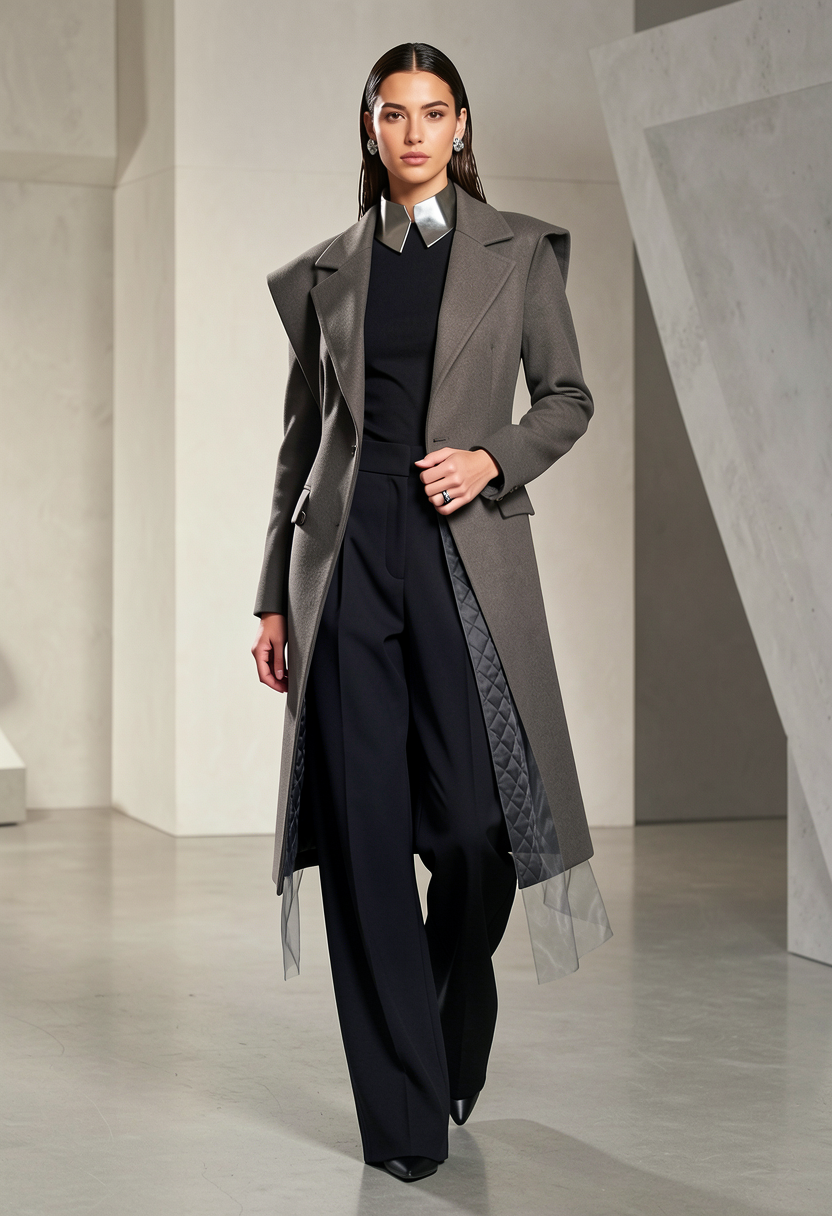
A written brief goes in. One 832 × 1216 PNG comes out. The workflow reads from left to right in five groups.
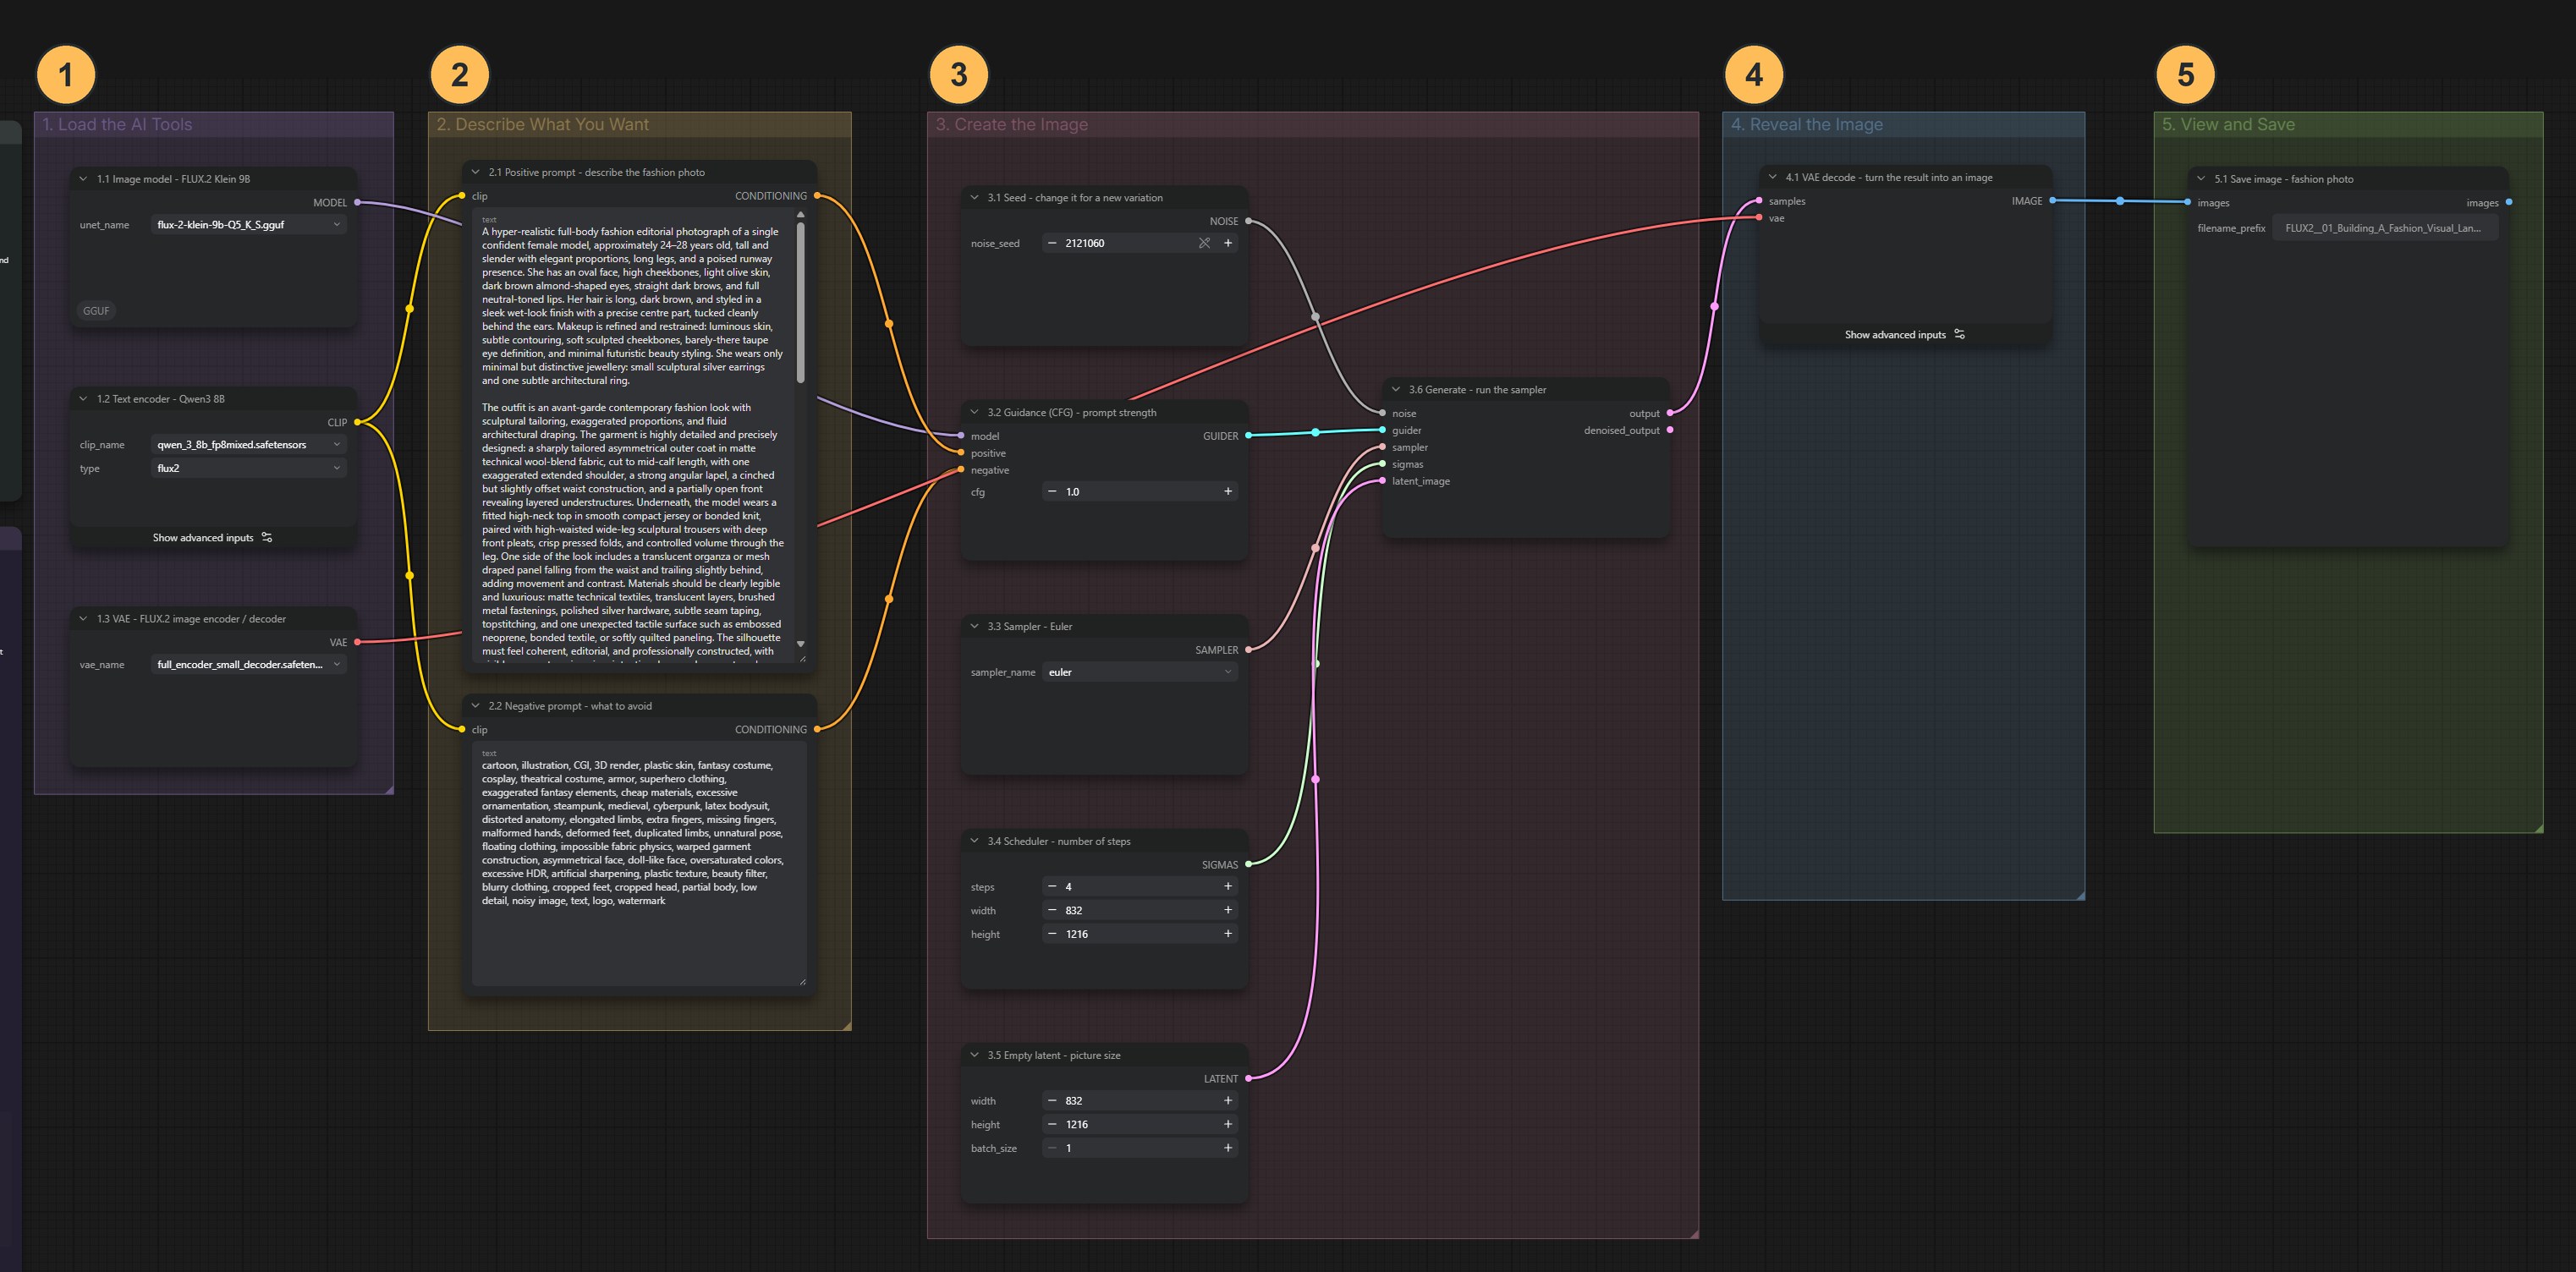
How the workflow works · Stage 1
Load the three models
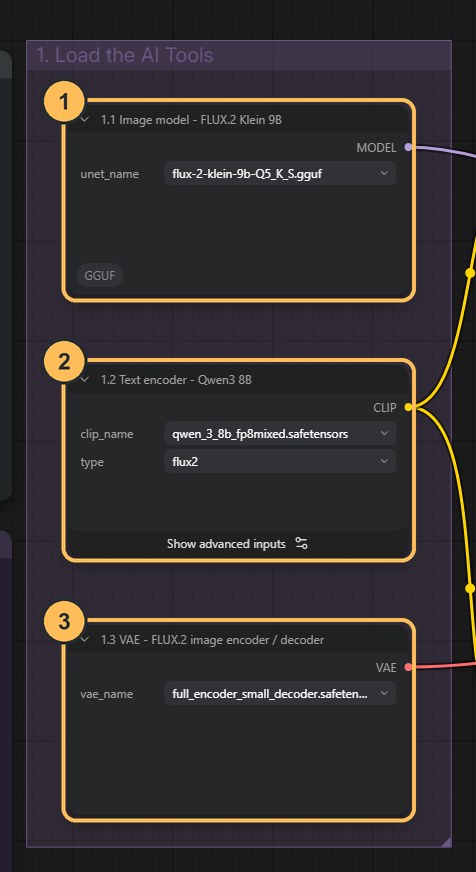
- Image model · FLUX.2 Klein 9BA neural network trained on a very large number of images with descriptions. It has learned how words relate to shapes, materials, people, light and space. It is the part that generates. Loaded by Unet Loader (GGUF), which needs the ComfyUI-GGUF custom nodes.
- Text encoder · Qwen3 8BA language model that converts your written brief into numbers (an embedding) the image model can use. A model that does this job is called a text encoder. You can think of it as the translator for words.
- VAE · FLUX.2 image encoder and decoderVAE is short for variational autoencoder. It converts between visible pixels and the compact internal form the image model works in. Here it decodes the finished result into a picture. In later workflows it also encodes reference photos. You can think of it as the translator for pictures.
Why two translators? Latent space
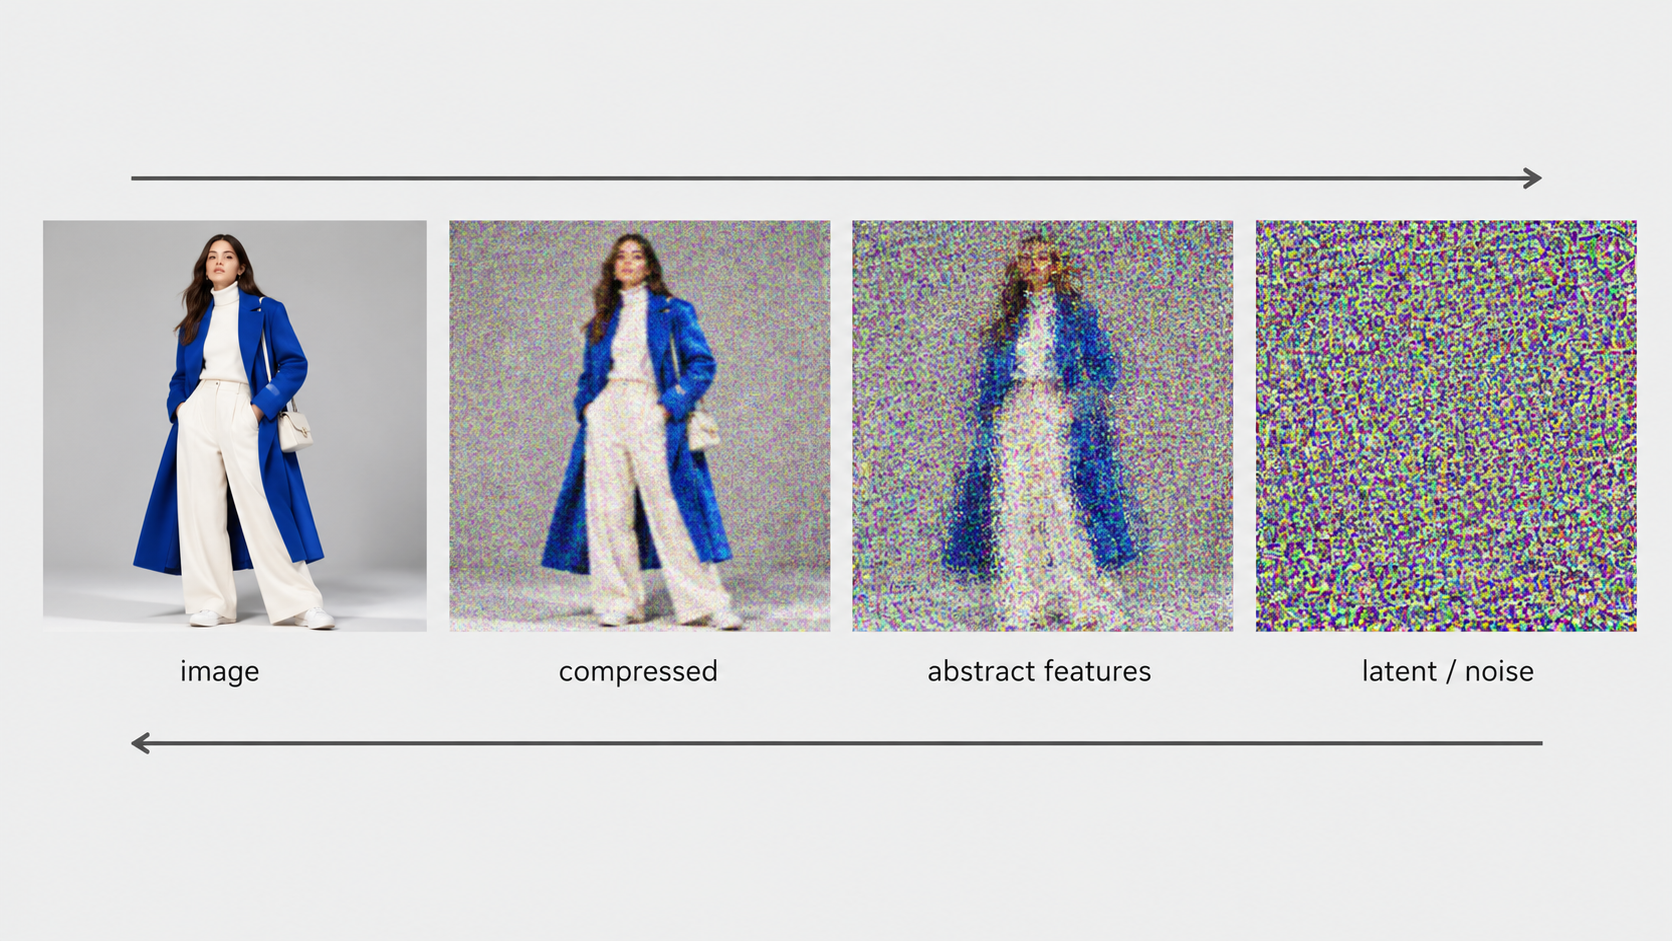
FLUX.2 does not work on pixels. It works on a latent: a much smaller grid of numbers that describes the image in compressed form. Working there is what makes generation possible on an 8 GB graphics card.
That is why two different conversions are needed. Text encoding turns words into numbers that steer the generation. Image encoding and decoding moves pictures into and out of the latent form. They are separate operations done by separate models.
Generation starts from a latent filled with random noise and refines it, step by step, towards something that matches the brief. FLUX uses a method called flow matching, but “start from noise, refine towards the brief” is an accurate first picture.
Stage 2 · Describe
Write a detailed fashion brief
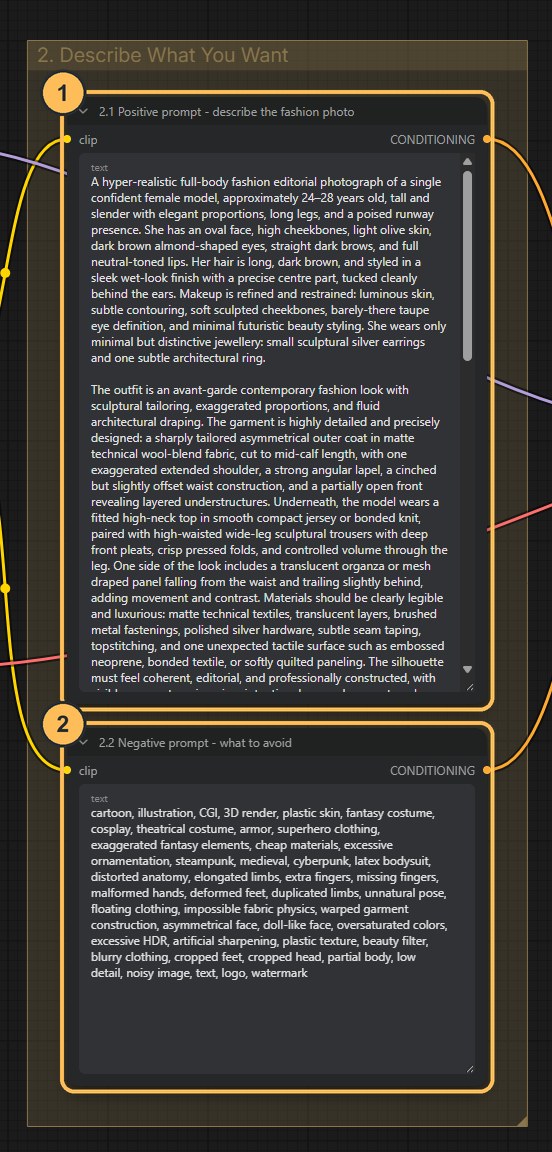
- Positive promptYour brief: what you want to see.
- Negative promptWhat to avoid.
A prompt is the text you give the model. The brief is typed into the positive prompt node. “A fashionable outfit” leaves every decision to the model. A detailed brief gives the model a direction and gives you something to judge the result against.
Order the brief like a designer
- Garment: silhouette, length, cut, seams, closures, layers
- Material: colour, texture and behaviour. Bonded wool holds its shape, silk falls
- Person and pose: age range, build, skin tone, hair, stance. If you leave these out, the model chooses for you
- Camera, light, setting, mood
A short example in that order:
A mid-calf asymmetrical coat in matte technical wool, over a high-neck top and wide-leg trousers, with a translucent draped panel. Full-body framing, pale concrete gallery, light from camera left.
Clear is better than long. Contradictions make the image less controlled. Read the full saved prompt.
What to change: one phrase at a time. Keep fixed: the seed and every setting in stage 3. Inspect: whether the part you changed, and only that part, is different.
The negative prompt
A second text node lists what to avoid. Whether it has any effect depends on the guidance value, explained in the next stage. Get the positive brief right first.
Stage 3 · Generate
Set the generation controls
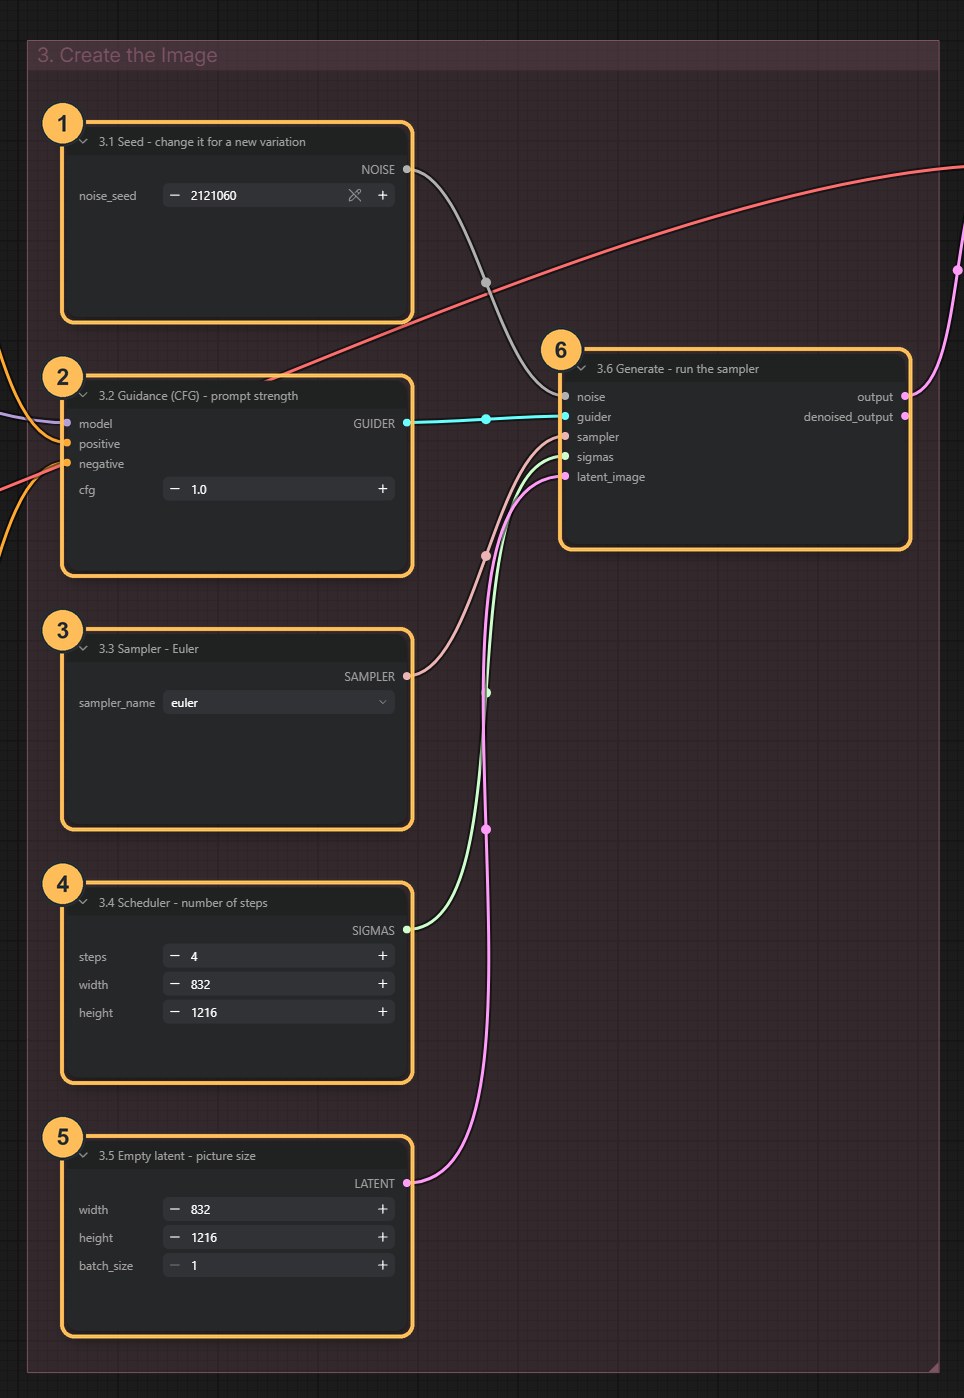
- SeedThe seed is the number that selects the starting noise. The same seed with the same settings reproduces the same image. Fix it while you test another setting. Change it to get a different image from the same brief.
- Guidance (CFG)The model makes two predictions, one for the positive prompt and one for the negative, and CFG sets how they are blended. At exactly 1.0 this implementation skips the negative prediction, so the negative prompt is ignored and each step is faster. The workflow uses 1.0, the value Black Forest Labs recommends for this model. Below or above 1, both predictions are calculated: values above 1 push the image further from the negative prompt, values below 1 pull it slightly towards it. This model is designed for values near 1. Higher is not better.
- Sampler · EulerThe sampler is the method used to move from one refinement step to the next. Keep Euler unless you are testing samplers on purpose.
- Scheduler · stepsSteps are the number of refinement passes. It also holds a width and height, which must match the image size below. See the step comparison underneath.
- Empty latent · width, height, batch sizeWidth and height set the image size (832 × 1216 here, about one megapixel, which is the size this model is designed for). Larger images need more memory and time: doubling both sides means four times the pixels. Batch size is the number of images made in one run, each from a different noise. Increase it only if you have memory to spare.
- Sampler nodeCombines model, prompts, noise and schedule and runs the steps. Its output is still a latent, not a picture.
What to inspect after any change: the silhouette first, then face, hands, seams and fabric texture.
Two properties of this model file
Quantized. The file flux-2-klein-9b-Q5_K_S.gguf stores the model’s numbers at reduced precision, which makes the file smaller and lets it fit in 8 GB of VRAM. Quantization is compression. It can cost a little fine detail compared with the full-precision model.
Distilled. Separately, FLUX.2 Klein was trained to reach a usable image in very few steps. That is why the workflow uses 4. Distillation is about how many steps the model needs, not about file size.
Do more steps make a better image?
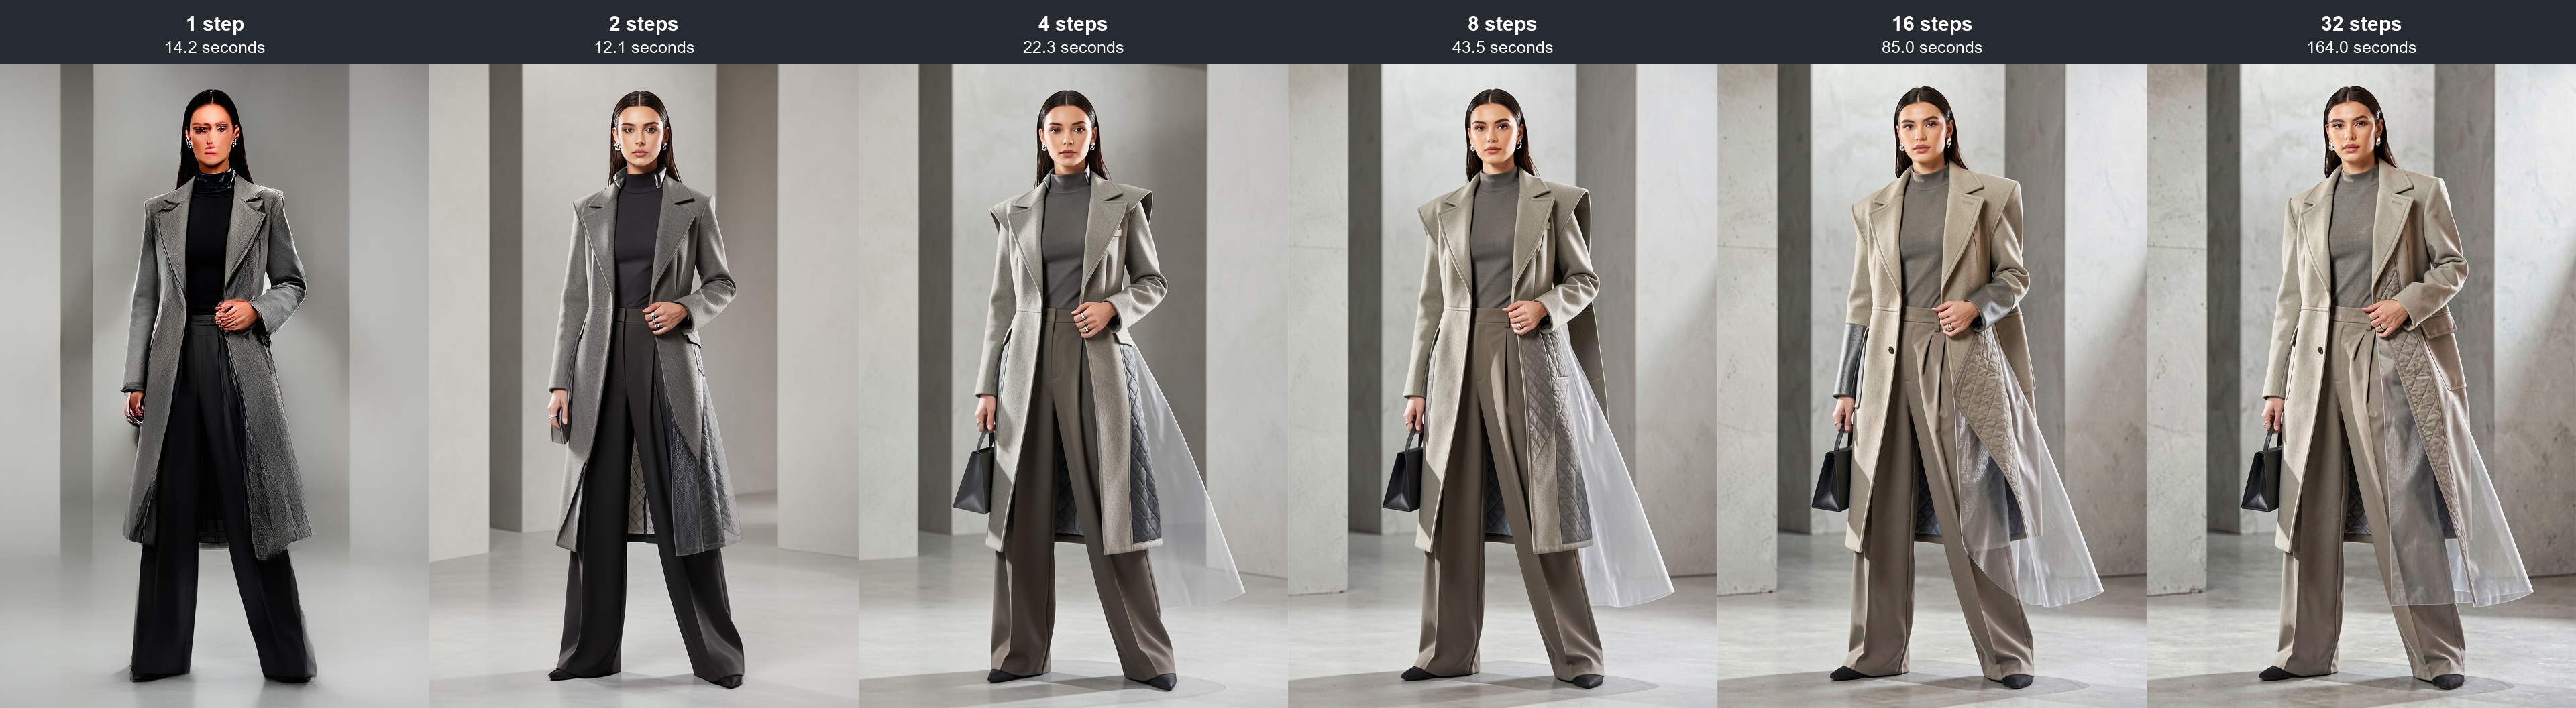
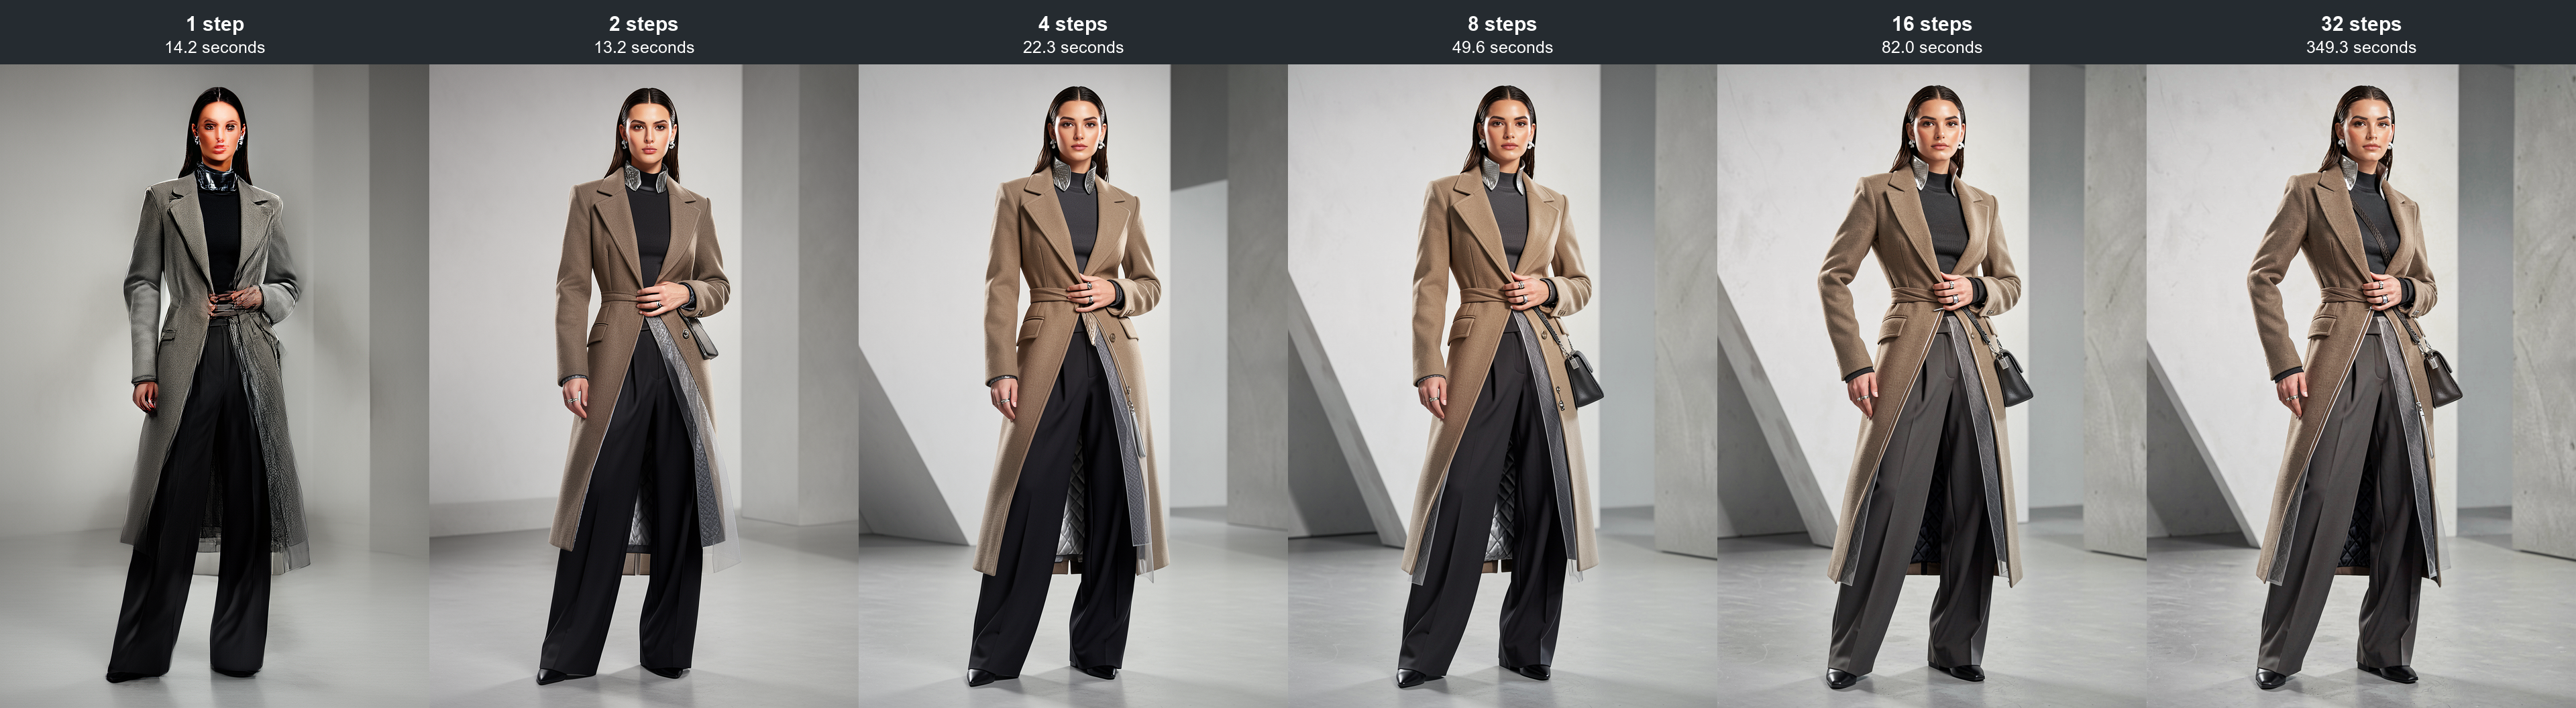
An earlier test ran the same seed and brief at 1, 2, 4, 8, 16 and 32 steps. Compare the face, skin texture, lapels, seams and silhouette, not only the amount of detail. At higher step counts, also look for blotchy or noisy texture, colour shifts and contrast that has become too strong.
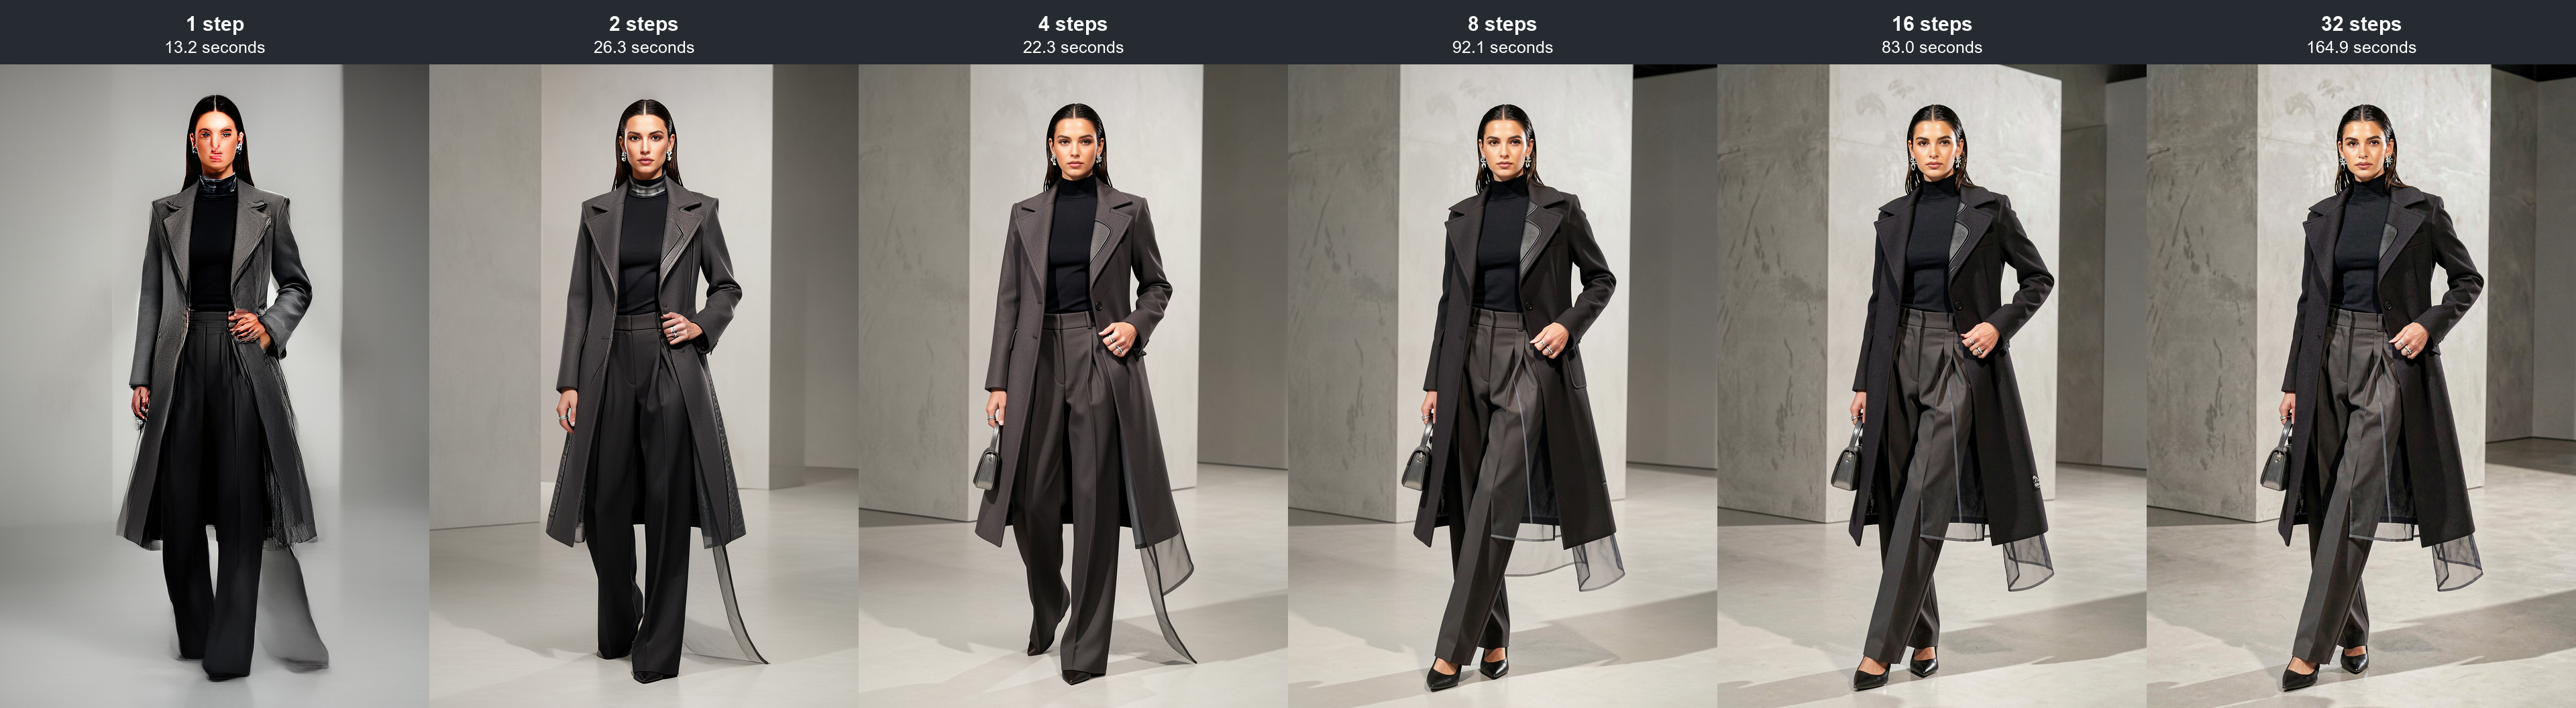
In these examples the overall look is set within the first few steps. Extra steps change details, and sometimes the design. Generation time rises steadily with the step count.
Measured in that earlier test: FLUX.2 Klein 9B Q5_K_S, 640 × 960, Euler, CFG 0.8, on an RTX 3060 with 8 GB. Median of fresh runs. Your times will differ.
Three more seeds from the same test
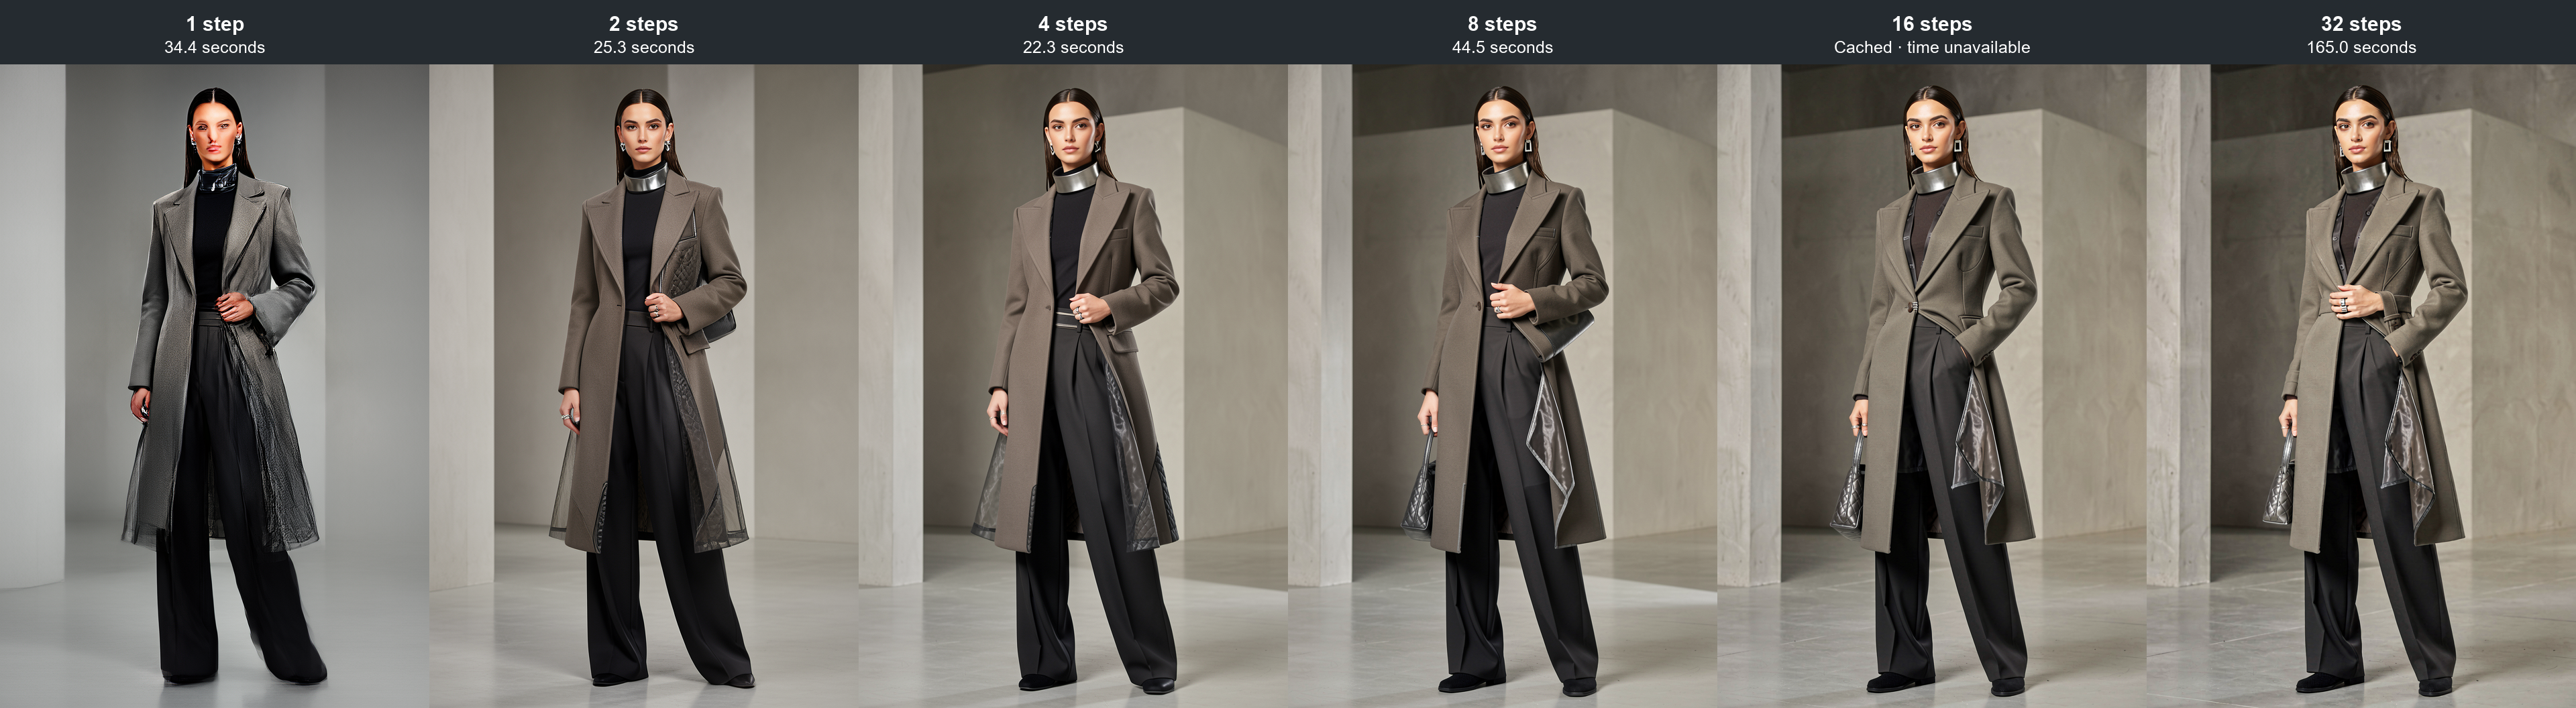
The recommended value: 4 steps
Black Forest Labs, the makers of this model, built it to produce an image in 4 steps with CFG 1, and the workflow is saved with those values. A check at the workflow’s current size agrees. With the same seed, 8 steps looked much the same as 4, and 28 steps added a fine artificial pattern to the fabric and the wall.
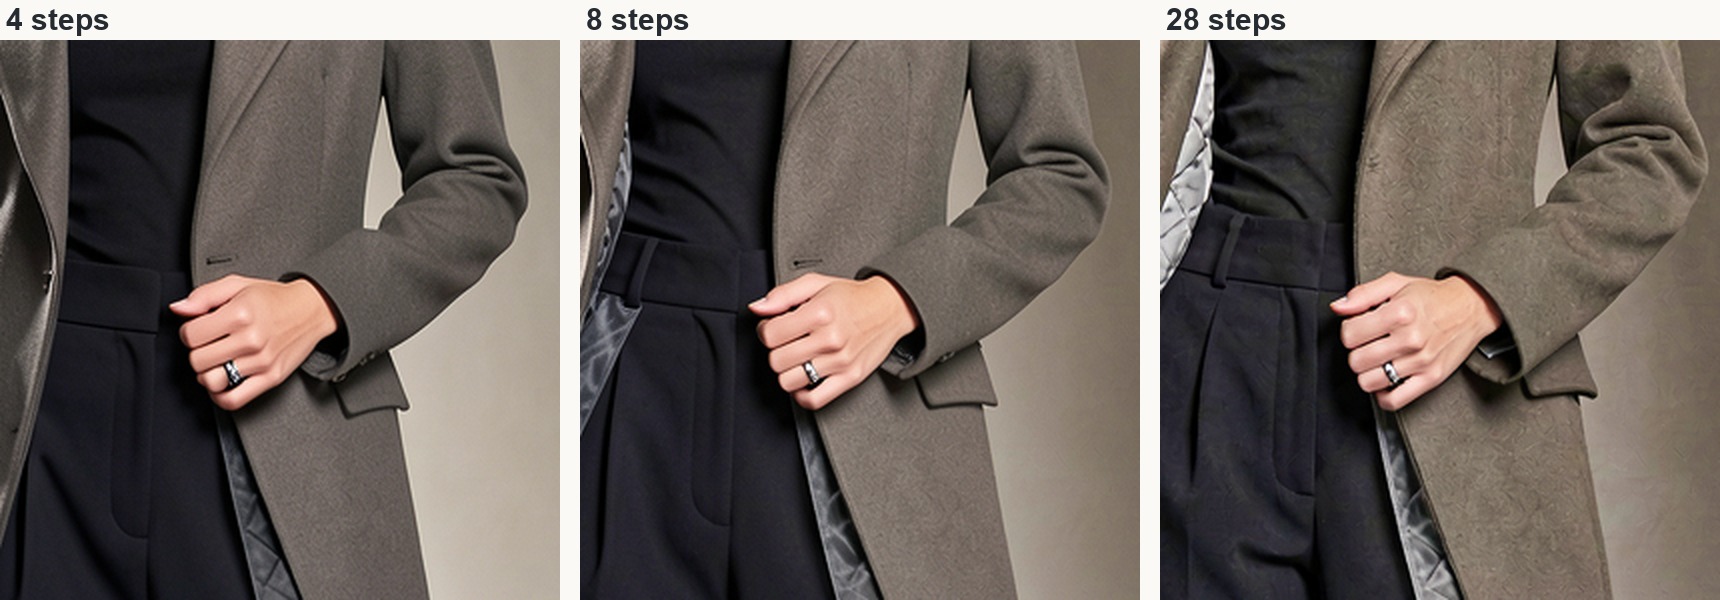
To test steps yourself: keep the seed, brief, CFG and size fixed, change only the step count, and compare the results side by side before deciding.
Stages 4 and 5 · Decode and save
Decode the latent and save the image
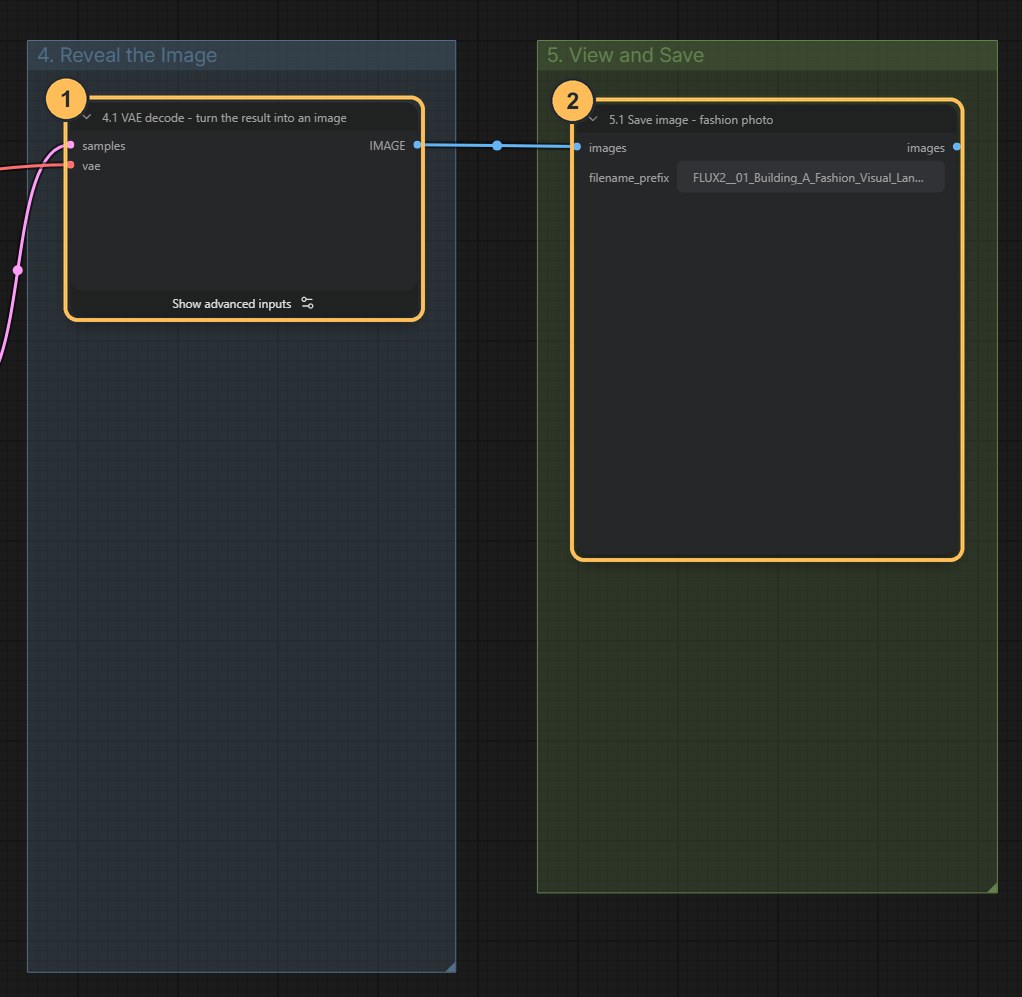
- VAE Decode (Tiled)The VAE from stage 1 converts the finished latent into a visible image. “Tiled” means it decodes the image in overlapping pieces to use less memory.
Tile size (512) is the size of each piece. Smaller uses less memory and is slower. Overlap (64) is how much neighbouring pieces share, which hides the joins. These two are memory controls. They do not change the design, so leave them unless decoding runs out of memory or you can see a faint grid.
Temporal size and temporal overlap apply only to video models. They have no effect on a single image. - Save ImageShows the result and writes a PNG to the
outputfolder. The filename prefix tells you which workflow made the file. Change it if you want to label a test.
Check the result
- The silhouette reads clearly even as a thumbnail
- Seams, closures and fabrics match the brief and are readable
- Hands, feet and garment edges look convincing
- The light helps you understand the clothes
- The design decisions are yours. Vague phrases such as “a dramatic statement accessory” let the model invent the design
Download the workflow
- A_Text_To_Fashion_Photo.jsonThe text-to-image workflow described on this page
- 01_Building_A_Fashion_Visual_Language__D_Steps_Sweep.jsonRuns the earlier six-step-count comparison, at its original settings (640 × 960, CFG 0.8)
Click a filename to download it, or right-click it and choose Save link as. Keep the .json ending. Then drag the file onto the ComfyUI canvas, or use Workflow → Open.