02 · Print design
Textile Repeat
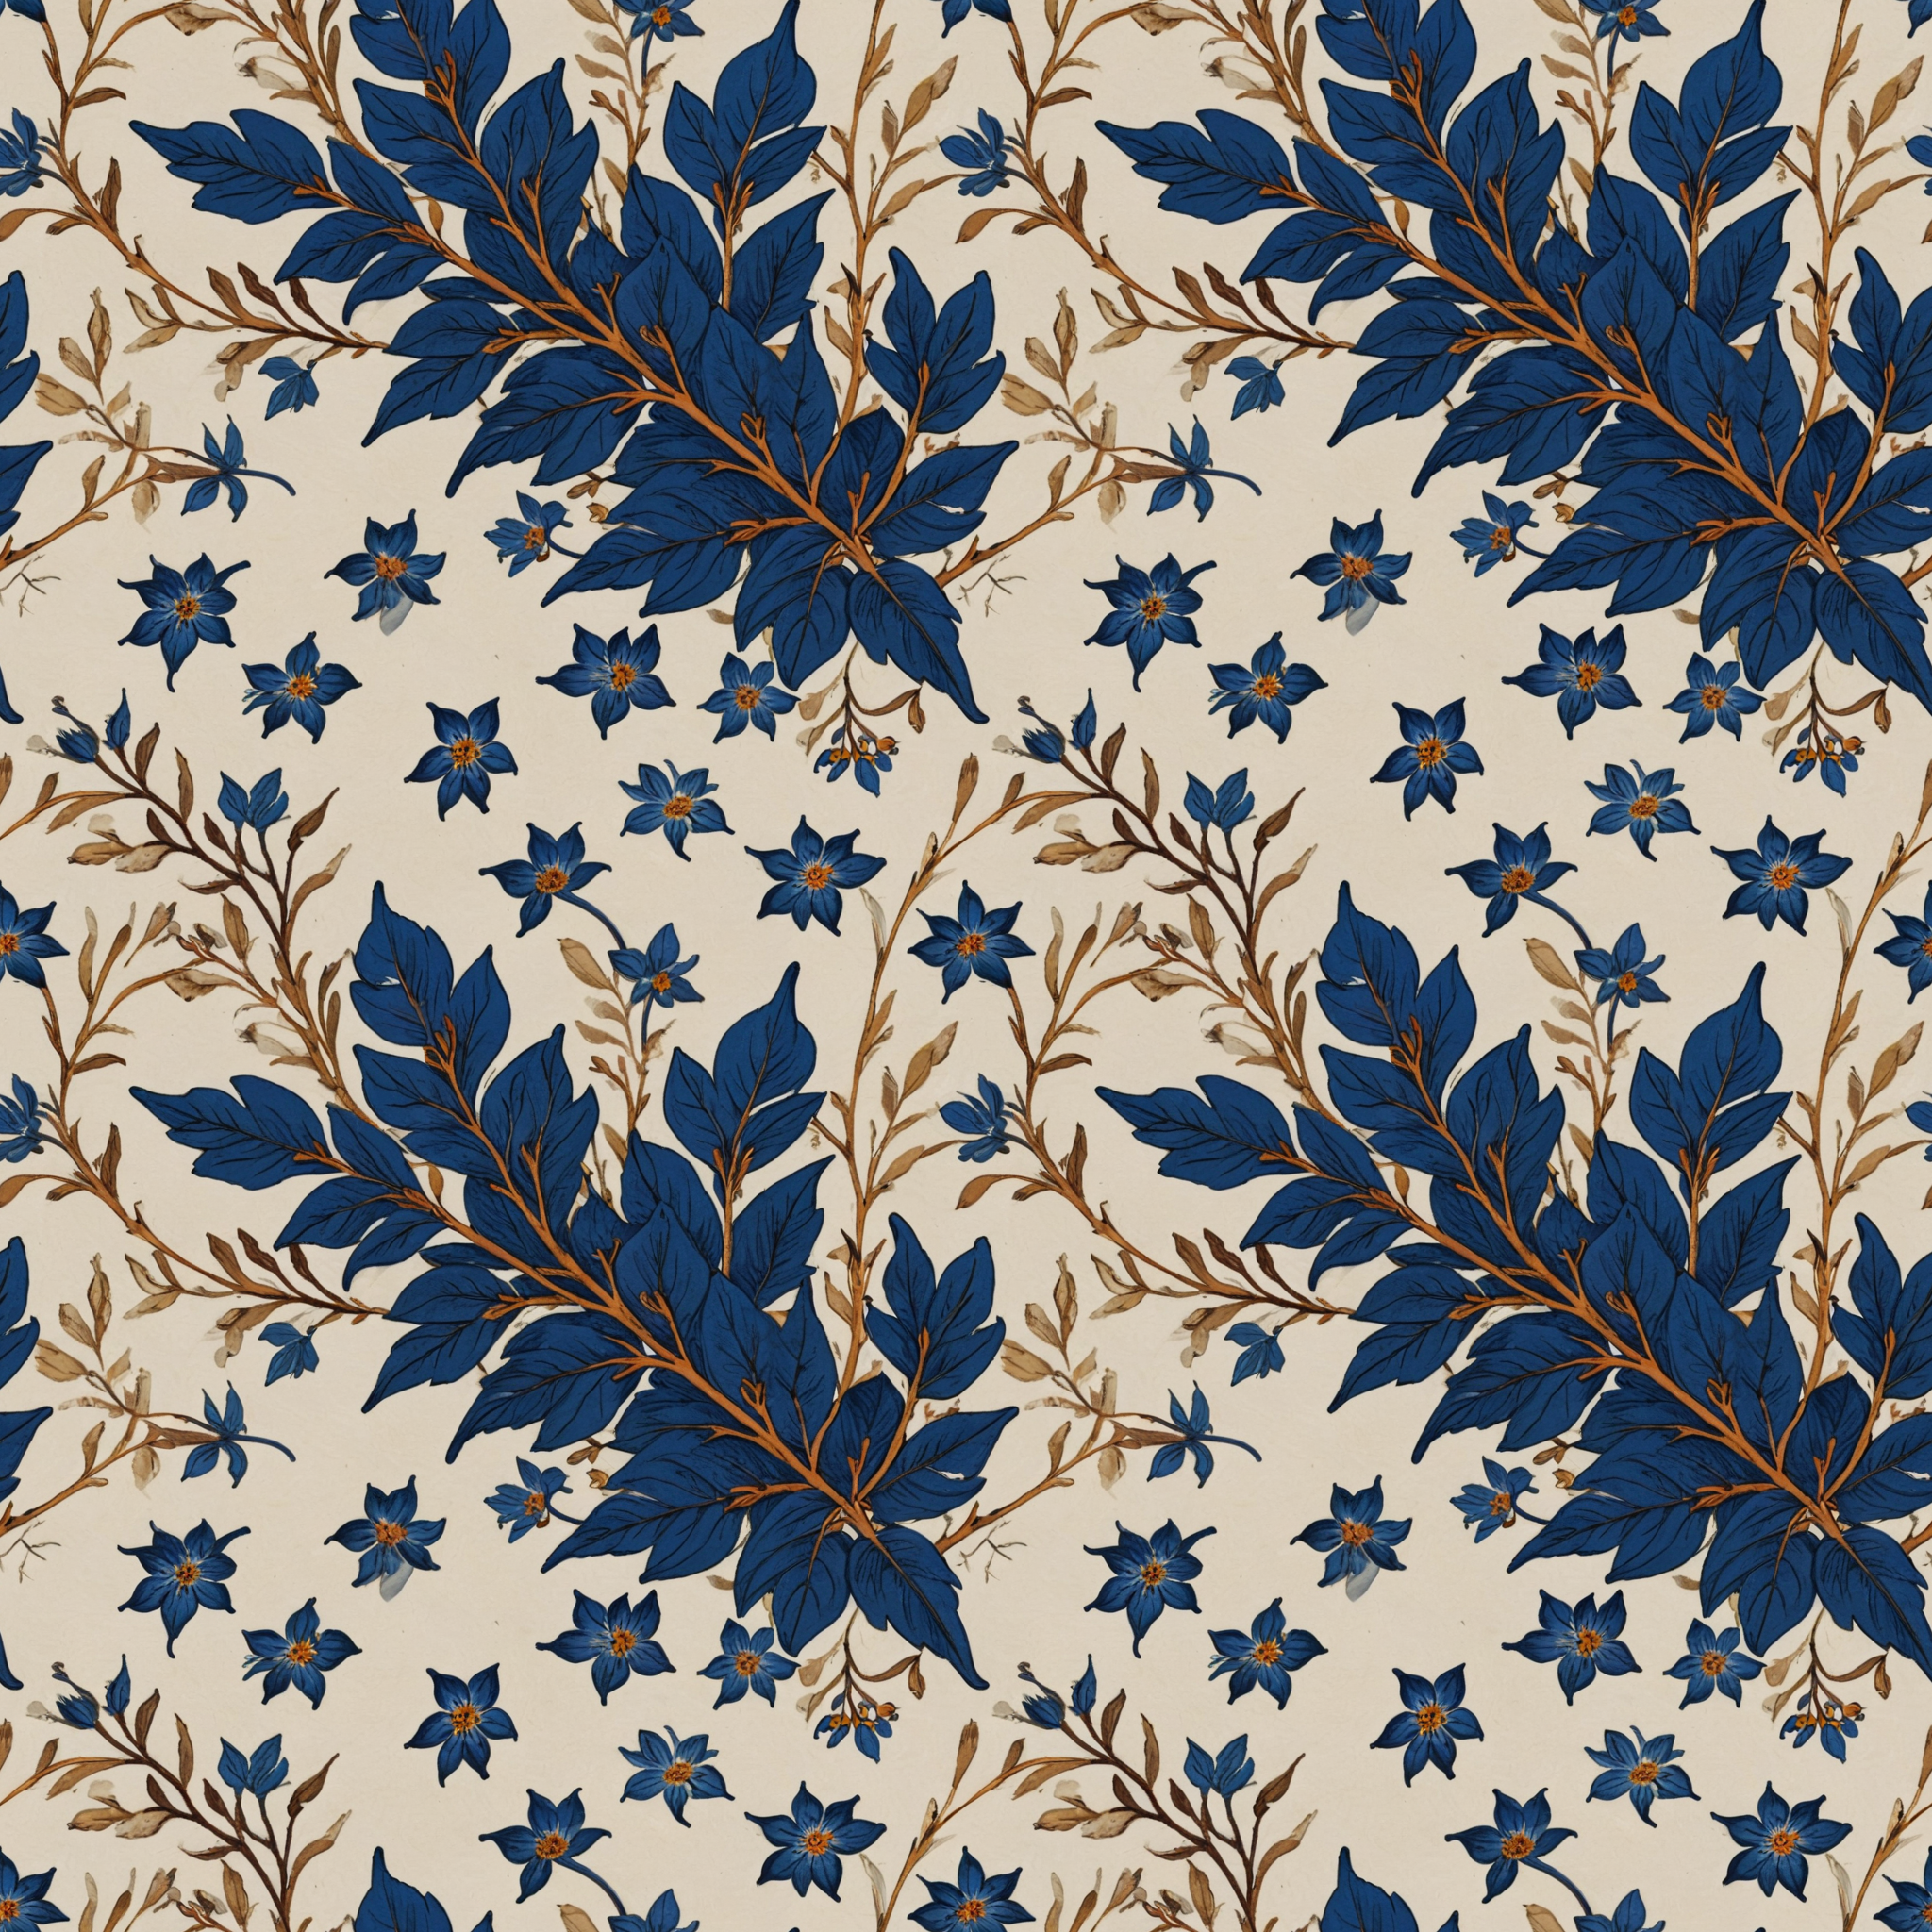
A printed textile is built from a repeat unit: one tile that joins to copies of itself on every side. This workflow generates a flat tile and two checks, so you can judge the joins and the rhythm before developing the print.
This workflow uses a different model from 01A: RealVisXL V4.0 Lightning. The FLUX.2 files are not needed here. Its file and custom nodes are listed in Getting Started.
- You’ll learn
- How seamless tiling makes opposite edges join, how to write a surface-design brief, and how to check a repeat with a 2 × 2 proof and an offset check.
What goes in, what comes out
A written surface brief goes in. One run saves three PNGs: the tile itself, and two separate checks made from it.
Surface briefMotifs, palette, scale, spacing, negative space. A flat print with no folds, borders or lettering.
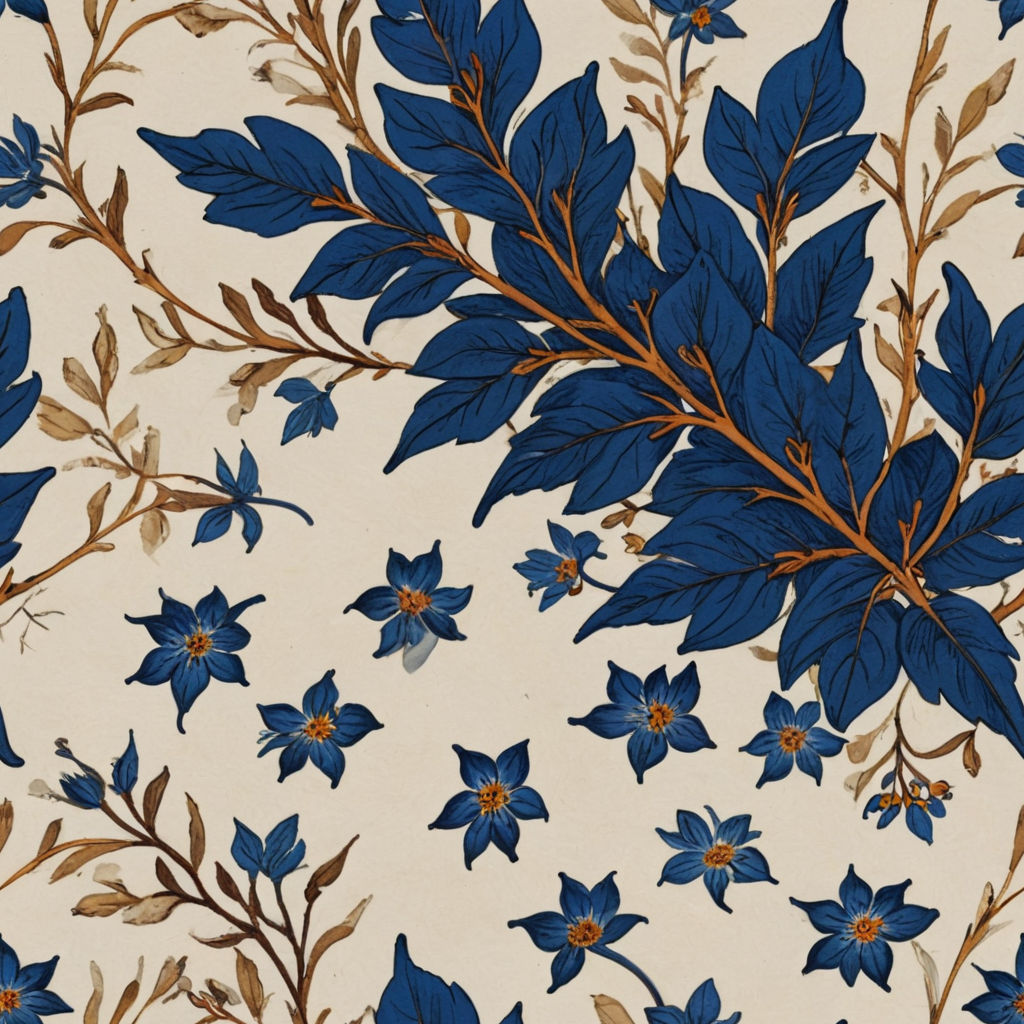
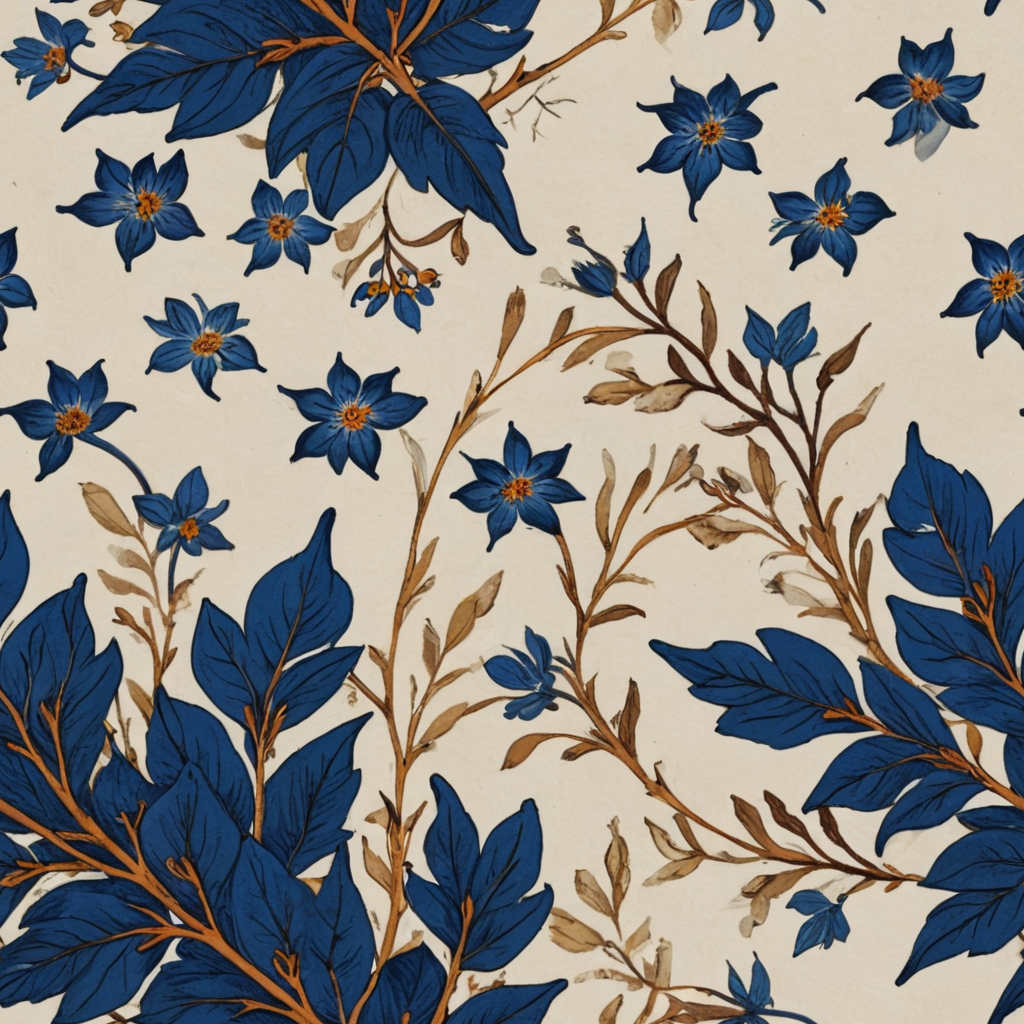
Images 2 and 3 are both made from image 1. They are inspection tools, not extra designs.
How the workflow works
Explained earlier:latents and the VAE · seed, guidance, sampler and steps
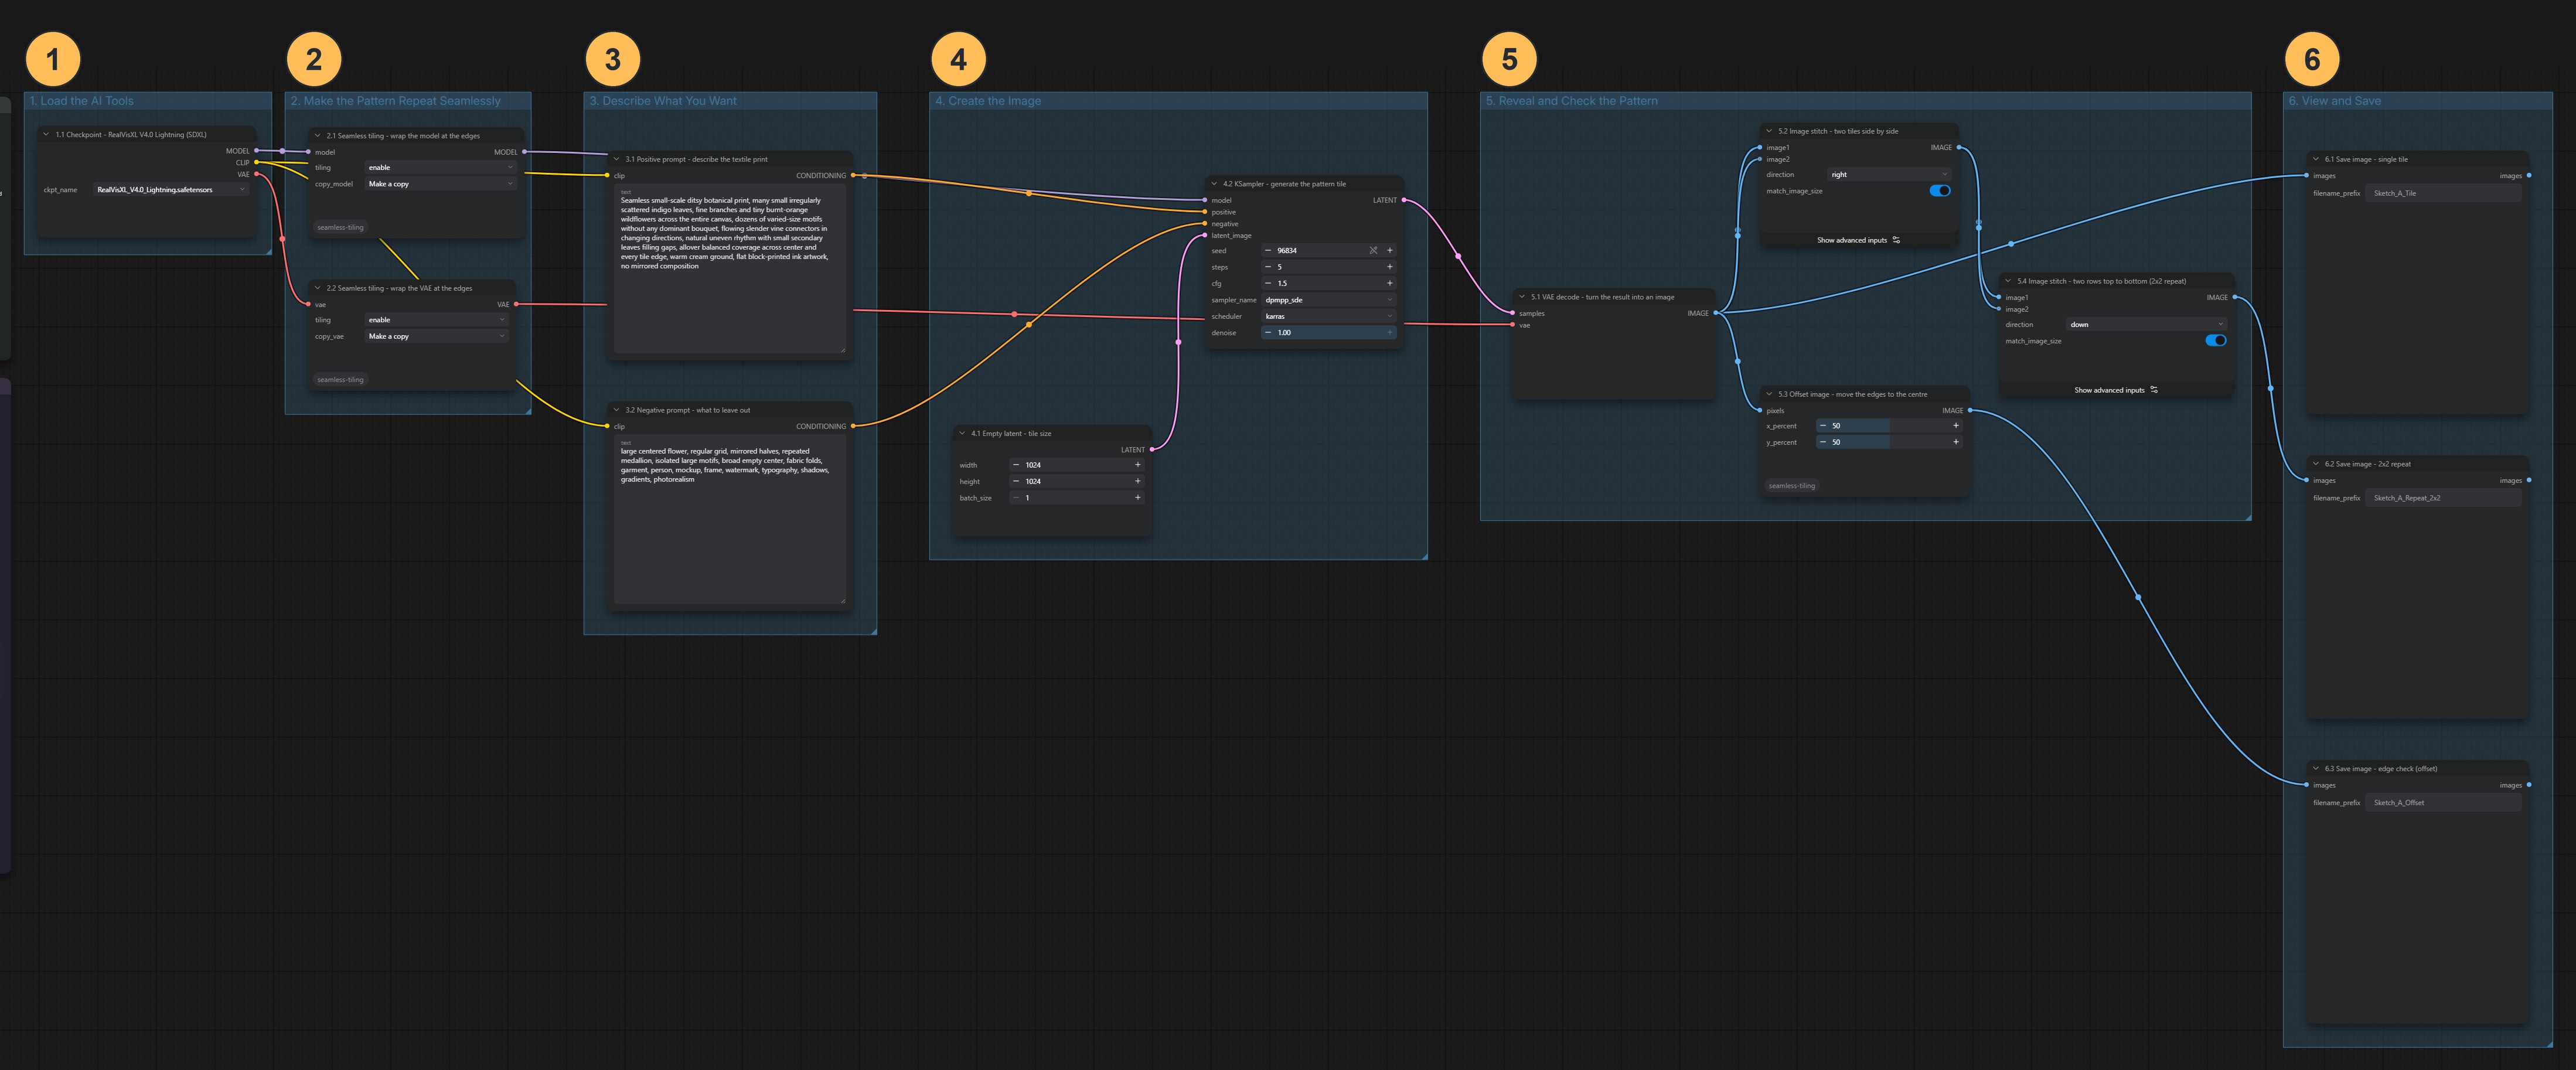
Load one checkpoint
01A loaded three separate files. Here one file contains the image model, its text encoders and its VAE. A file like this is called a checkpoint. RealVisXL V4.0 Lightning belongs to the SDXL family, so the settings and the prompt style differ from FLUX.2.
Make the edges wrap around
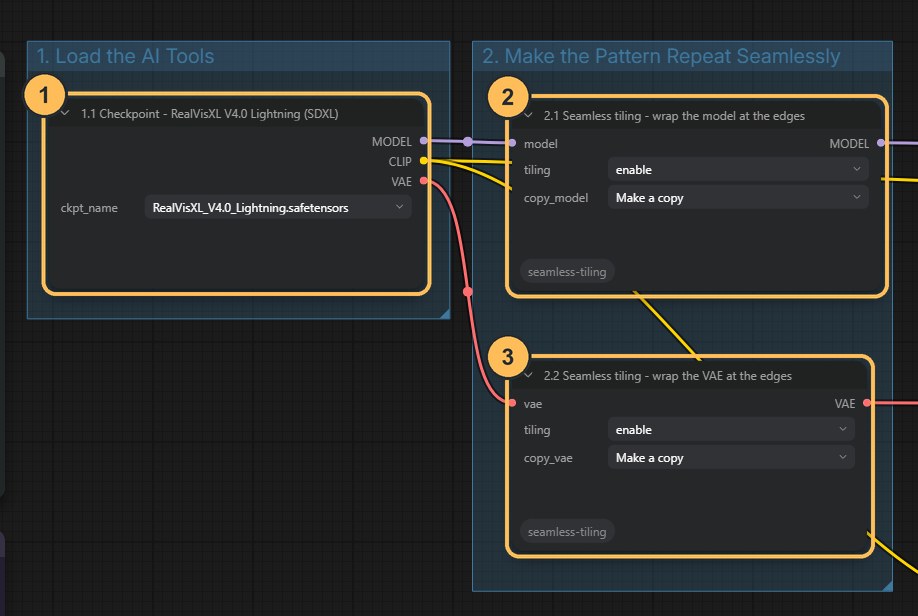
Groups 1 and 2. Normally a model treats the edge of an image as the end of the picture. Seamless tiling changes that: the model treats the left edge as the neighbour of the right edge, and the top edge as the neighbour of the bottom edge. A motif that leaves one side continues on the opposite side.
It behaves like a repeating surface, such as wallpaper or a tiled floor, where the pattern has no outer border. In a video game with a wrap-around map, walking off one edge brings you in at the other. The tile works the same way.
- CheckpointLoads the RealVisXL model.
- Seamless tiling on the modelMakes opposite edges join while the tile is being generated.
- Seamless tiling on the VAEThe VAE is the part that turns the result into a visible picture. This node keeps the join clean at that stage. Both are needed.
Write a surface-design brief
Describe the motifs, palette, scale (small ditsy, medium, large), spacing and negative space. Ask for a flat textile print, not a person wearing patterned fabric. The negative prompt lists what to leave out: a large centred motif, a regular grid, folds, shadows, lettering.
Change: one palette or scale word. Keep fixed: the seed and all numeric settings. Inspect: both check images, not only the tile.
Generate the tile
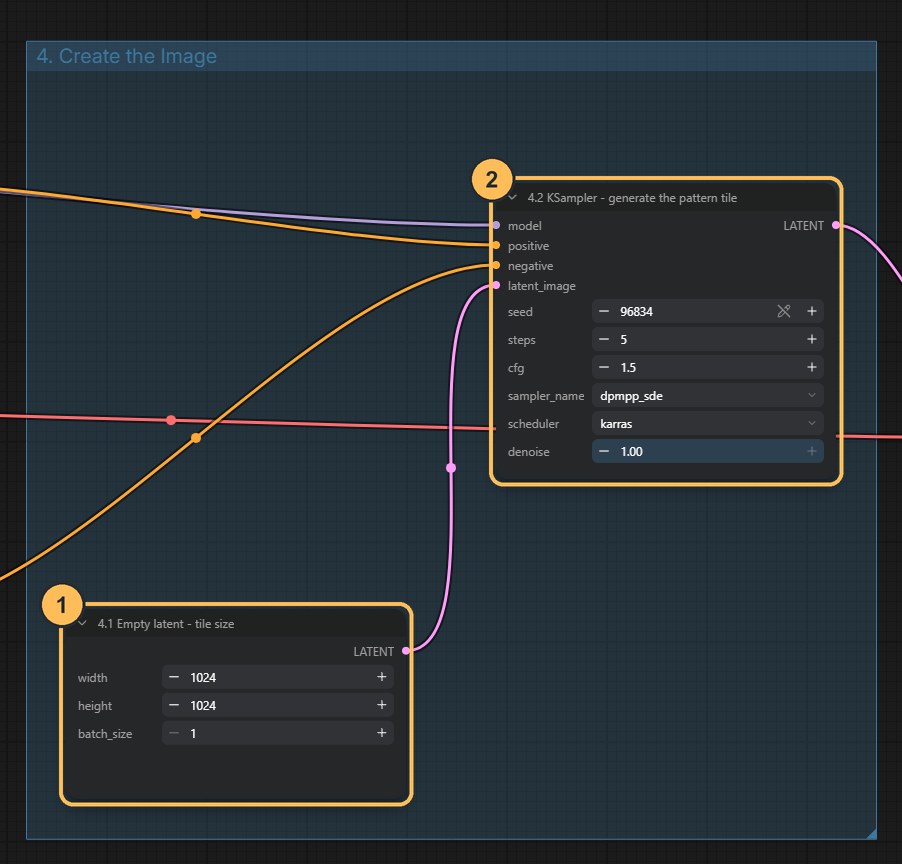
- Tile sizeWidth and height of the tile. Keep it square.
- KSamplerThe node that generates. Seed, steps, CFG and sampler are all set here.
Control What it changes Seed The number that sets the random starting point. A new seed gives a different arrangement of the same brief. Width and height The tile size, 1024 × 1024. Keep it square for a square repeat. Sampler and scheduler The refinement method. Lightning models are sensitive to this choice, so change it only as a deliberate test. CFG Short for classifier-free guidance. It sets how strongly the positive prompt is favoured over the negative. SDXL models respond to CFG differently from FLUX.2, so values from 01A do not carry over. Steps The number of refinement passes. Lightning models are built for a small number of steps. The workflow uses the values recommended on the model’s own page: the DPM++ SDE sampler with the Karras scheduler, 5 steps and CFG 1.5. The page gives a CFG range of 1 to 2. At exactly 1 the negative prompt would be ignored, so 1.5 keeps it working.
Build the two checks
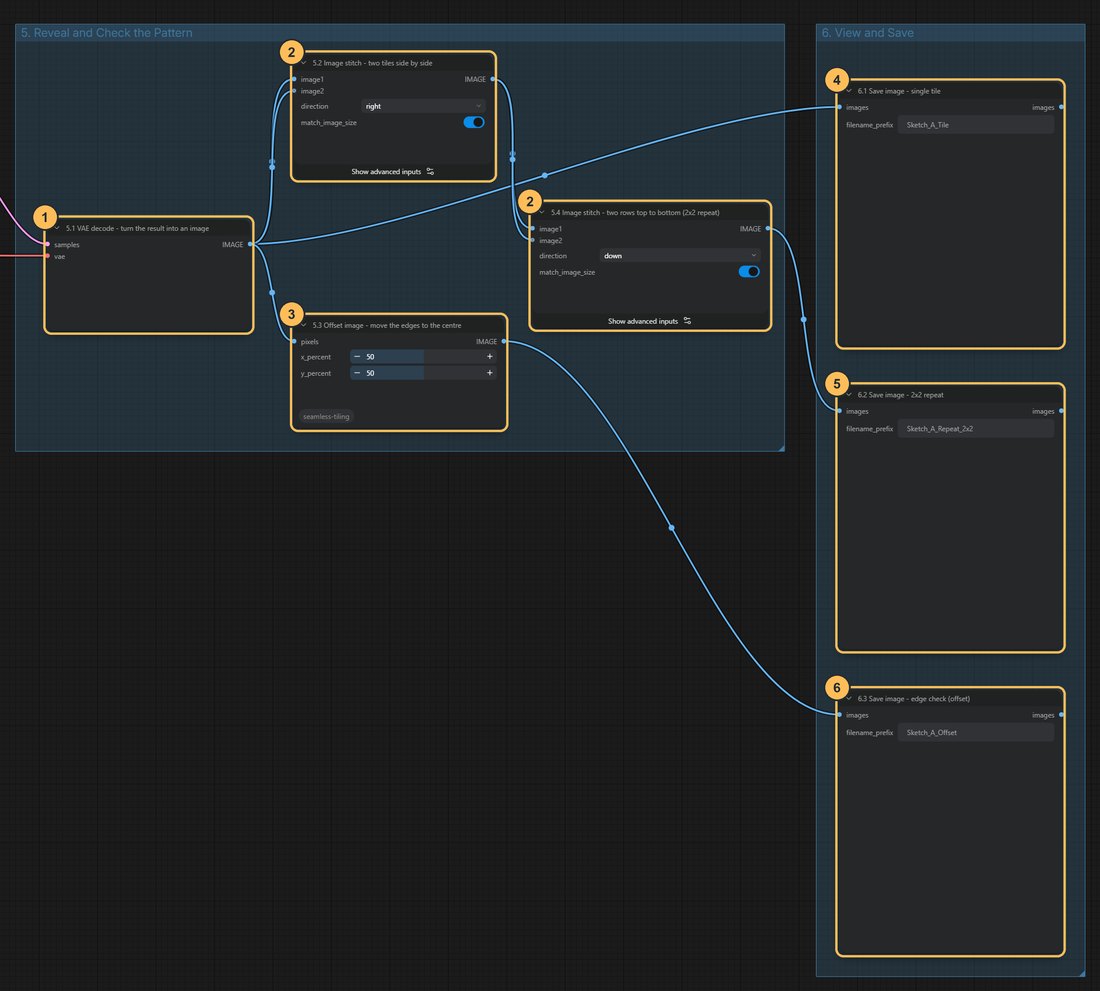
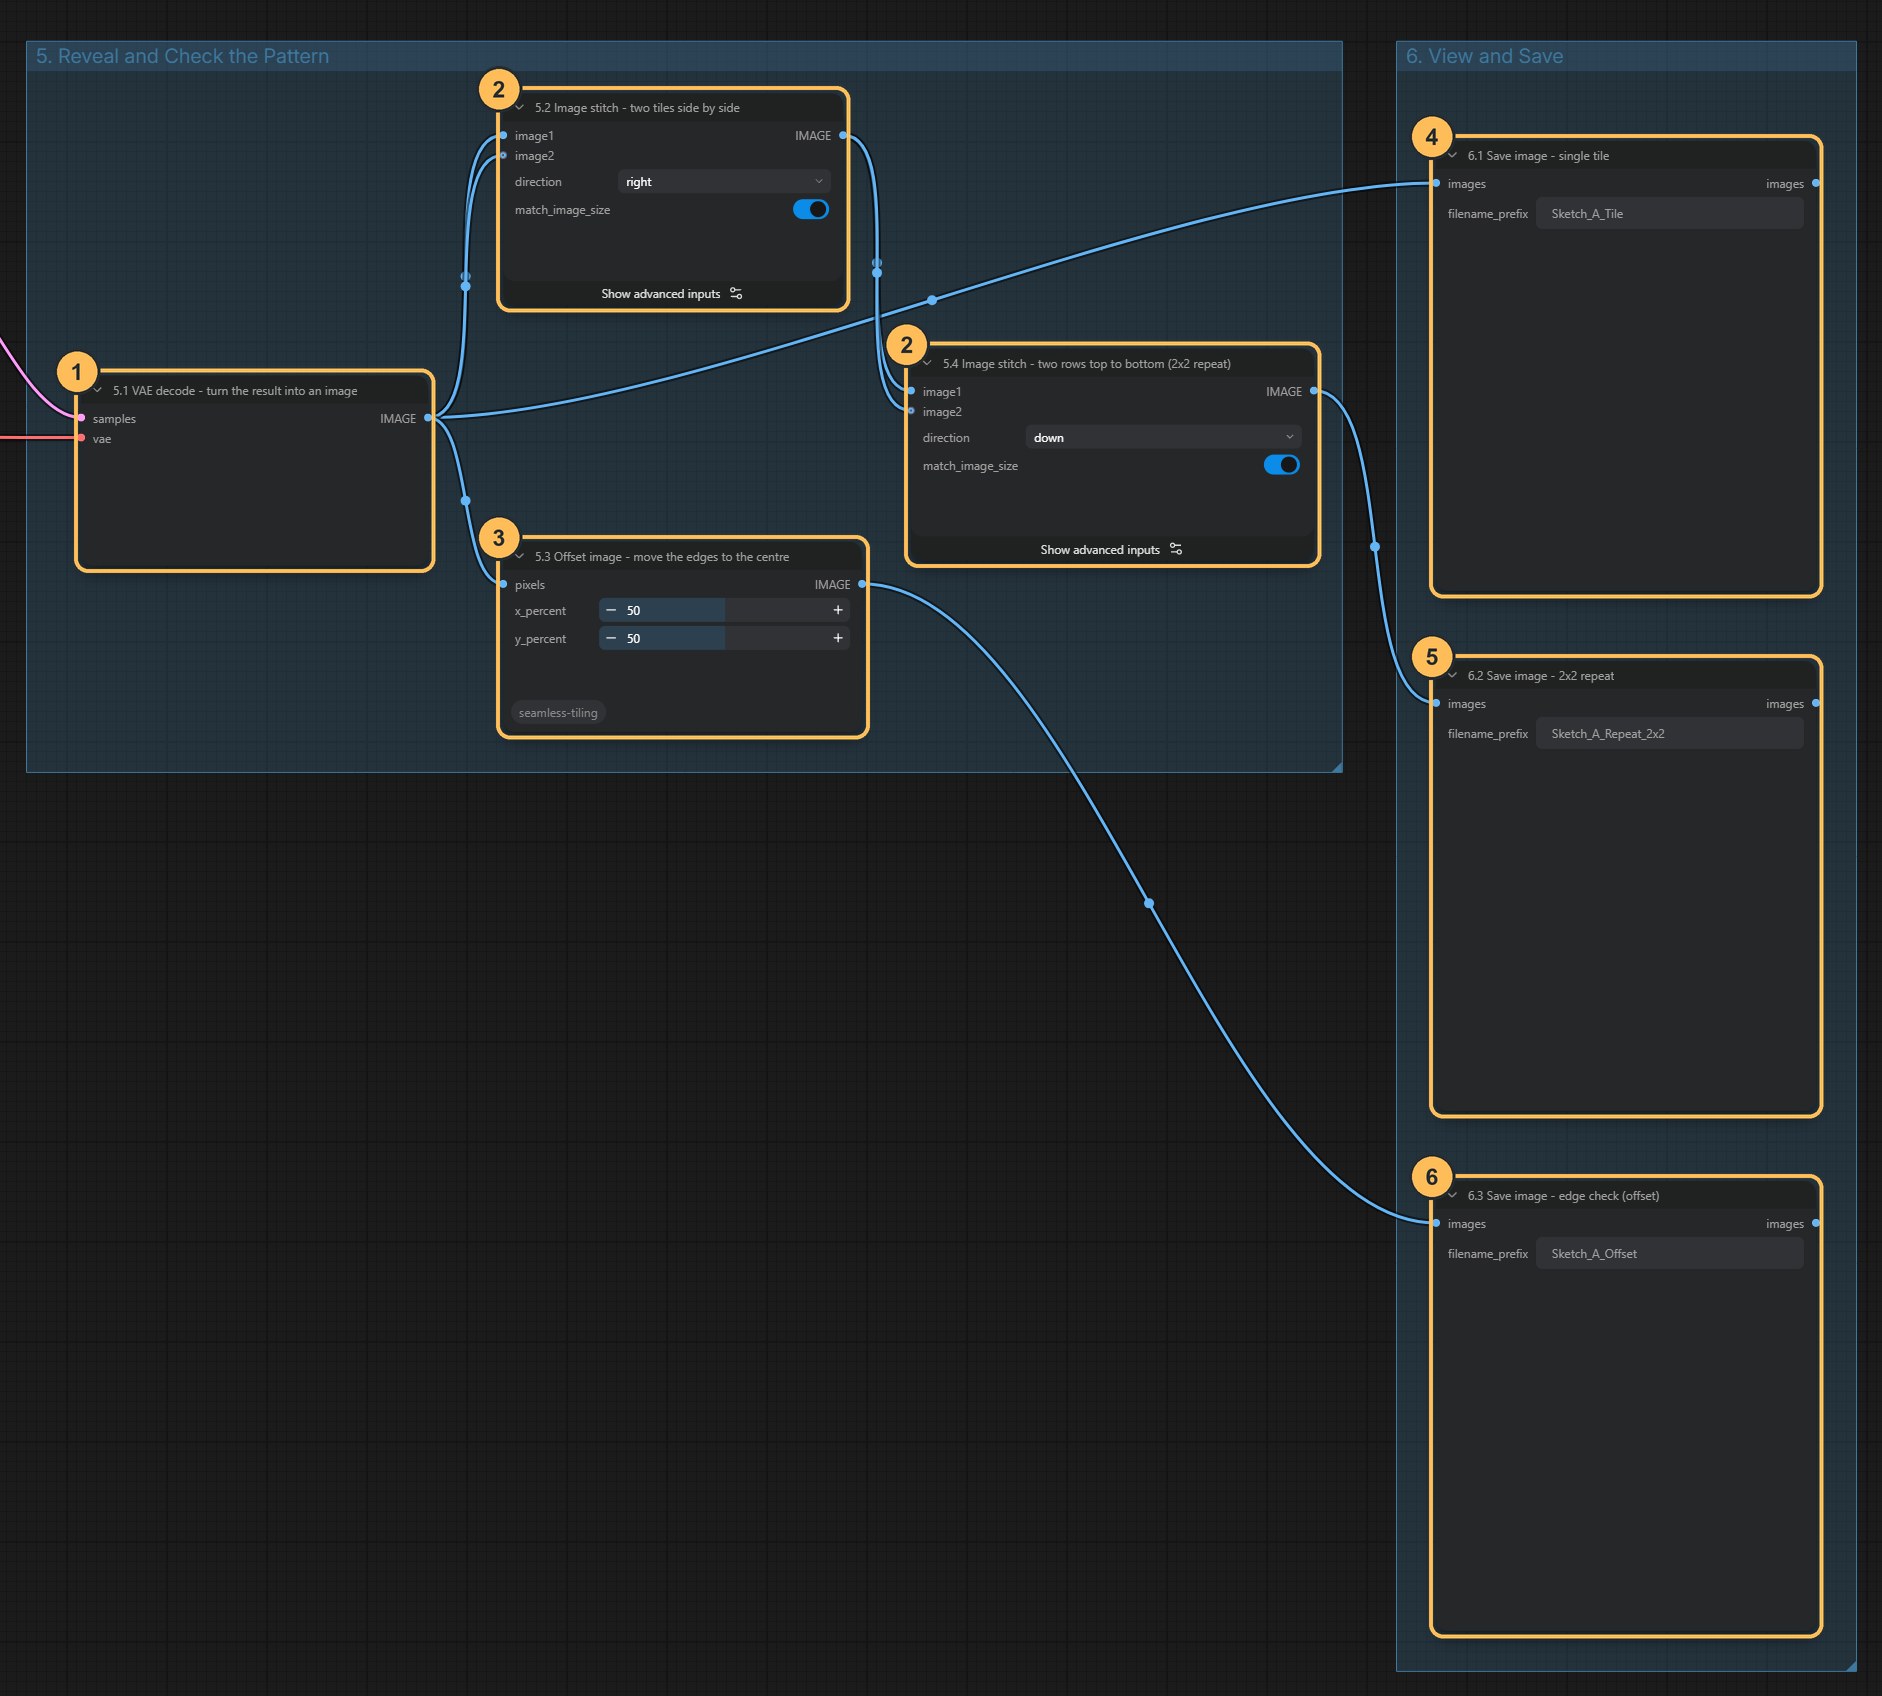
- DecodeTurns the result into a visible tile.
- Repeat proofTwo stitch nodes place the tile side by side, then stack that pair, to make a 2 × 2 sheet.
- OffsetSlides the tile by half so its edges meet in the middle, where a seam is easy to see.
- Save: tileThe repeat unit you keep.
- Save: 2 × 2 repeatThe repeat proof.
- Save: edge checkThe offset check.
The repeat proof shows the rhythm: whether a grid, a stripe or a dominant motif appears when the tile repeats. The offset check shows the joins.
Check the result
- Joins: no visible line, blur or colour jump through the centre of the offset check
- Spacing: motifs feel balanced, with no awkward gaps or crowding
- Rhythm: the 2 × 2 proof does not reveal an obvious grid or stripe
- Scale: the motif size suits the garment you have in mind
- Palette: the colours are the ones you asked for, and few enough to print
If a check fails, change the seed first. If the same problem returns, adjust the brief: name the motif scale, the spacing or the palette more precisely.
A clean join shows that the pixels are seamless. It does not show that the print is ready for production. Colour separations, the repeat size in centimetres and the print method are still your decisions.
Download the workflow
- A_Print_Tile.jsonNeeds the RealVisXL checkpoint in models/checkpoints and the seamless-tiling custom nodes
Click a filename to download it, or right-click it and choose Save link as. Keep the .json ending. Then drag the file onto the ComfyUI canvas, or use Workflow → Open.