03 · Three references, three jobs
Multiple References to Sketch
Combine the long line of one dress, the construction of another and the surface of a print swatch into one new design sketch. A reference image is a picture you give the model to borrow something from. This workflow takes three of them, plus a written instruction that says what to take from each.
- You’ll learn
- How to give the model several reference images, how to assign each one a role in the prompt, and why images without written roles are not enough.
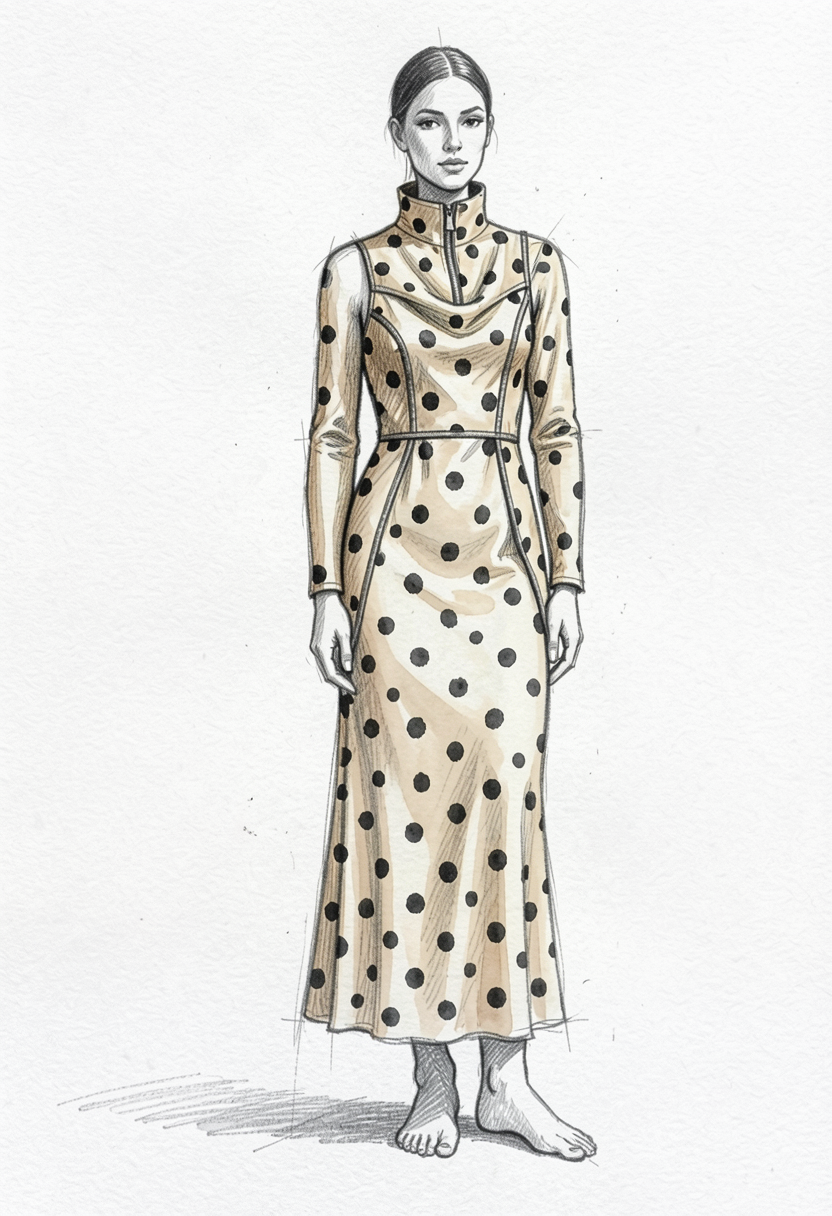
What goes in, what comes out
Three images and one written instruction go in. One sketch comes out.
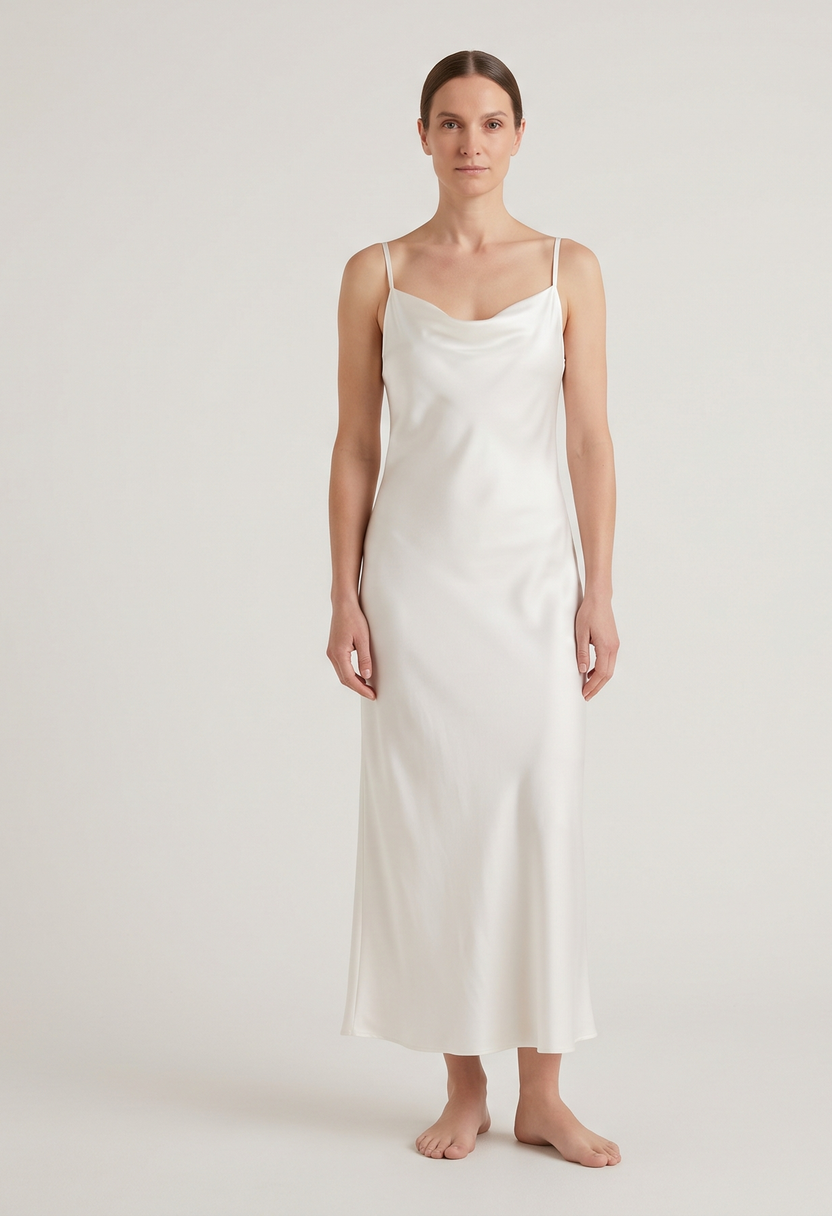
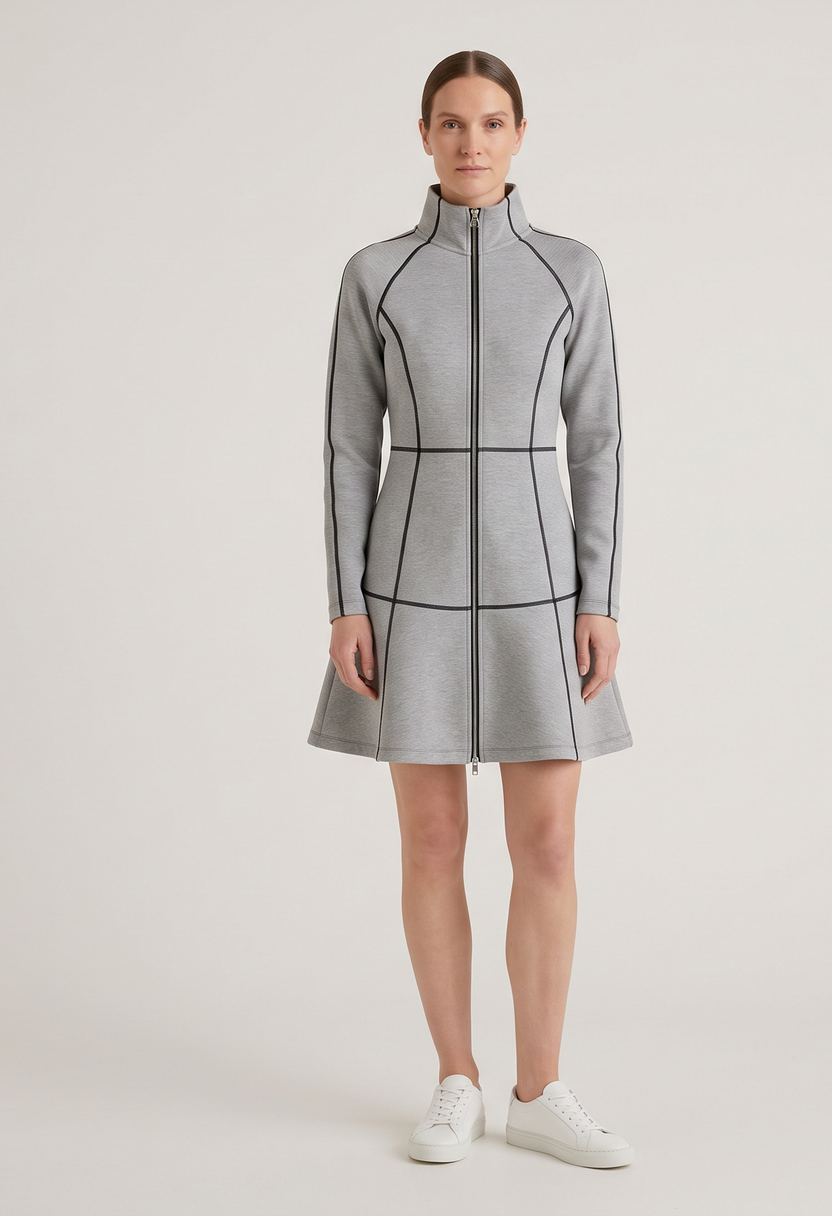
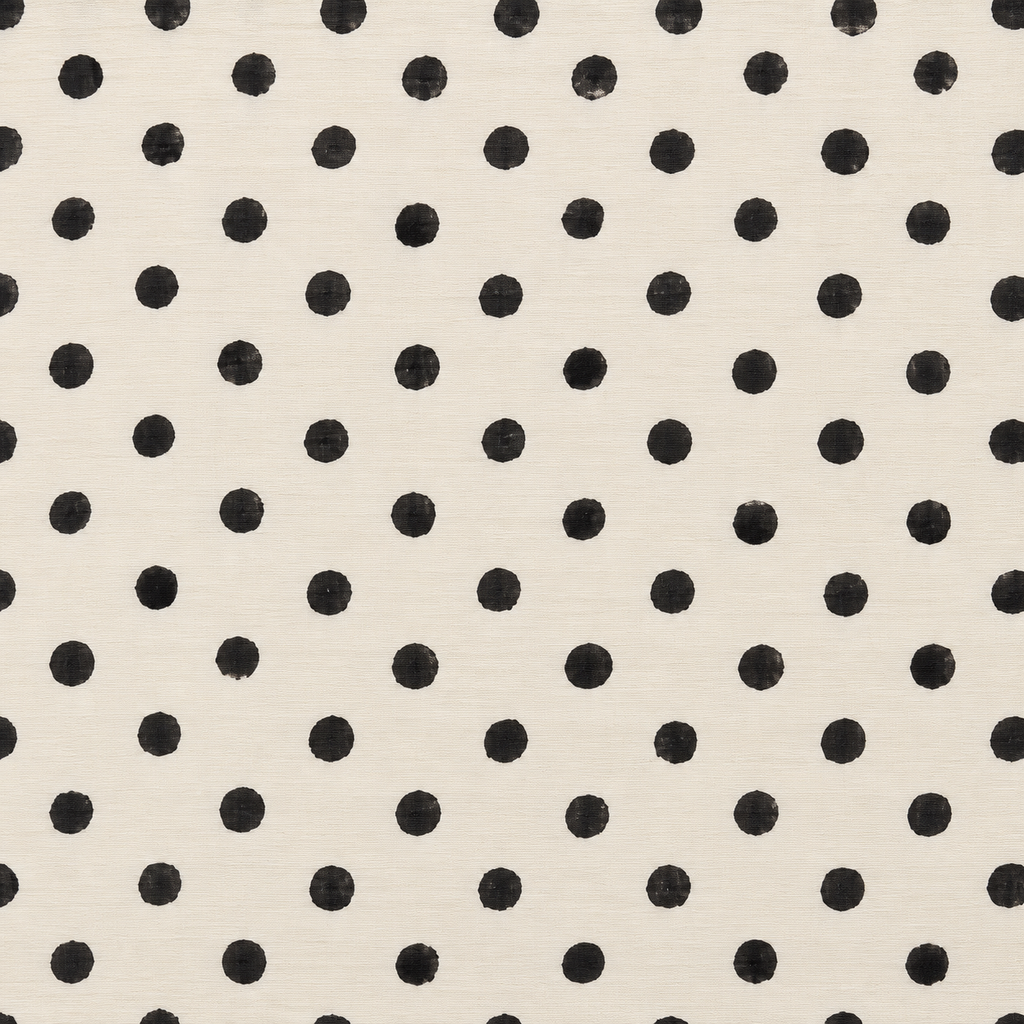
Written roles“Silhouette from image 1. Construction from image 2. Print from image 3.” Plus the medium: a hand-drawn illustration.
How the workflow works
Explained earlier:the three models · writing a brief · seed, guidance and steps · decode and save
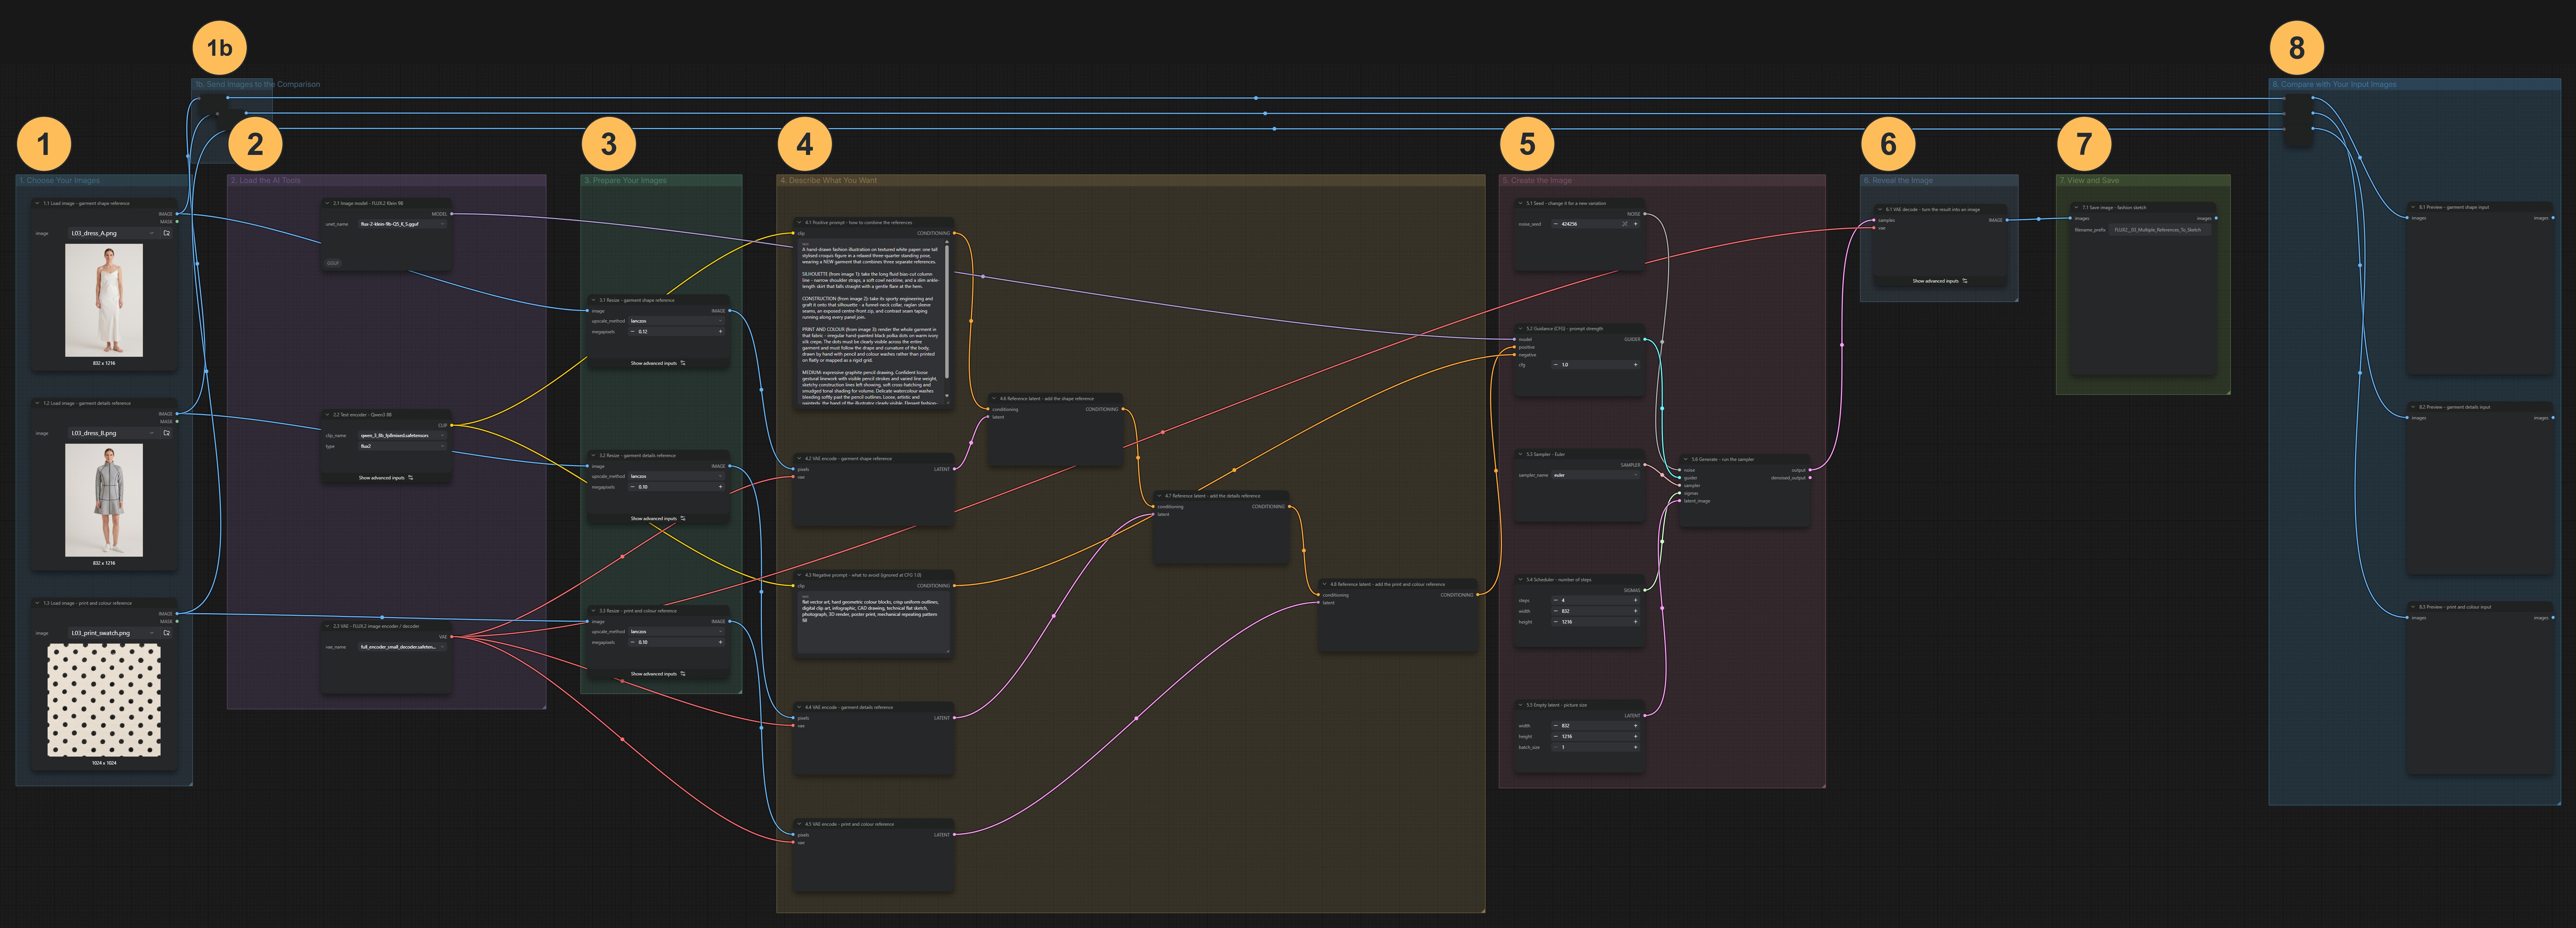
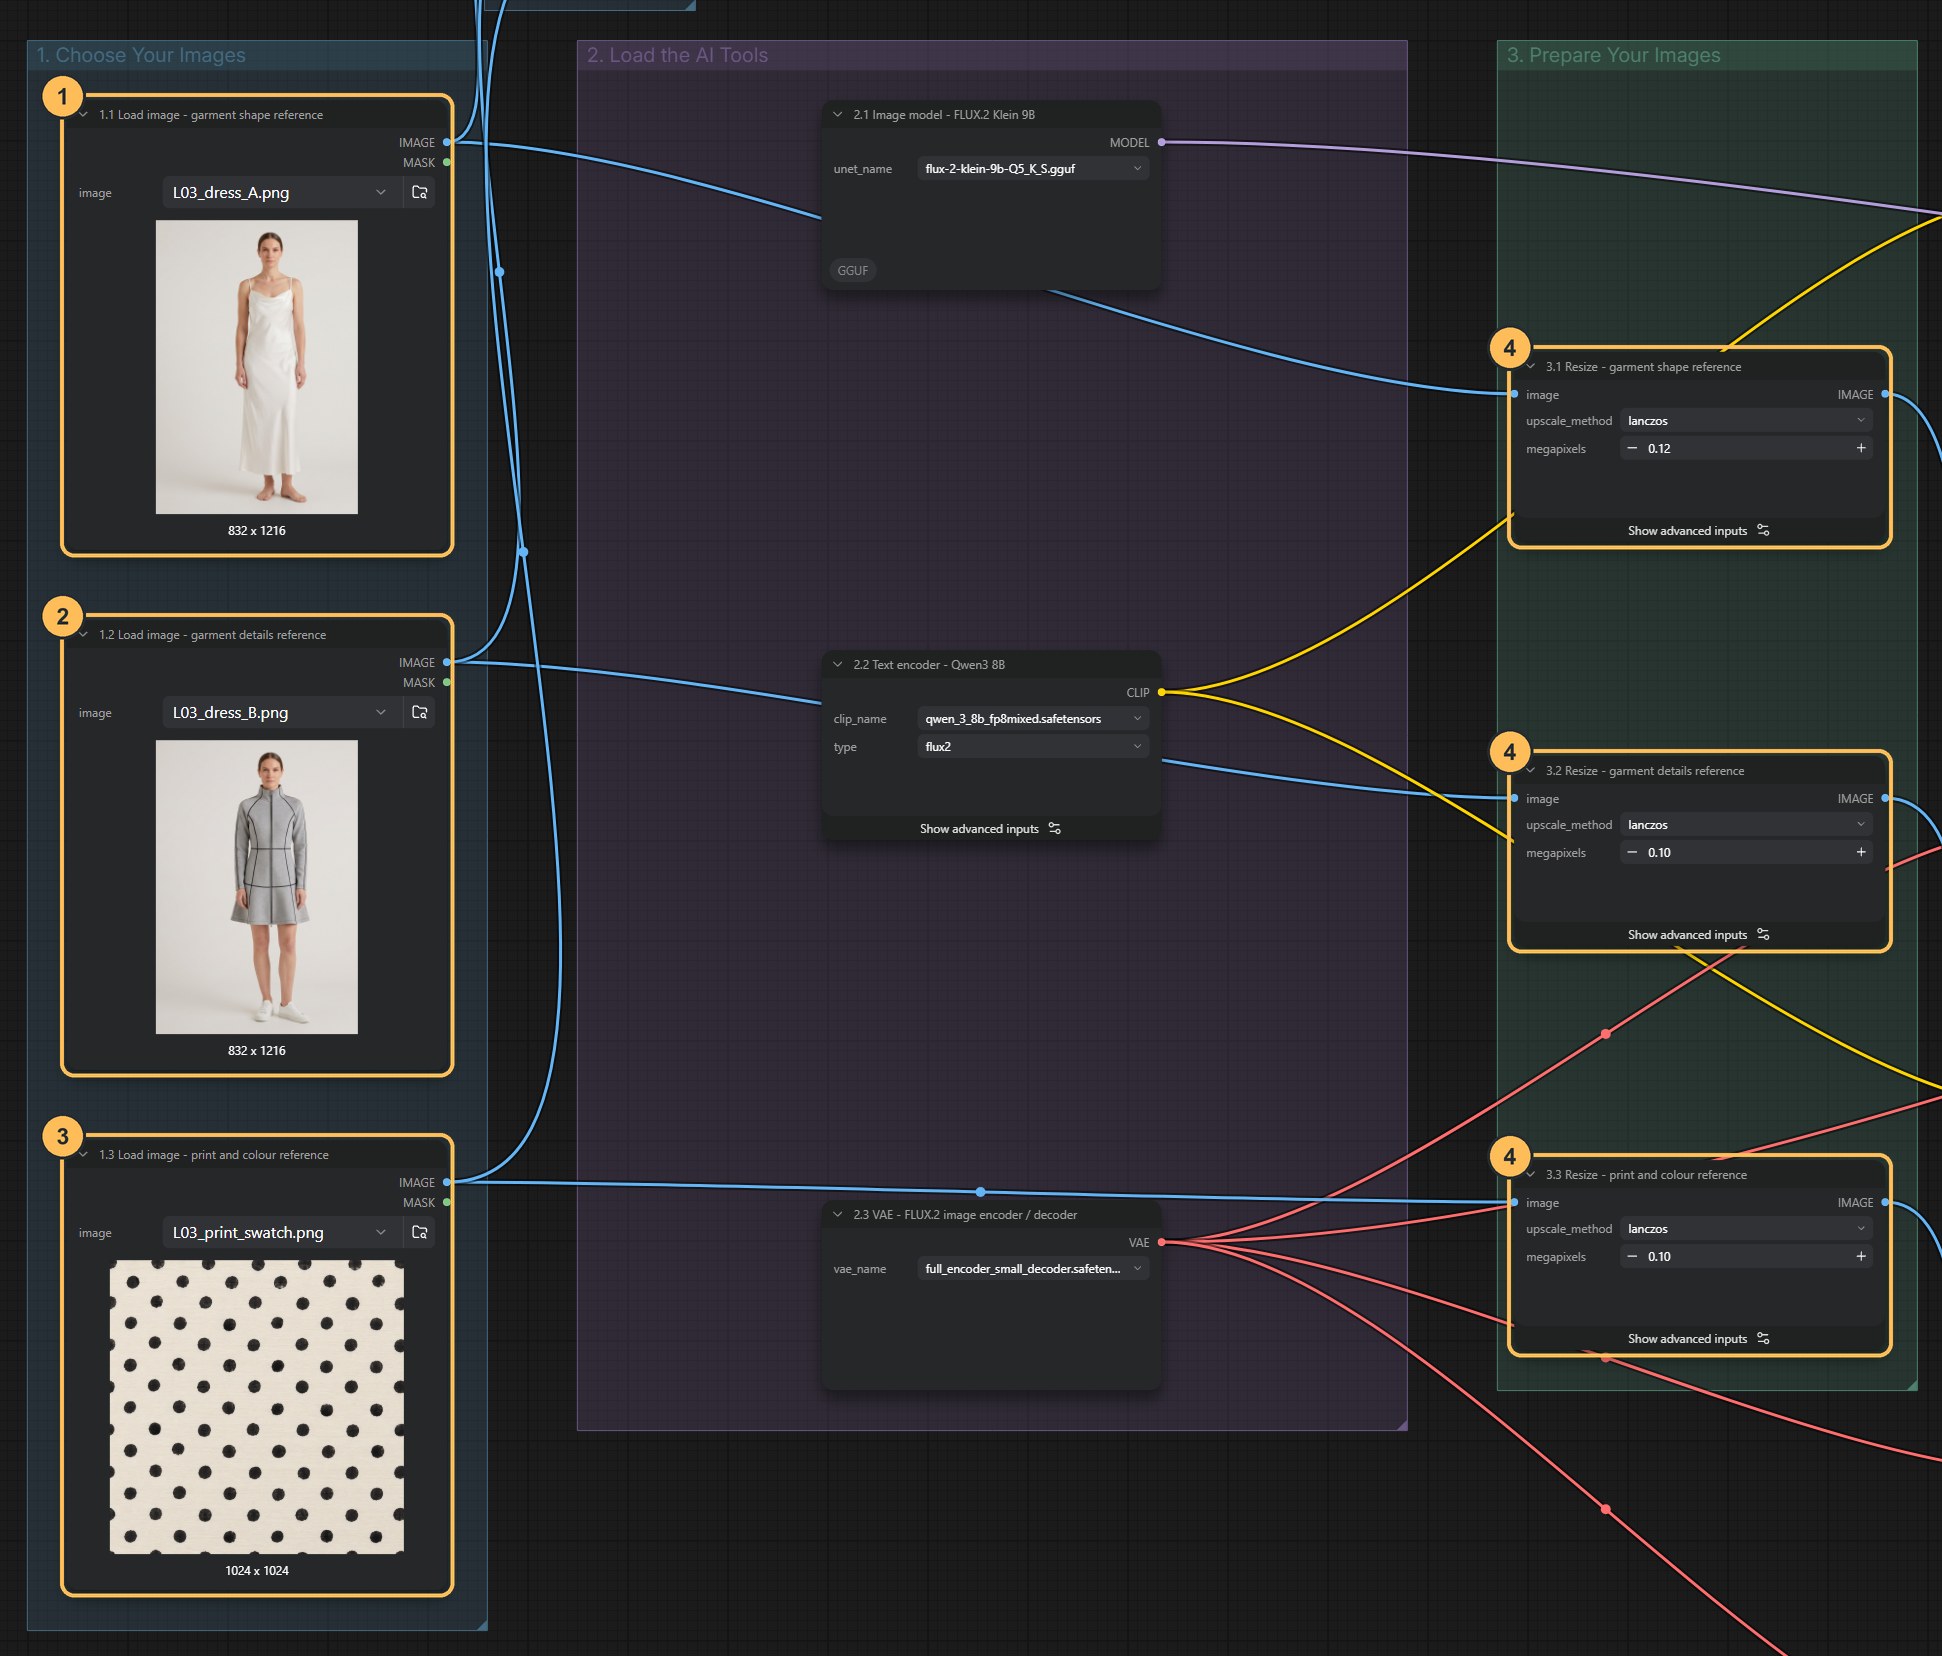
Load the three references
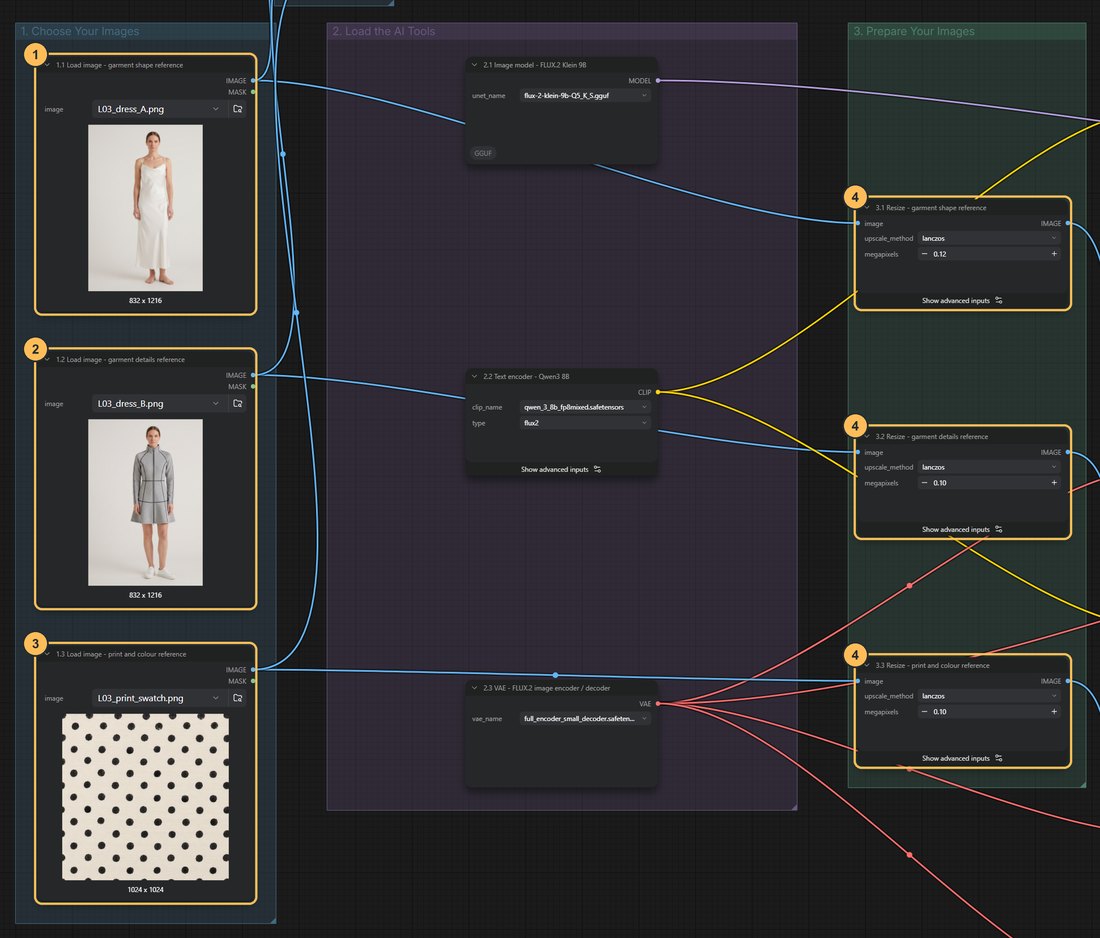
Groups 1 and 3: the three images and their resize nodes. Three Load Image nodes hold one picture each. The order matters, because the prompt refers to them as image 1, image 2 and image 3.
- Image 1, silhouette: contributes the overall line, length and proportion. Use a full-length view with the hem visible
- Image 2, construction: contributes the collar, panels and seam placement. Use a picture where these are clearly readable
- Image 3, print and colour: contributes the surface pattern and palette. Use a flat, evenly lit swatch
The model cannot use detail that a picture does not show.
Prepare each image size
Each reference passes through a resize node that keeps its proportions and scales it to a total size in megapixels (one megapixel is a million pixels). The saved values are 0.12, 0.10 and 0.10.
These numbers are preparation sizes, not influence. 0.12 does not mean 12% strength. A smaller reference carries less fine detail and uses less memory and time. A larger one carries more detail. There is no simple strength slider for a reference in this workflow. Its role comes from the prompt.
Assign the roles in writing
The model receives the three images and the prompt together. It does not read node titles, and without instructions it has no way to know that one picture is meant for shape and another for print. It would blend all three freely.
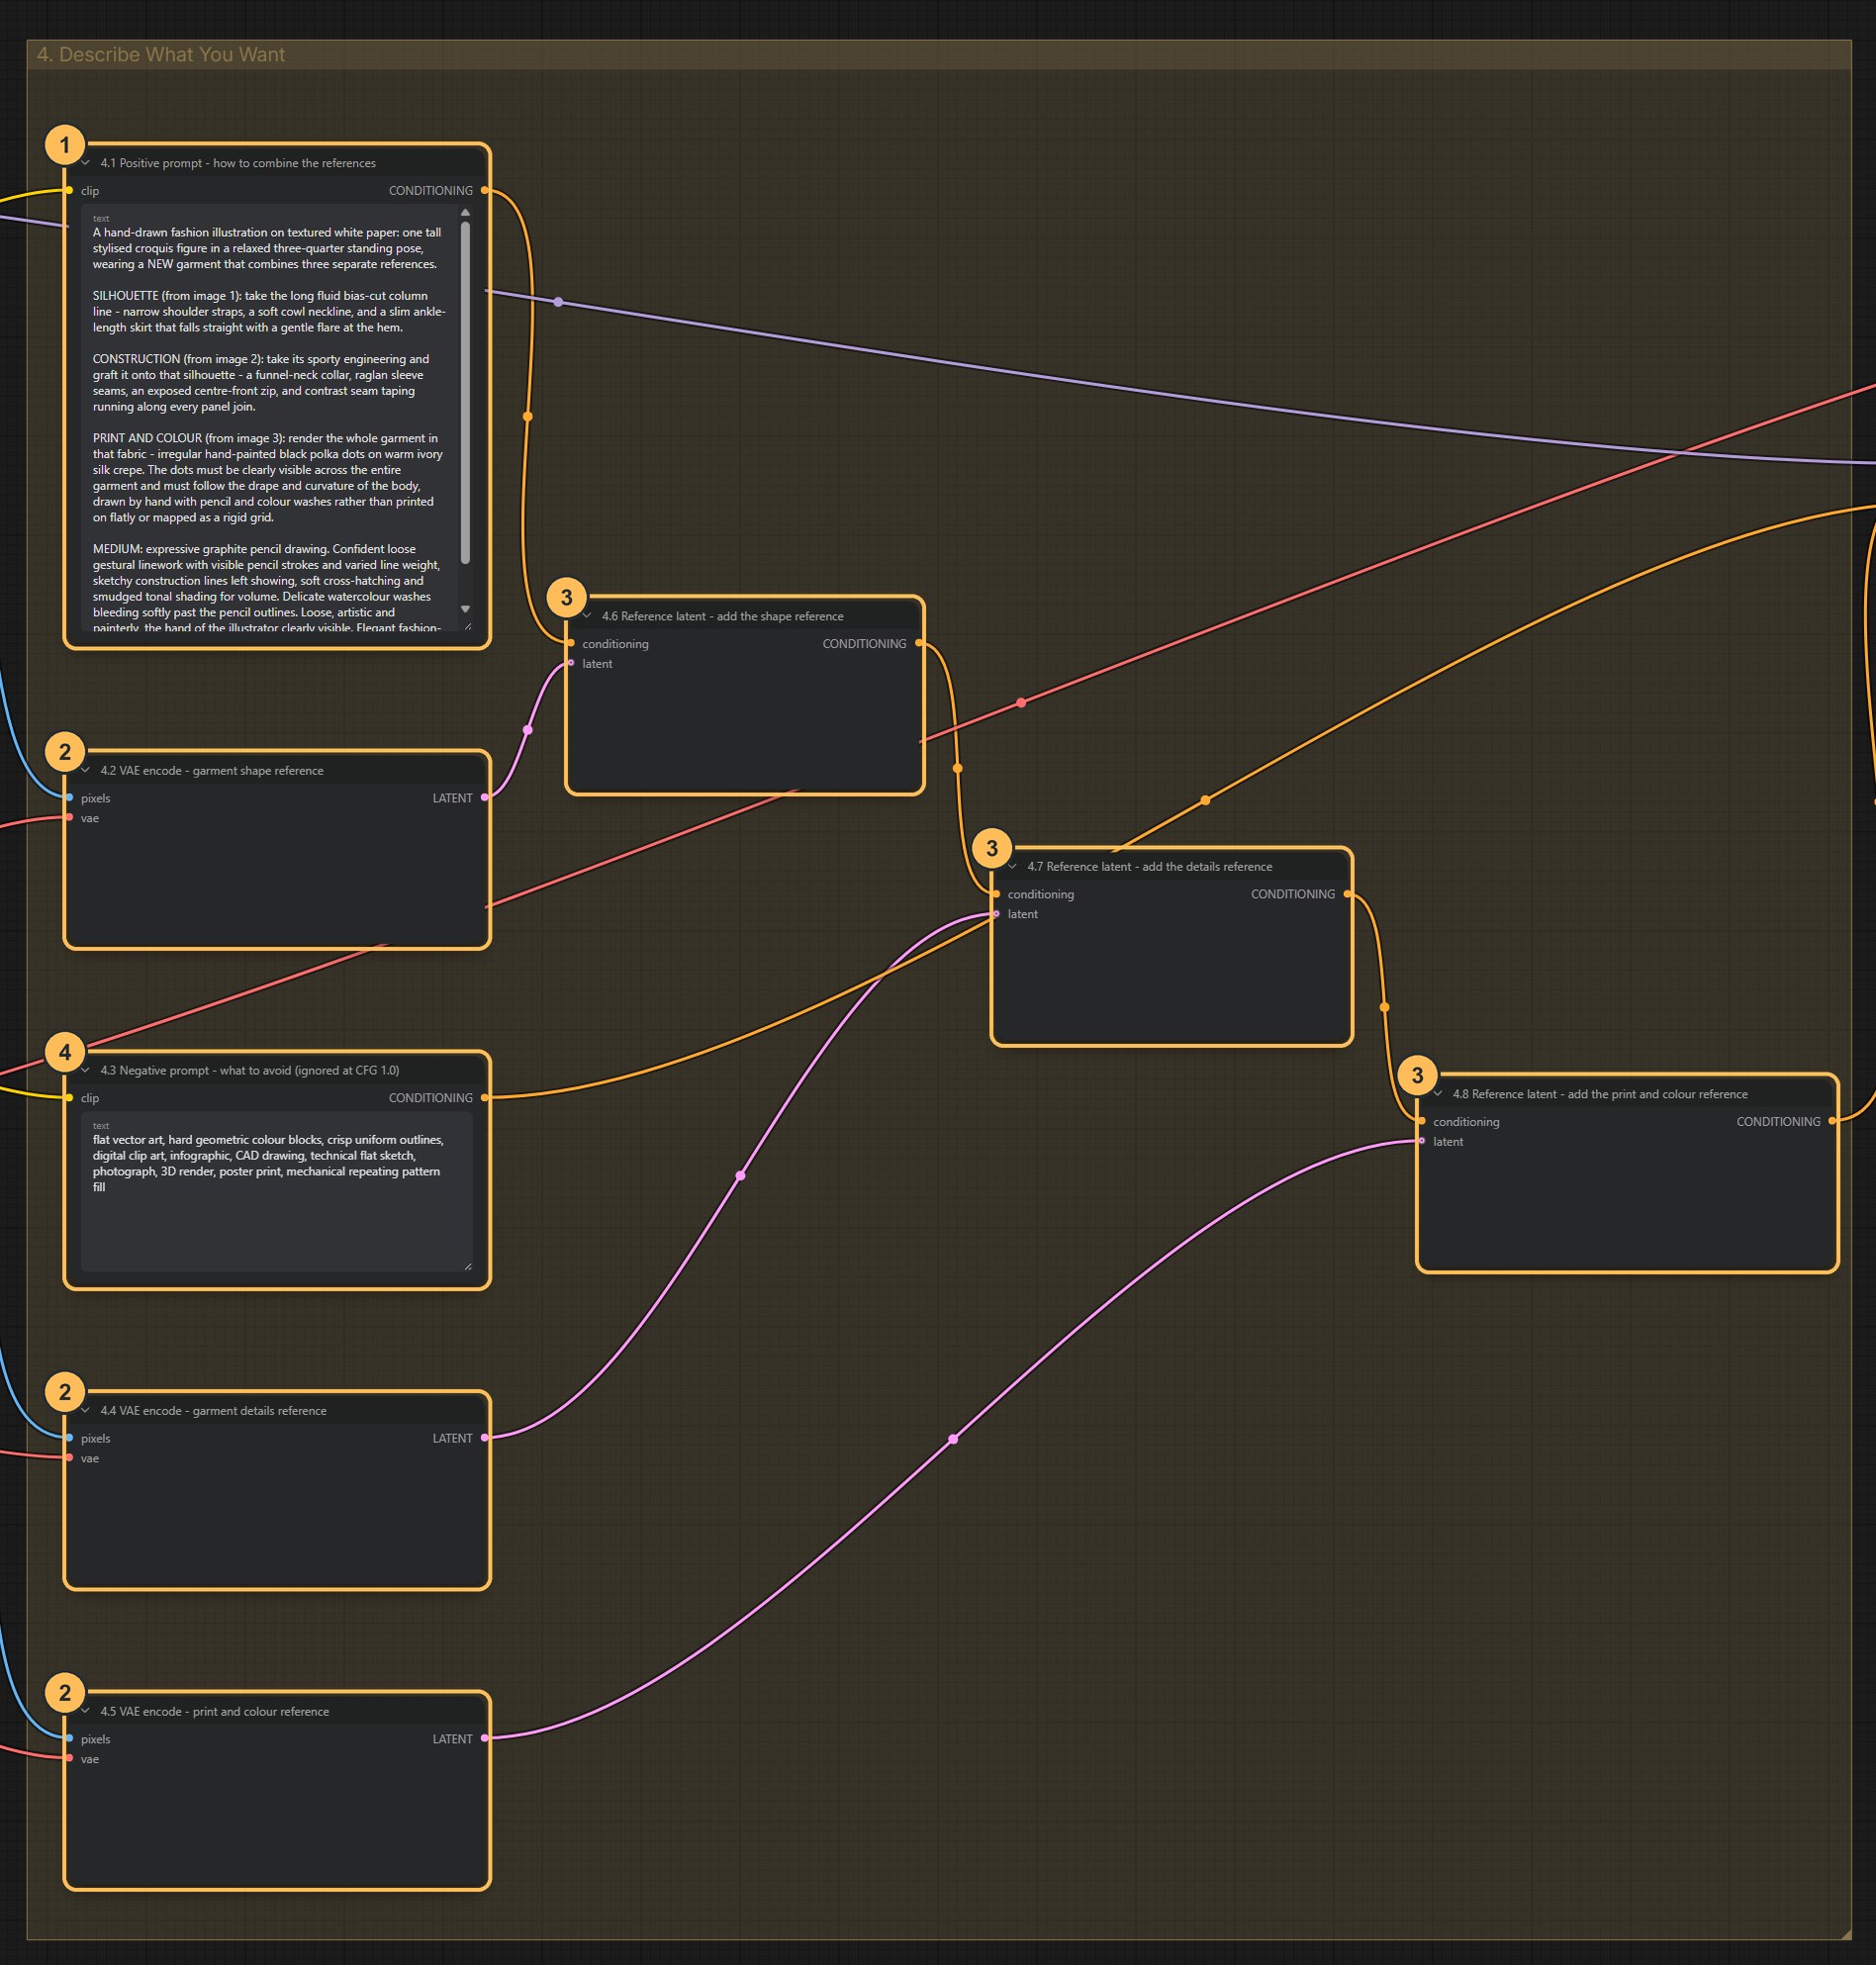
The saved prompt therefore has one labelled paragraph per reference: “SILHOUETTE (from image 1): take the long fluid bias-cut column line…”, then construction from image 2, then print from image 3. It also names the medium, a hand-drawn fashion illustration on paper. For a photographic study, describe a photograph instead.
If a small detail matters, such as a collar shape or a print colour, name it in words as well as showing it. The shoe example in 07 shows why.
Change: one reference image, or one role paragraph. Keep fixed: the other two references and the seed. Inspect: whether the change stayed within its role.
Attach the references to the instruction
The model cannot use a picture directly. The VAE first converts each reference into the model’s internal form, called a latent. A chain of Reference Latent nodes then attaches them to your prompt one after another. The roles are requests, not guarantees: a reference can still influence features outside its role. To add a fourth reference, copy one encode-and-attach pair, add it to the end of the chain, and describe its role in the prompt.
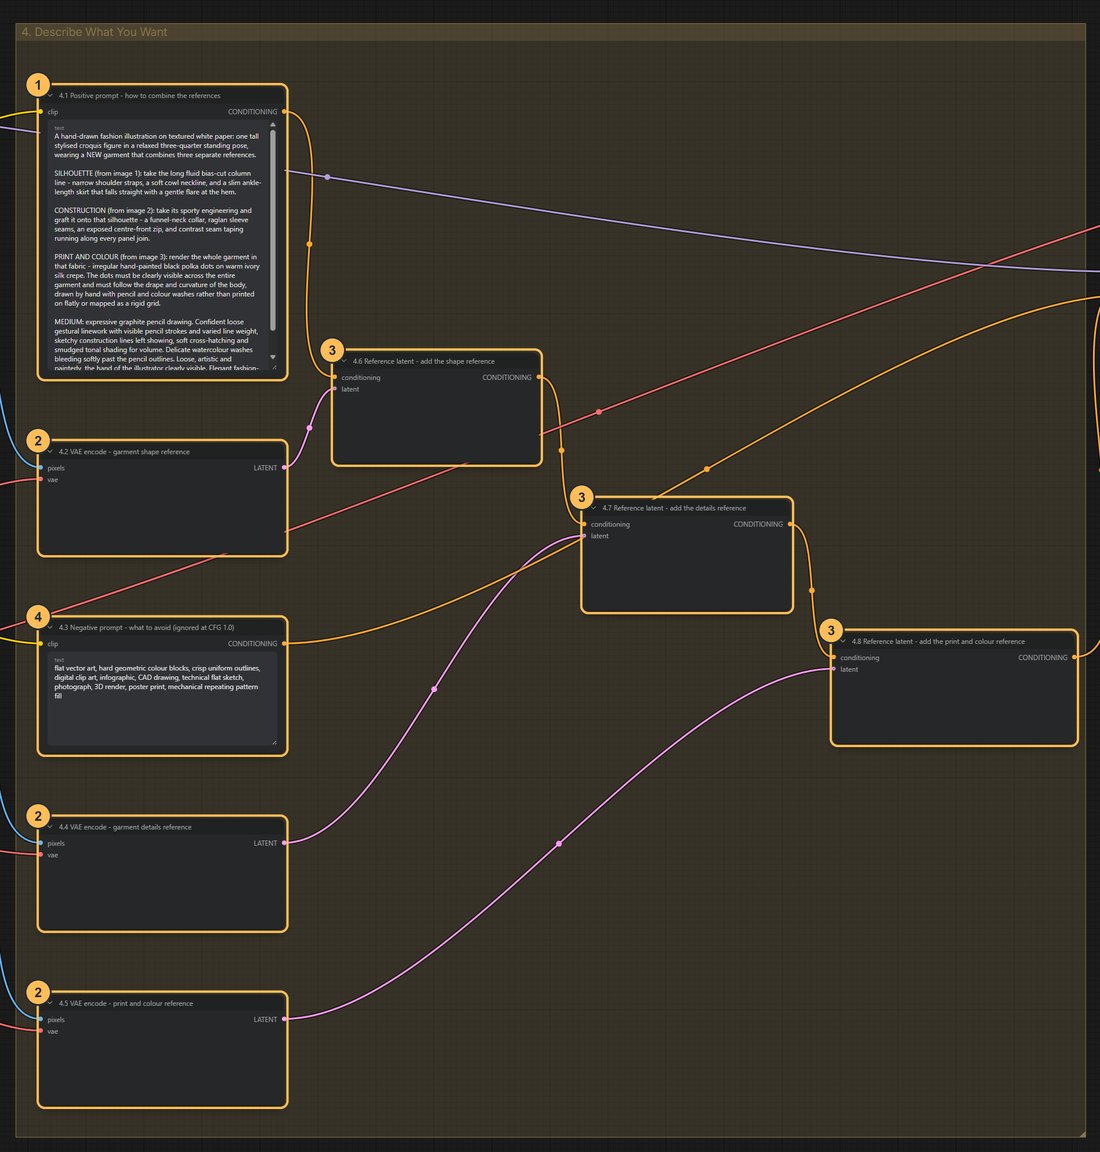
- Positive promptSays what to take from image 1, image 2 and image 3.
- VAE encodeConverts each reference image into the model’s internal form.
- Reference latentAttaches each converted image to the prompt, one after another.
- Negative promptWhat to avoid. It is ignored while the CFG setting is 1.
Generate, decode and save
The same controls as 01A, on an 832 × 1216 image. The workflow uses the recommended 4 steps and CFG 1, so its negative prompt is ignored.
Three results, three seeds
The same three references and the same instruction, run with three different seeds. Everything else is identical, so the differences show how much the seed alone changes the design.
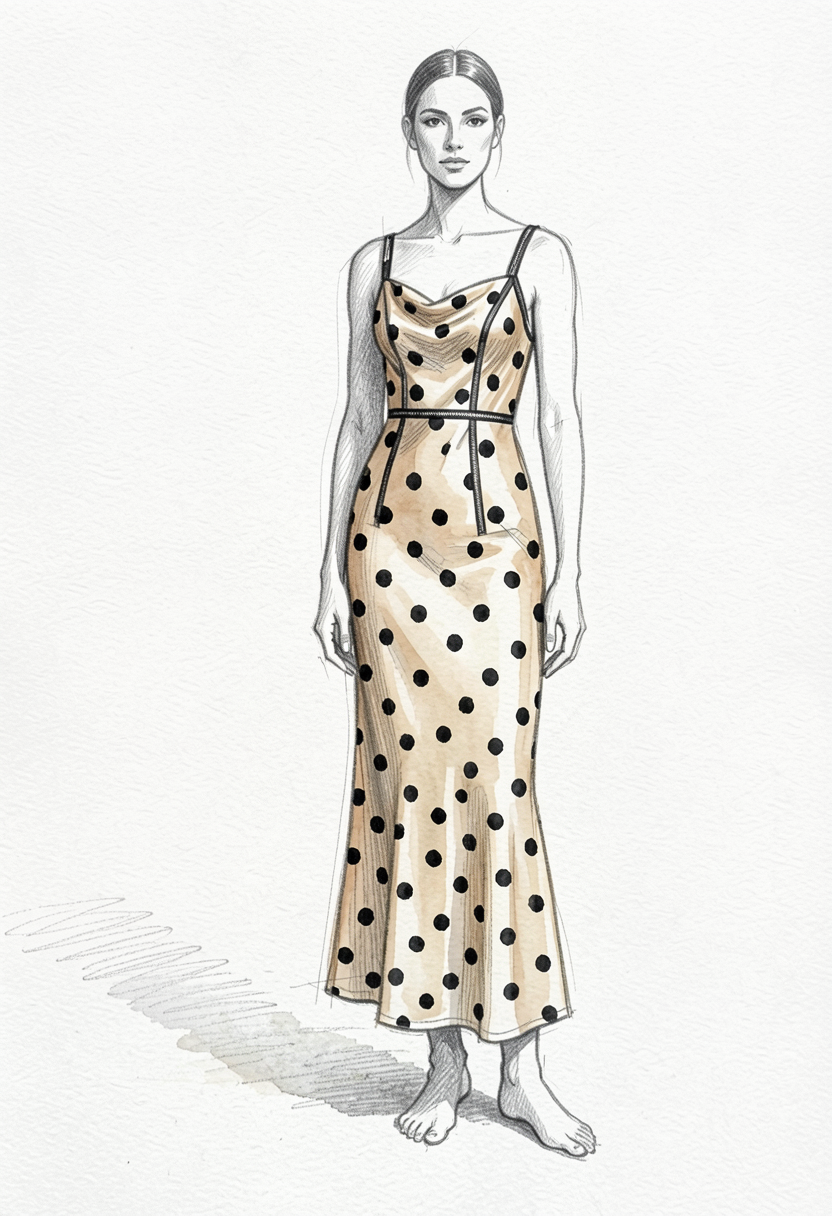
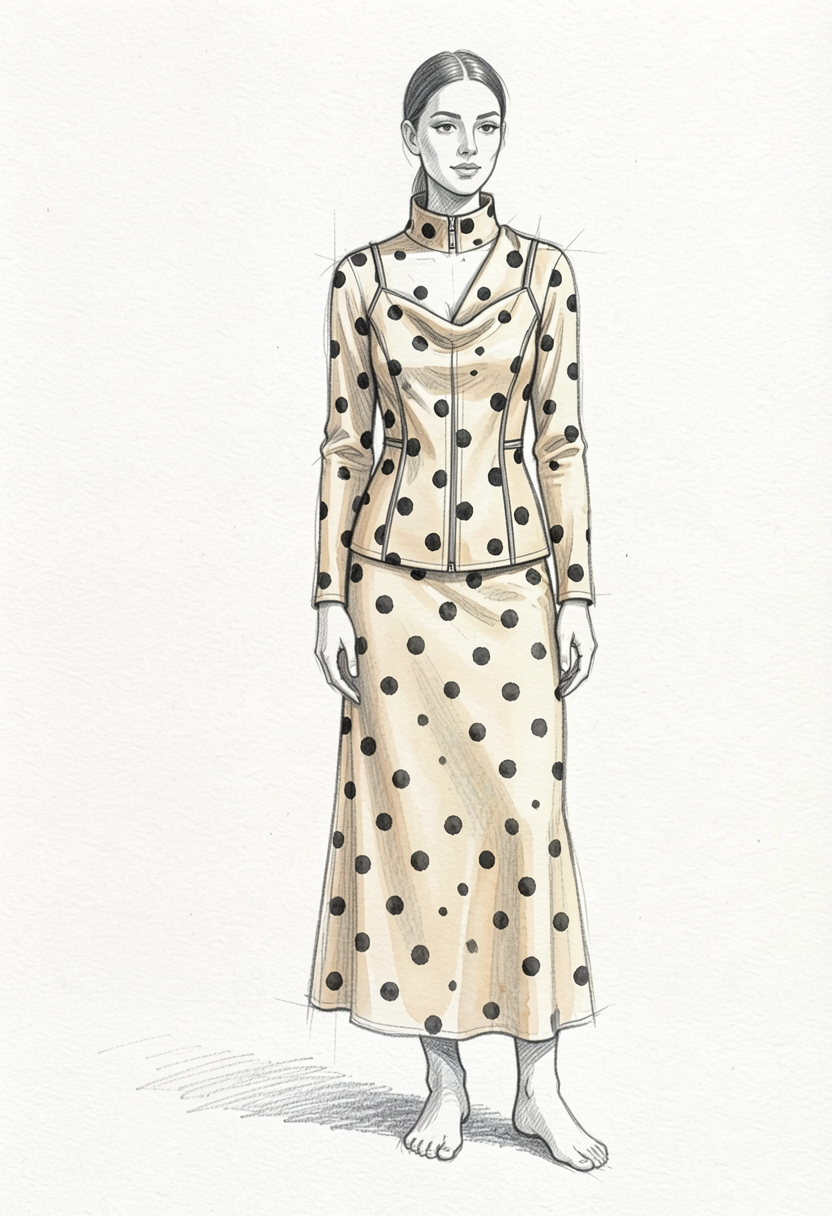
All three: 4 steps, CFG 1, Euler, 832 × 1216.
Check the result
- The silhouette from image 1 is still readable
- Construction details from image 2 are integrated into the garment, not pasted on
- The print from image 3 is at a scale that suits the garment
- The print follows the body’s form and does not lie flat like wallpaper
- The medium is the one you asked for
- No reference has taken over a role that belongs to another
Whose images are these?The two dress references were themselves AI-generated. That does not make them original or free of rights. A public image is not automatically free to use. More on rights and consent.
Download the workflow
- A_Multiple_References_To_Sketch.jsonThe three-reference workflow
- L03_dress_A.png, L03_dress_B.png, L03_print_swatch.pngThe example reference images. Put them in ComfyUI’s input folder, or load your own
Click a filename to download it, or right-click it and choose Save link as. Keep the .json ending. Then drag the file onto the ComfyUI canvas, or use Workflow → Open.