04 · Garment transfer
Garment Try-On
See an outfit from one photograph on the person in another. One photo supplies the clothes, a second supplies the wearer, and a written instruction says what to transfer and what to keep.
- You’ll learn
- How to arrange two photographs as one left and right reference, how to write a transfer instruction, and how to assess what was preserved.
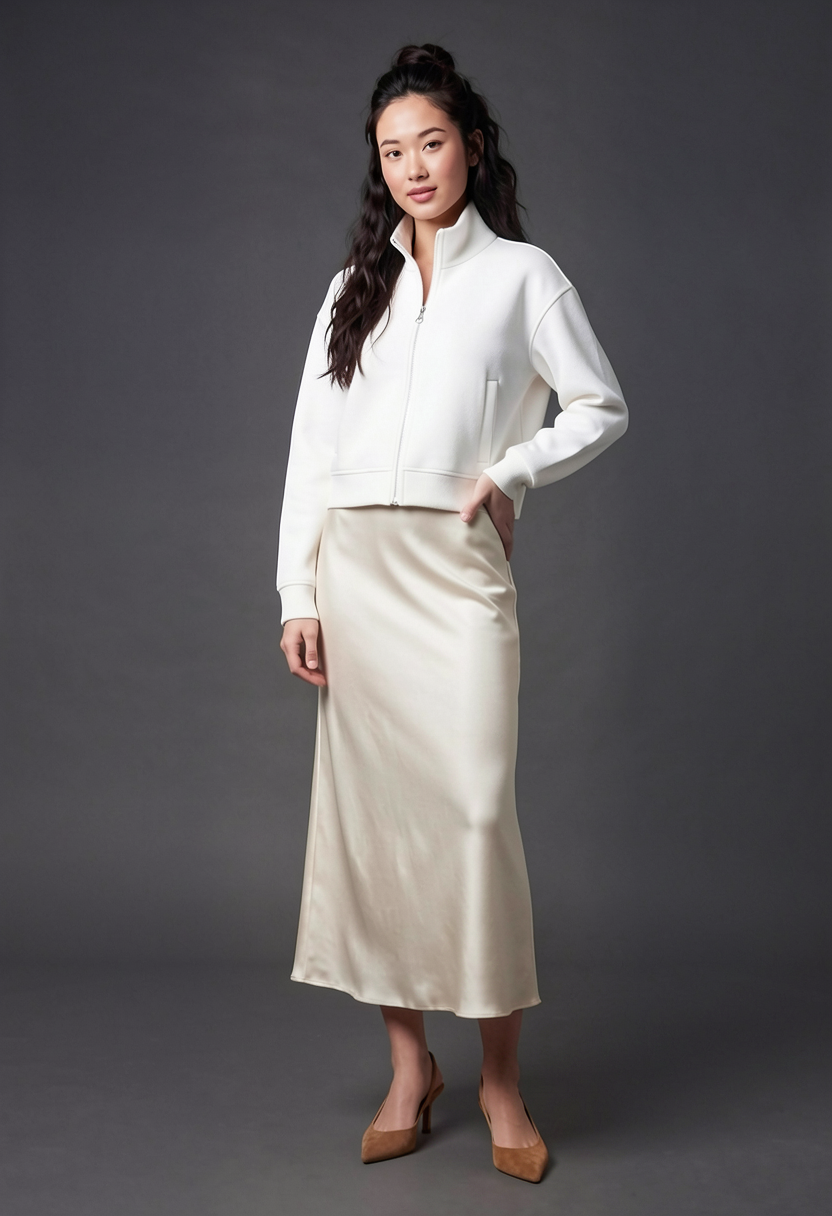
What goes in, what comes out
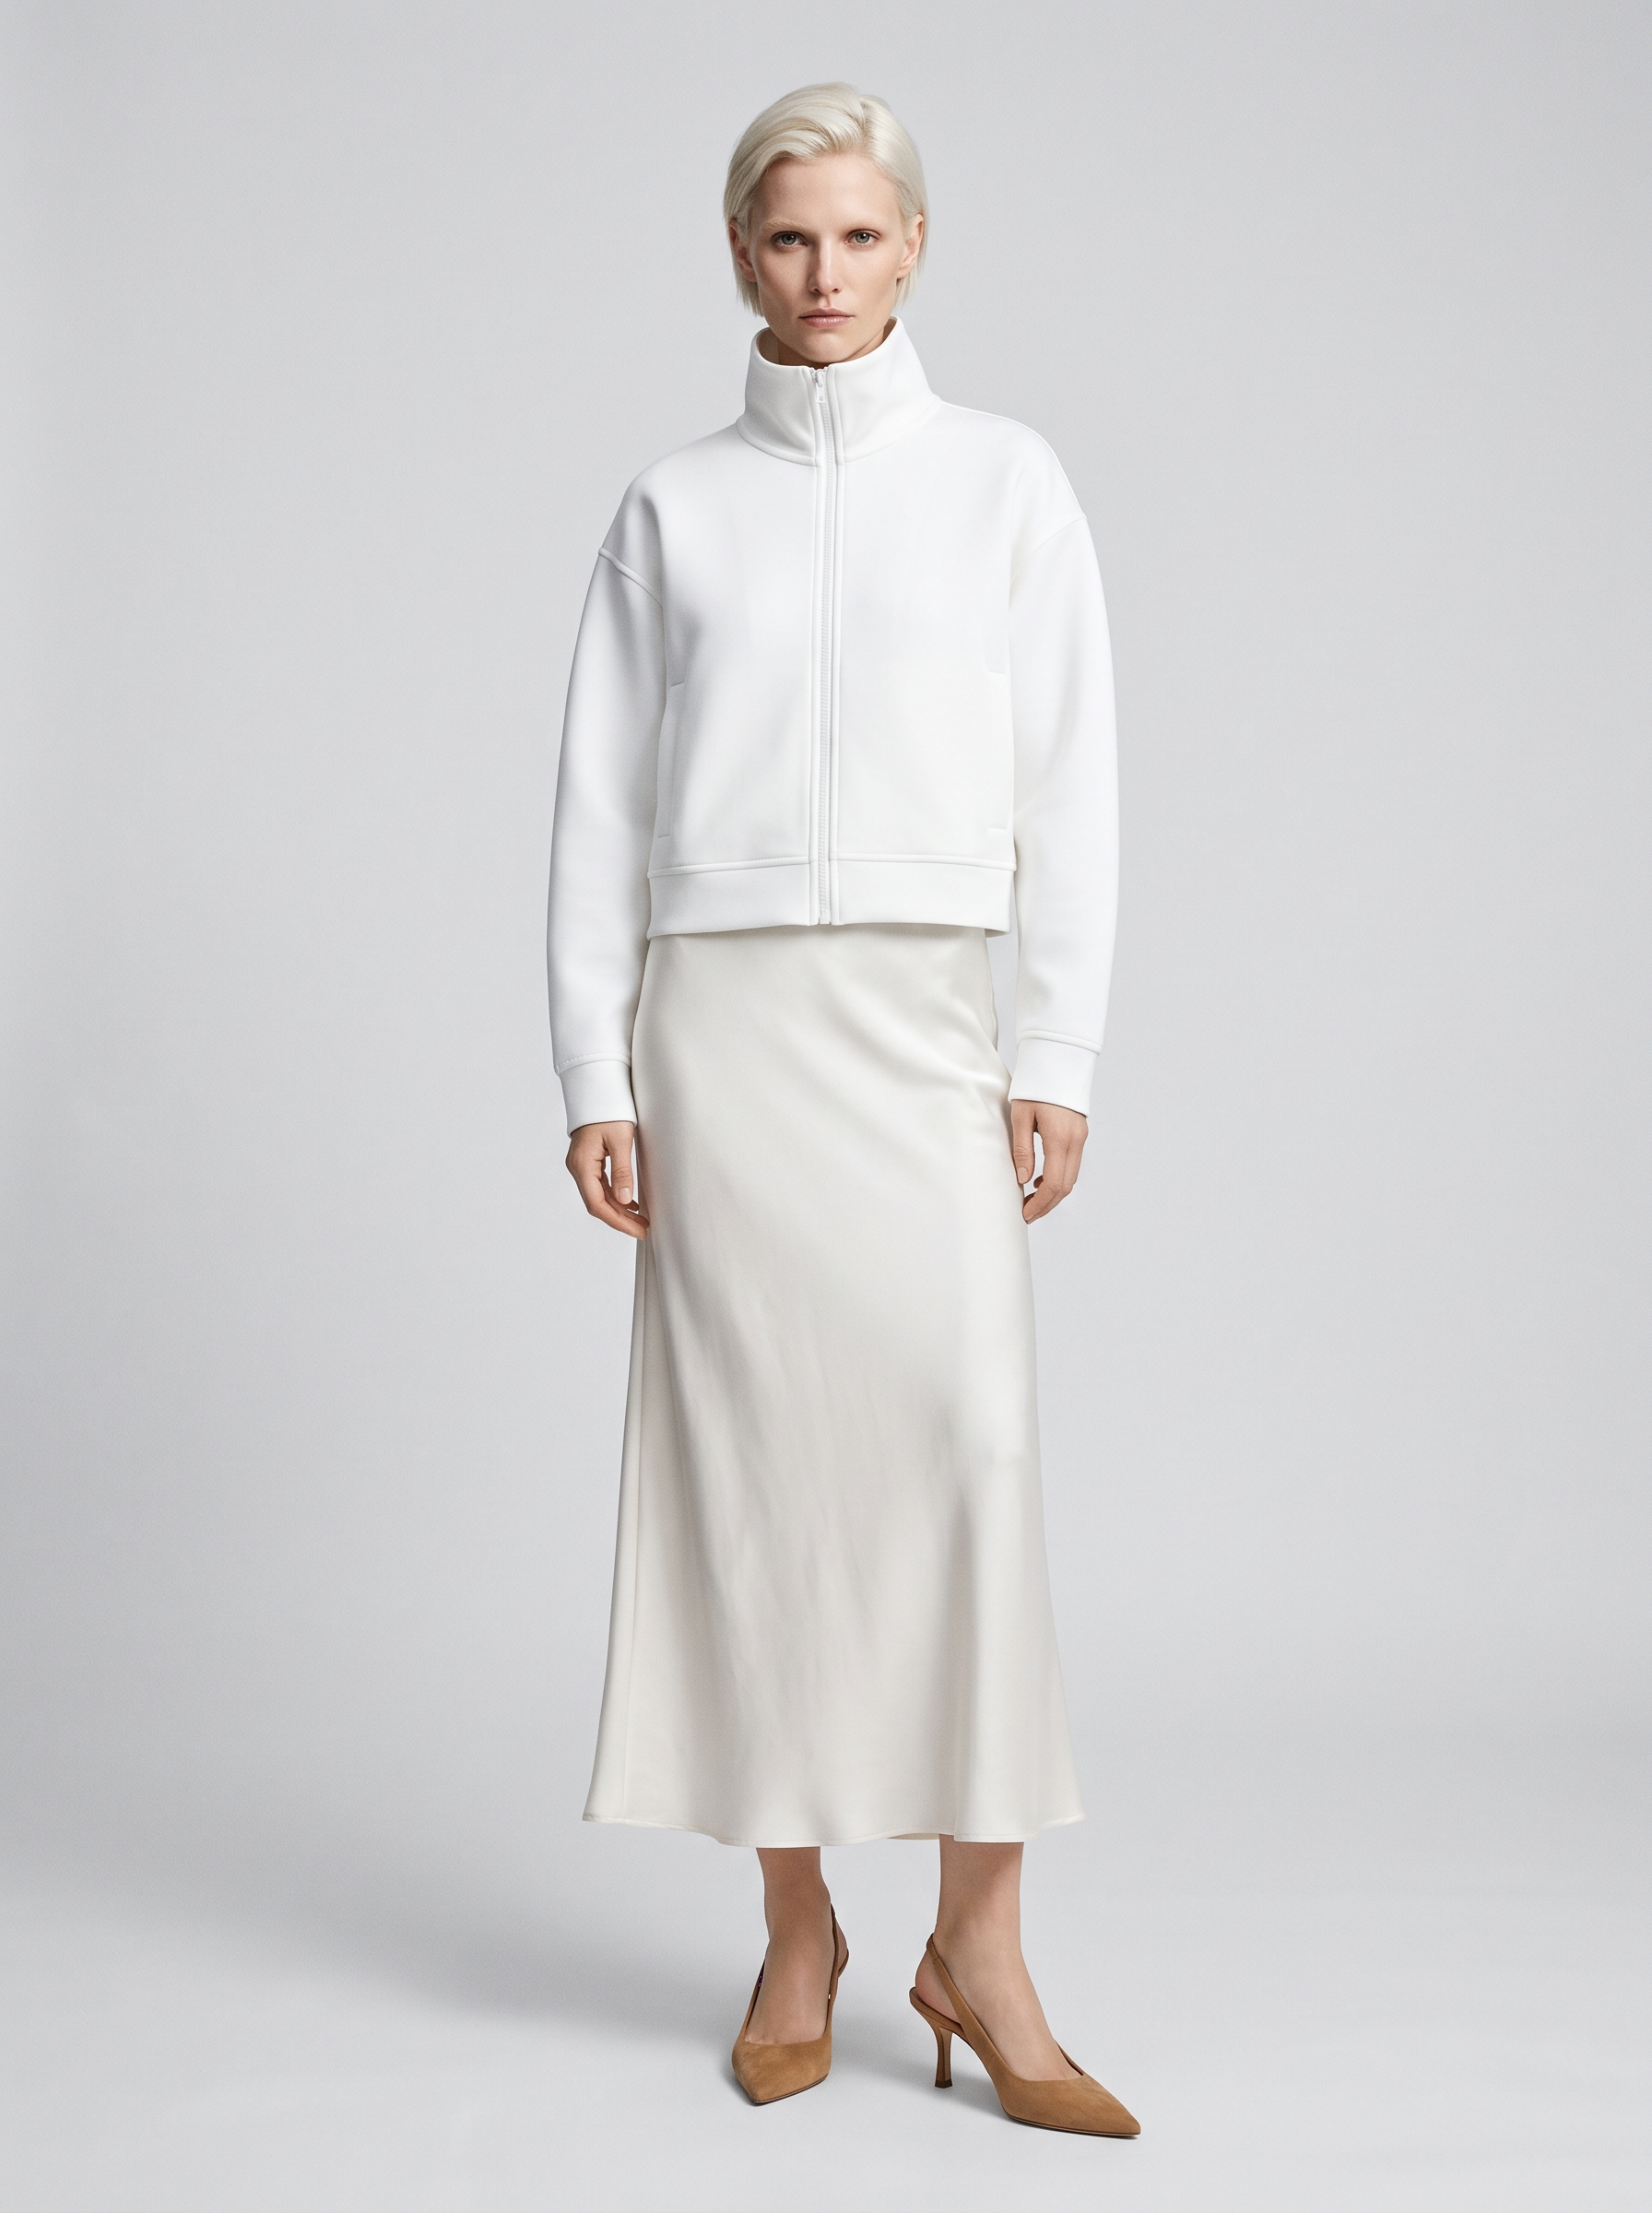
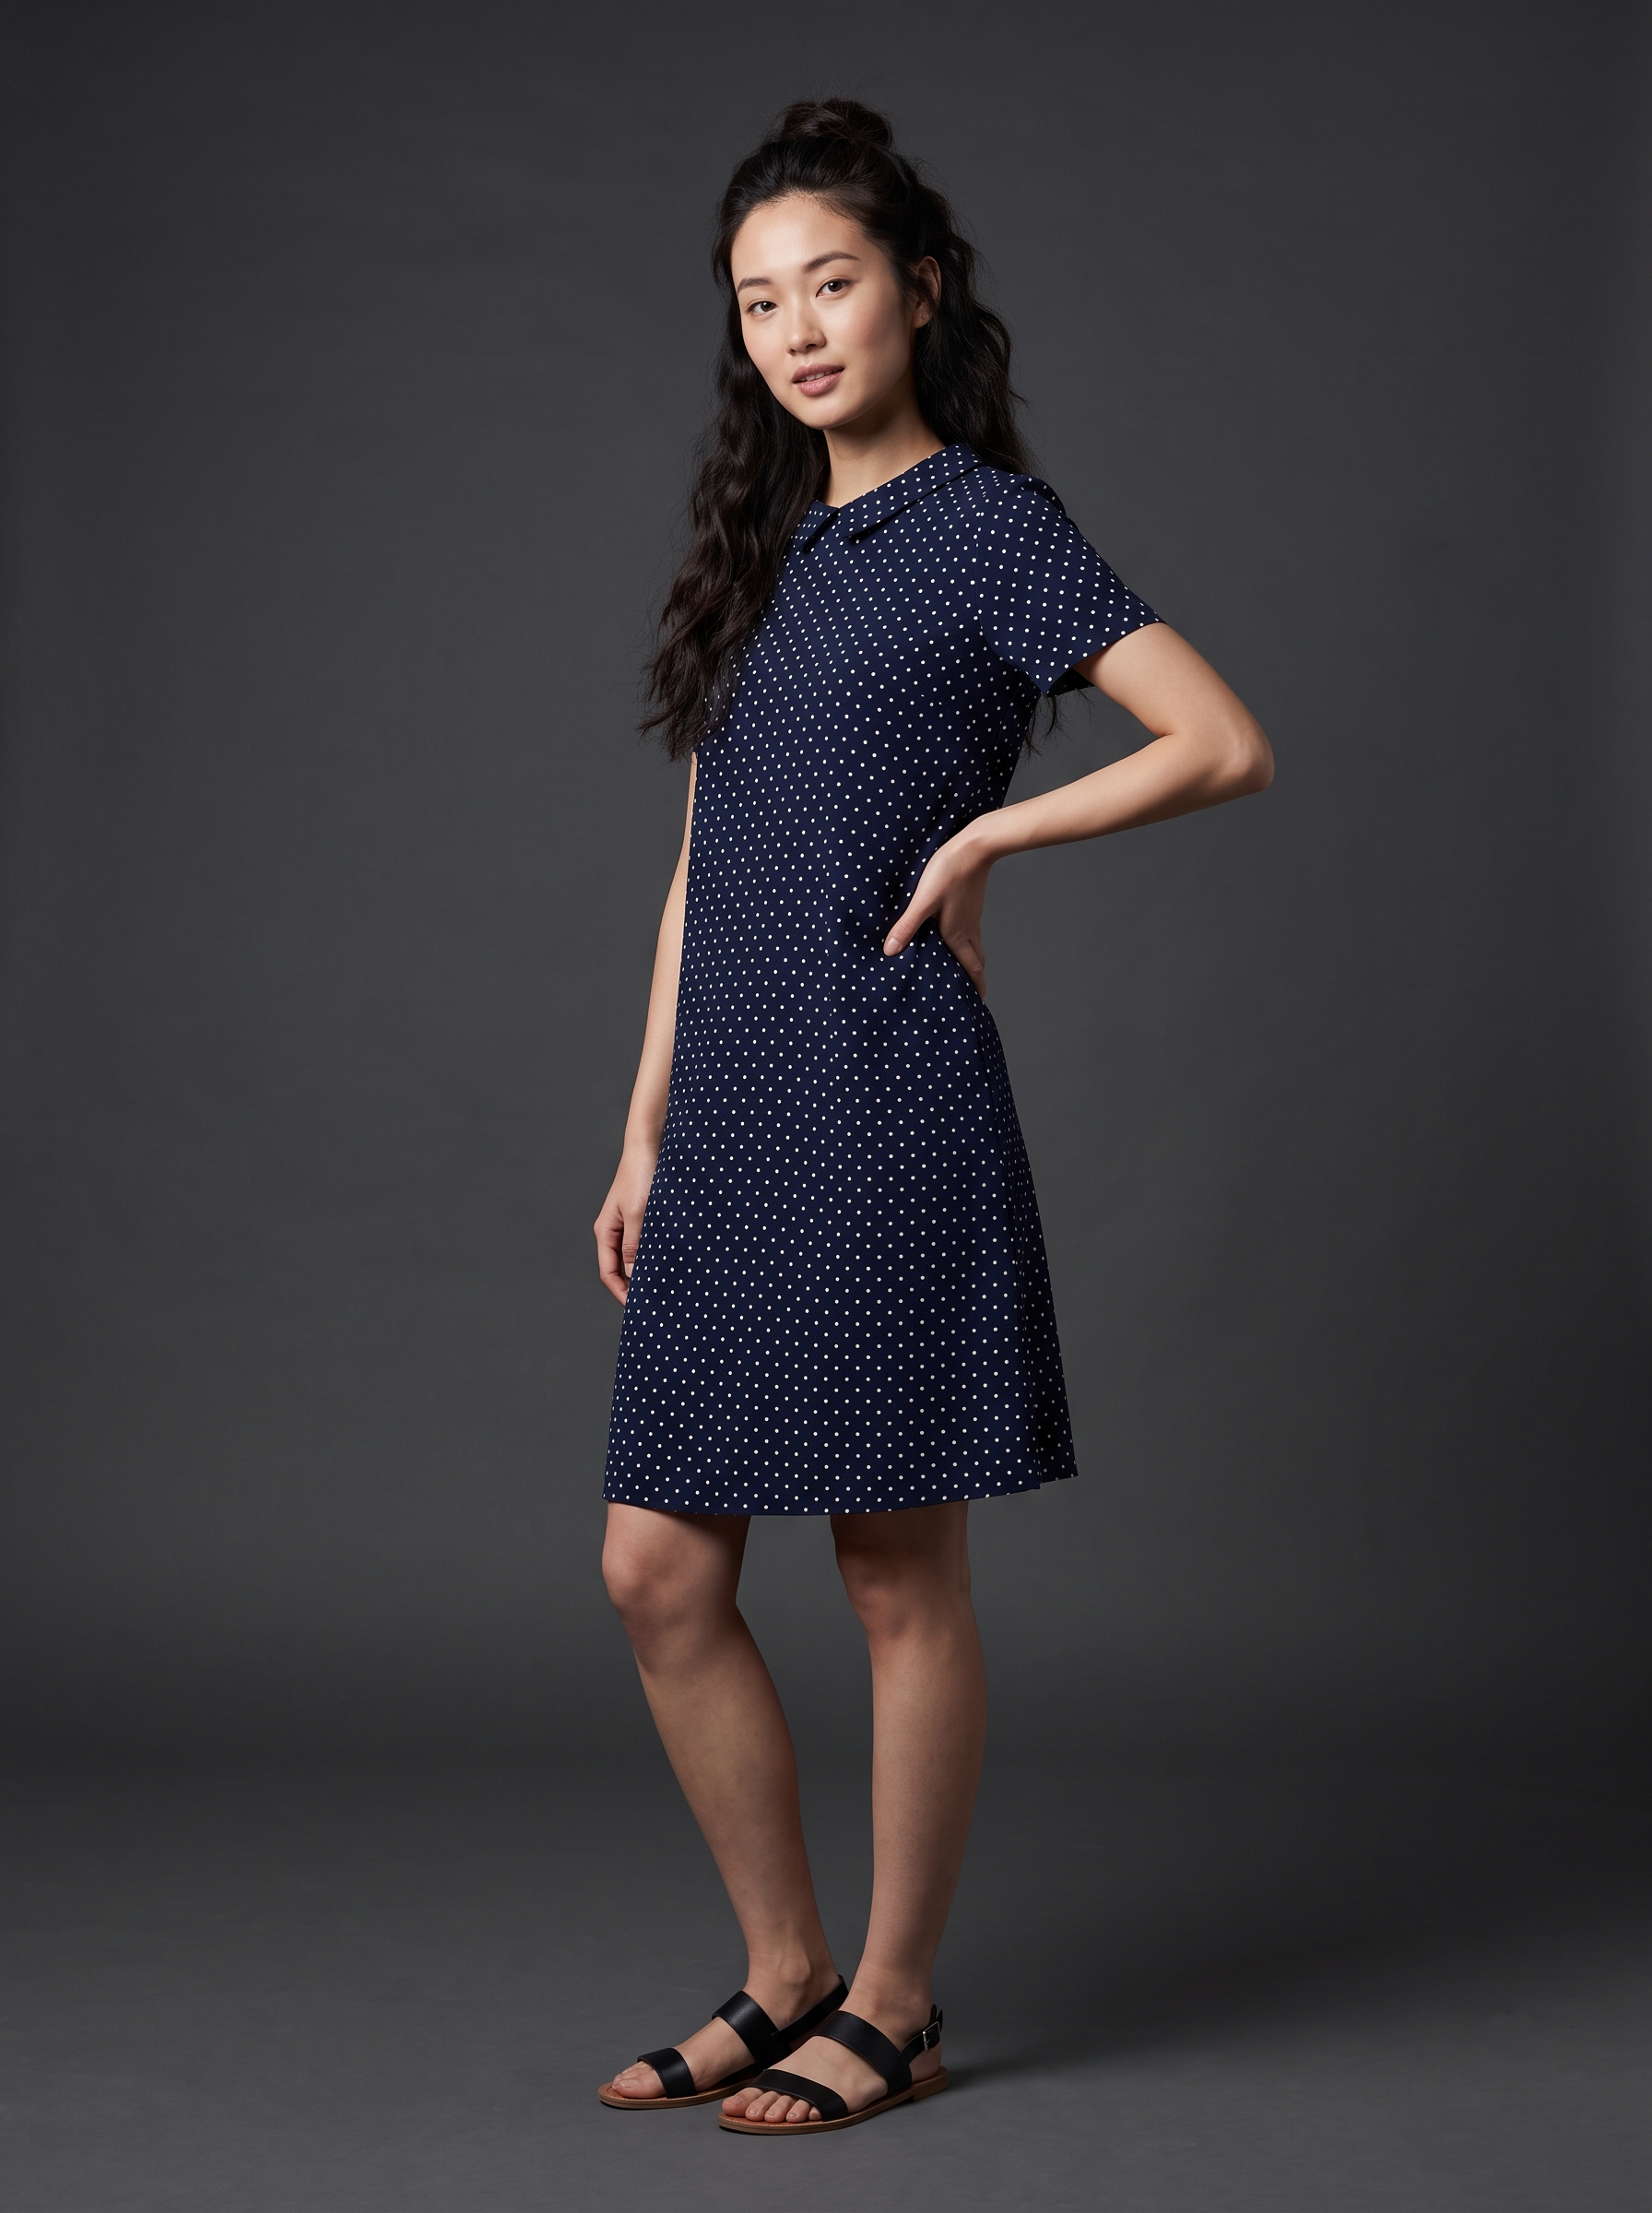
Transfer instruction“Edit only the person on the right. Dress her in the complete outfit shown on the left…”
How the workflow works
Explained earlier:seed, guidance and steps · reference images and preparation size (03) · decode and save
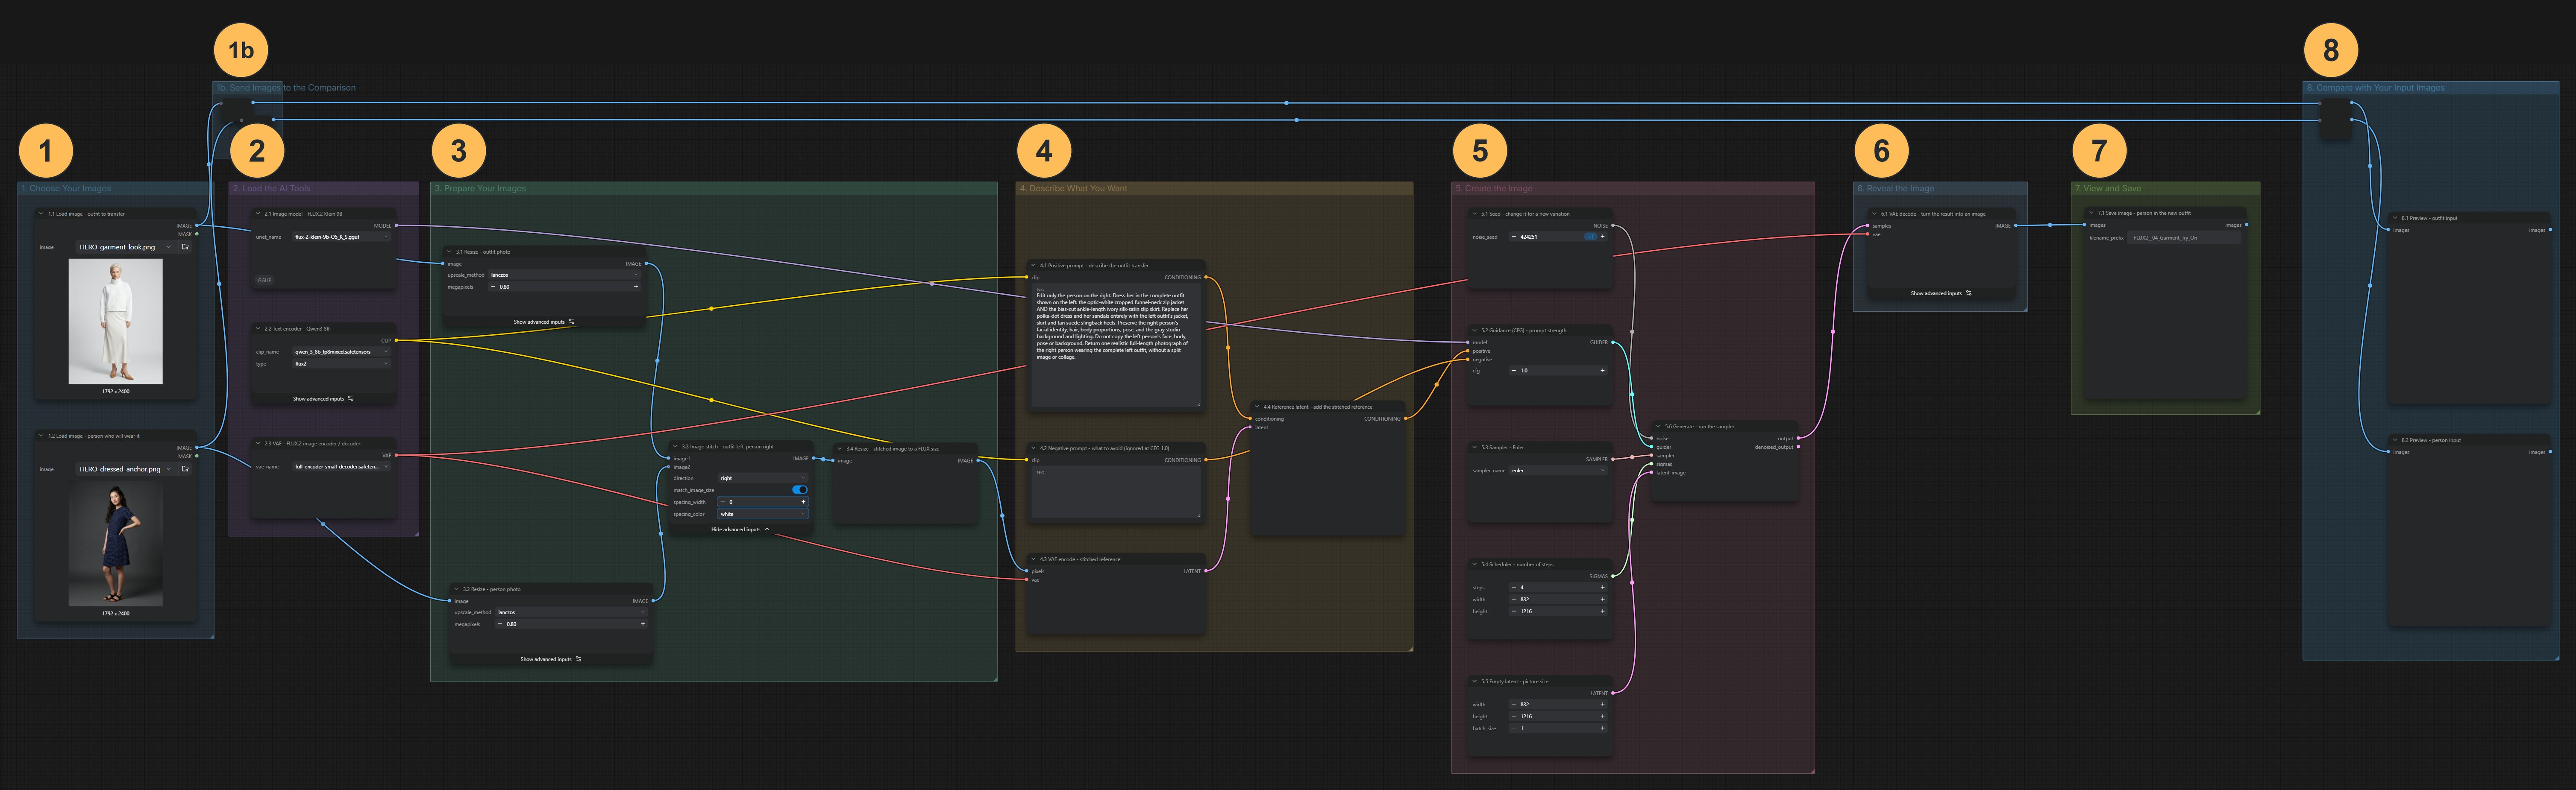
Choose the outfit and the wearer
The outfit photo should show the clothing clearly and completely. The wearer photo provides the person, pose, framing and background you want to keep. Anything hidden in the outfit photo, behind an arm or under a bag, will be invented by the model.
Arrange the pair: outfit left, wearer right
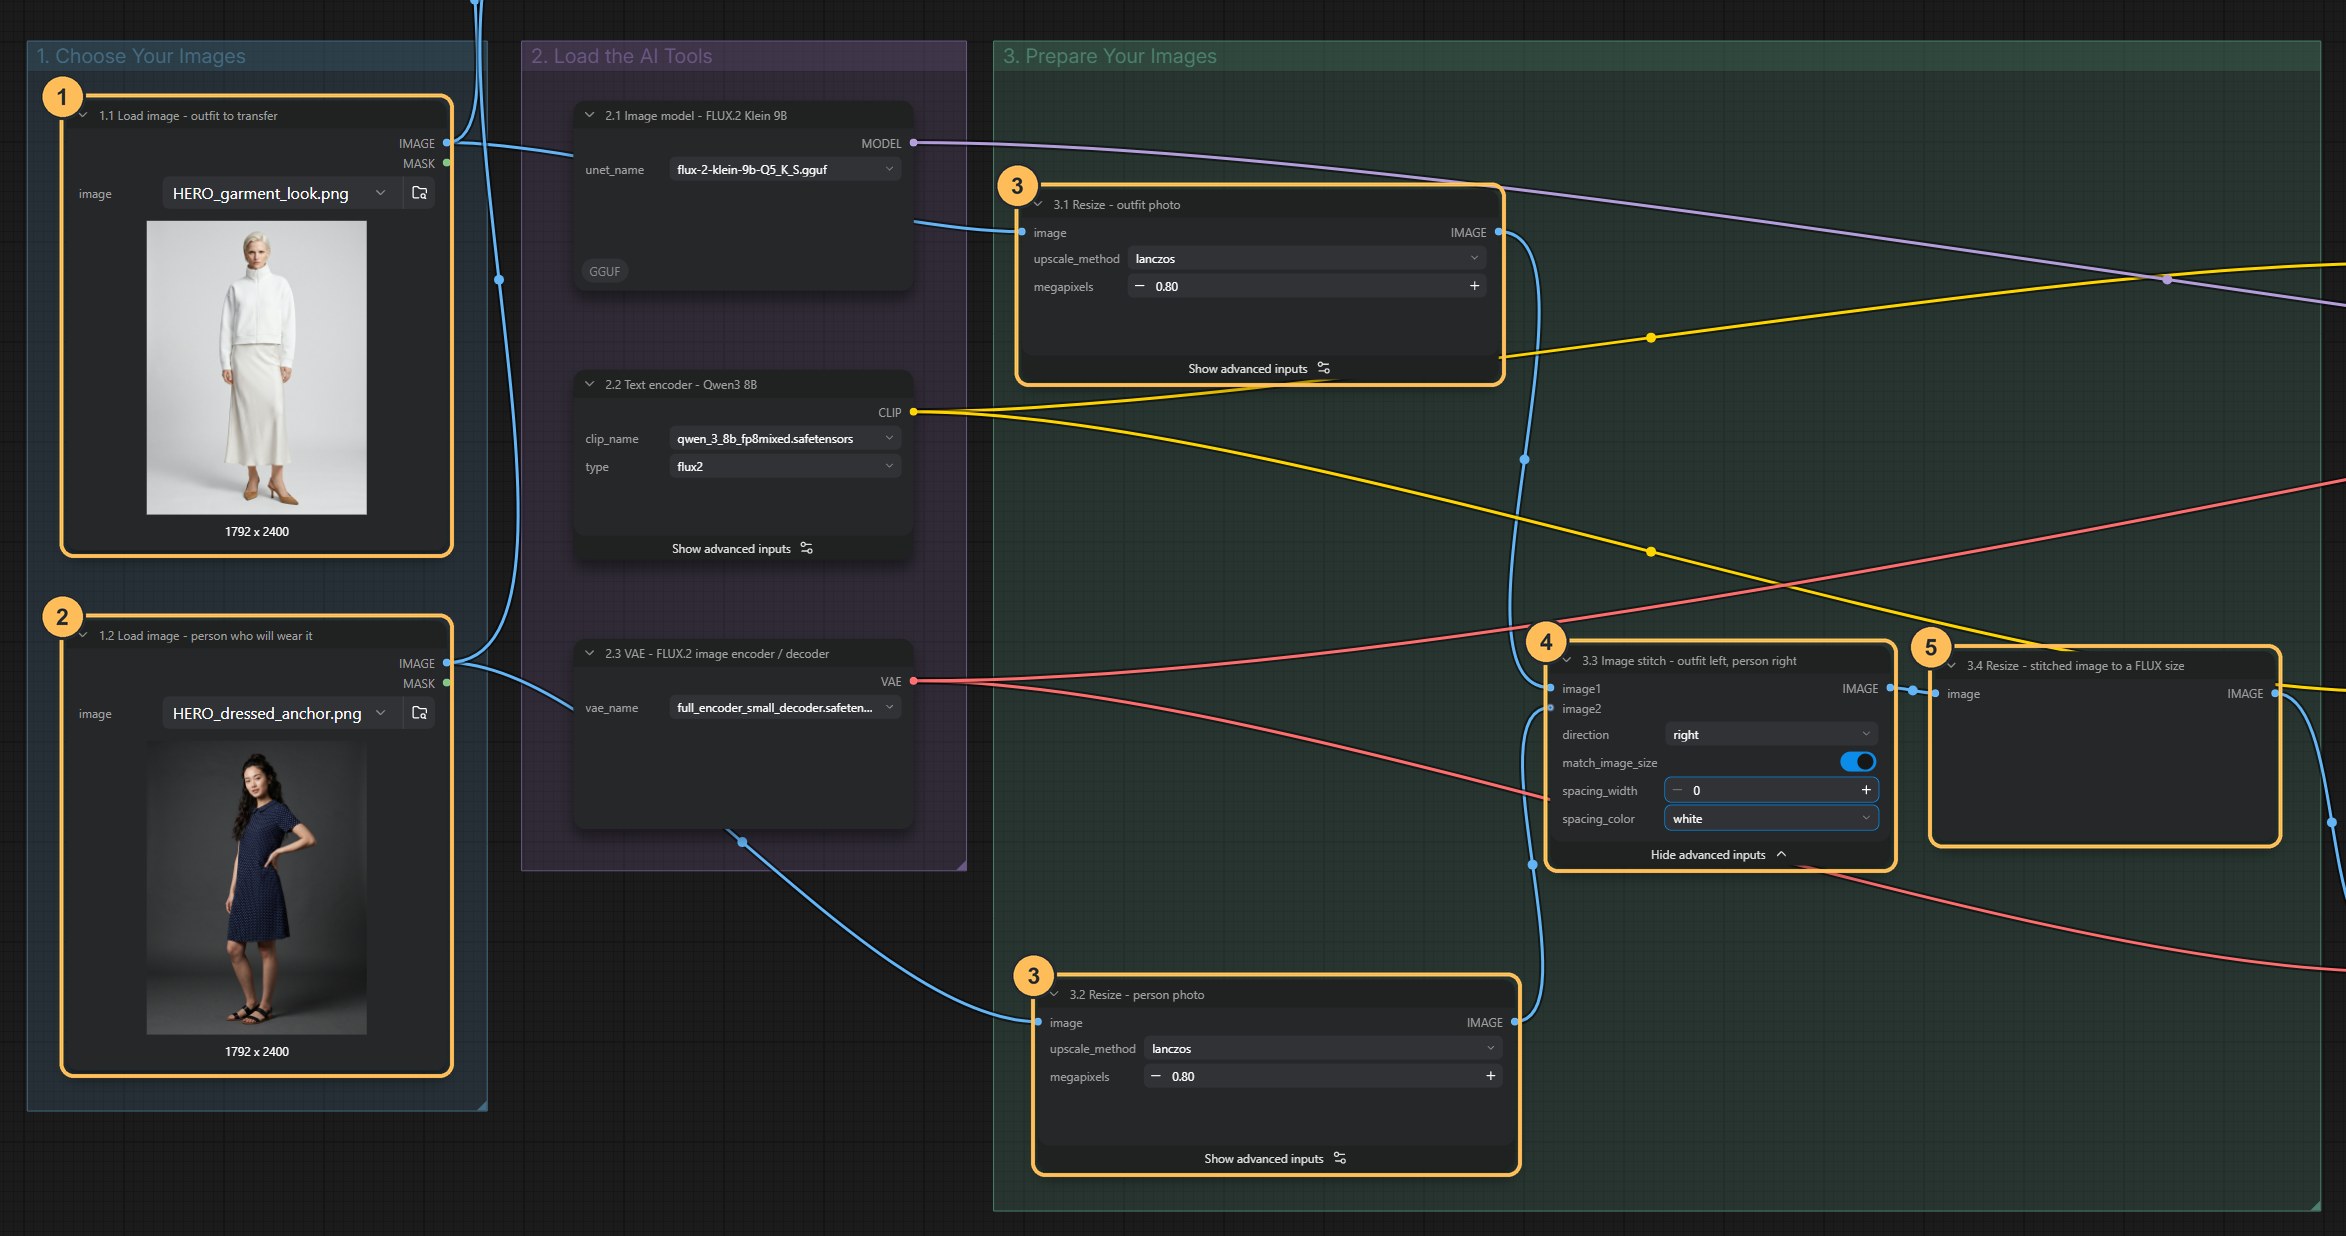
Both photos are resized to 0.8 megapixels and joined side by side into one picture by an Image Stitch node. That joined picture is the reference image, the visual evidence the model works from: outfit on the left, target wearer on the right. The prompt uses the words “left” and “right”, so the two Load Image nodes must stay in this order. If you swap them, the instruction points at the wrong person.
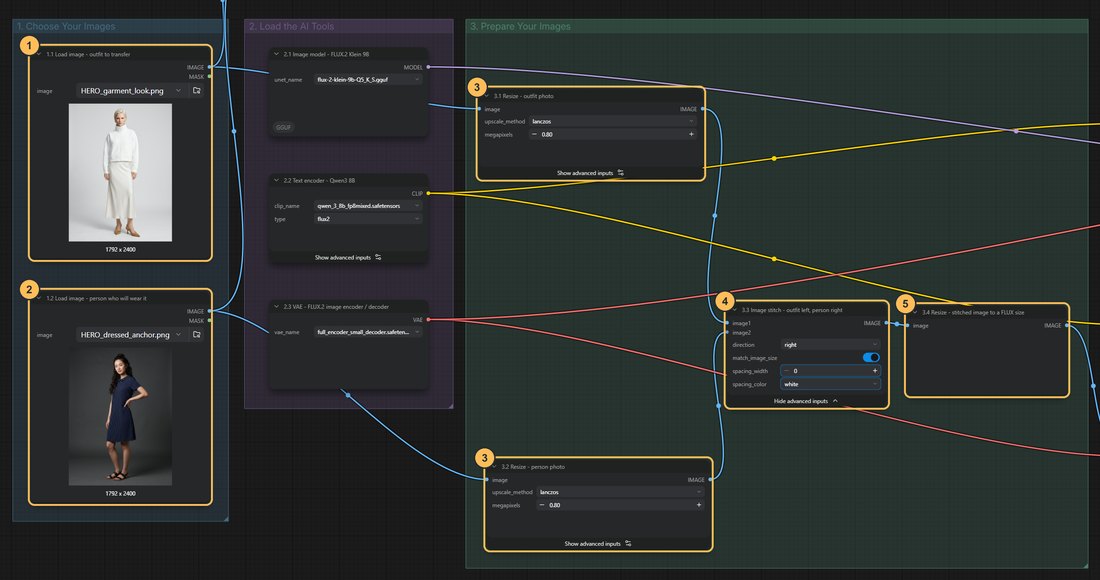
- Outfit photoThe clothes to transfer.
- Wearer photoThe person who will wear them.
- ResizePrepares both photos at the same size.
- Image stitchJoins them side by side: outfit left, wearer right.
- Resize for FLUXAdjusts the joined image to a size the model handles well.
Write the transfer instruction
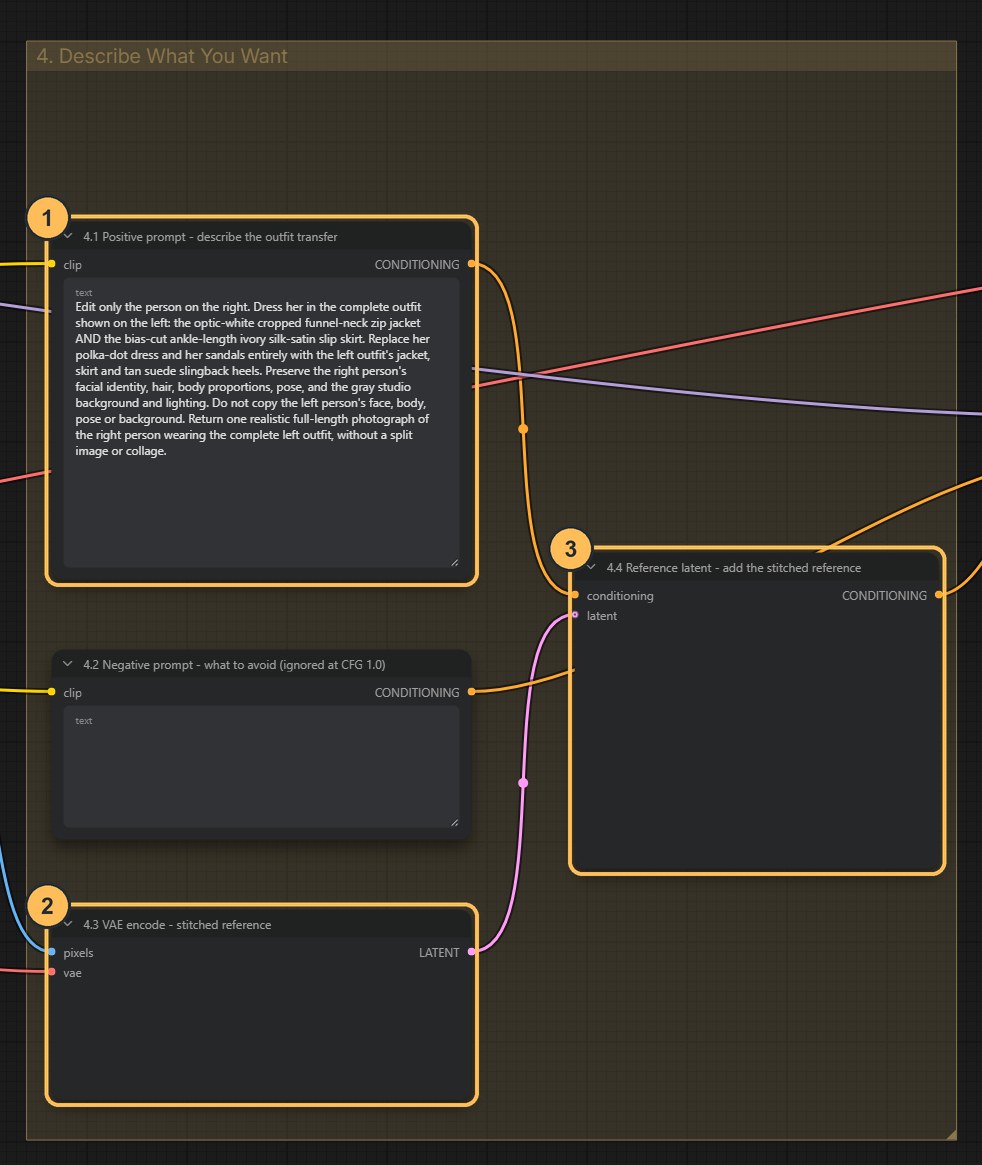
- Positive promptThe transfer instruction: who to edit, what to transfer, what to keep.
- VAE encodeConverts the joined picture into the model’s internal form.
- Reference latentAttaches the joined picture to the instruction.
The instruction has three parts. First, who to edit: “Edit only the person on the right.” Second, what to transfer, naming every piece: the jacket, the skirt, the shoes. Third, what to preserve: her face, hair, body proportions, pose and the background. You do not paint a selection here. The words alone say which person to change.
Say what must disappear as well as what arrives, for example “replace her polka-dot dress and sandals entirely”. Otherwise the model may layer the new jacket over the old dress.
Change: one sentence of the instruction. Keep fixed: both photos and the seed. Inspect: the part you changed and the four preservation points below.
Faithful transfer or redesign?
A faithful transfer reproduces the outfit as photographed: same length, same closures, same fabric. If you ask for a different skirt length or sleeve, you are making a design variation, which is a legitimate use but a different task. Decide which one you are doing before you judge the result, because a changed hem is a fault in the first case and the goal in the second.
Run and save
The same controls as 01A, on an 832 × 1216 image. The workflow uses the recommended 4 steps and CFG 1.
Check the result
Preservation is an aim that you assess on every result. None of these is guaranteed by the workflow.
- Identity: the face and hair still belong to the wearer. A good outfit on a different person is a failed try-on
- Pose: the body position and proportions match the wearer photo
- Background: the setting and light are unchanged
- Clothing fidelity: neckline, closures, hem and shoes match the outfit photo, and no trace of the old clothes remains
- The fabric drapes plausibly on the new body
This is a visual proposal. It does not measure fit.
People and permissionThe wearer must have agreed to being digitally re-dressed, not only photographed. Say that the image is AI-generated if it will help sell a product. Use it responsibly.
Download the workflow
- A_Garment_Try_On.jsonThe try-on workflow
- HERO_garment_look.png, HERO_dressed_anchor.pngThe example outfit and wearer photos. Put them in ComfyUI’s input folder, or load your own
Click a filename to download it, or right-click it and choose Save link as. Keep the .json ending. Then drag the file onto the ComfyUI canvas, or use Workflow → Open.