09 · Targeted changes
Masked Image Edit
Keep an approved image and change one part of it. You paint over the area that may change, and describe the change in words. The painted area is called a mask. In the example, white trainers become red.
- You’ll learn
- How to paint a filled mask with enough room for the edit, how the workflow generates an edited version and then pastes back only the masked region, and why the rest of the image is unchanged.
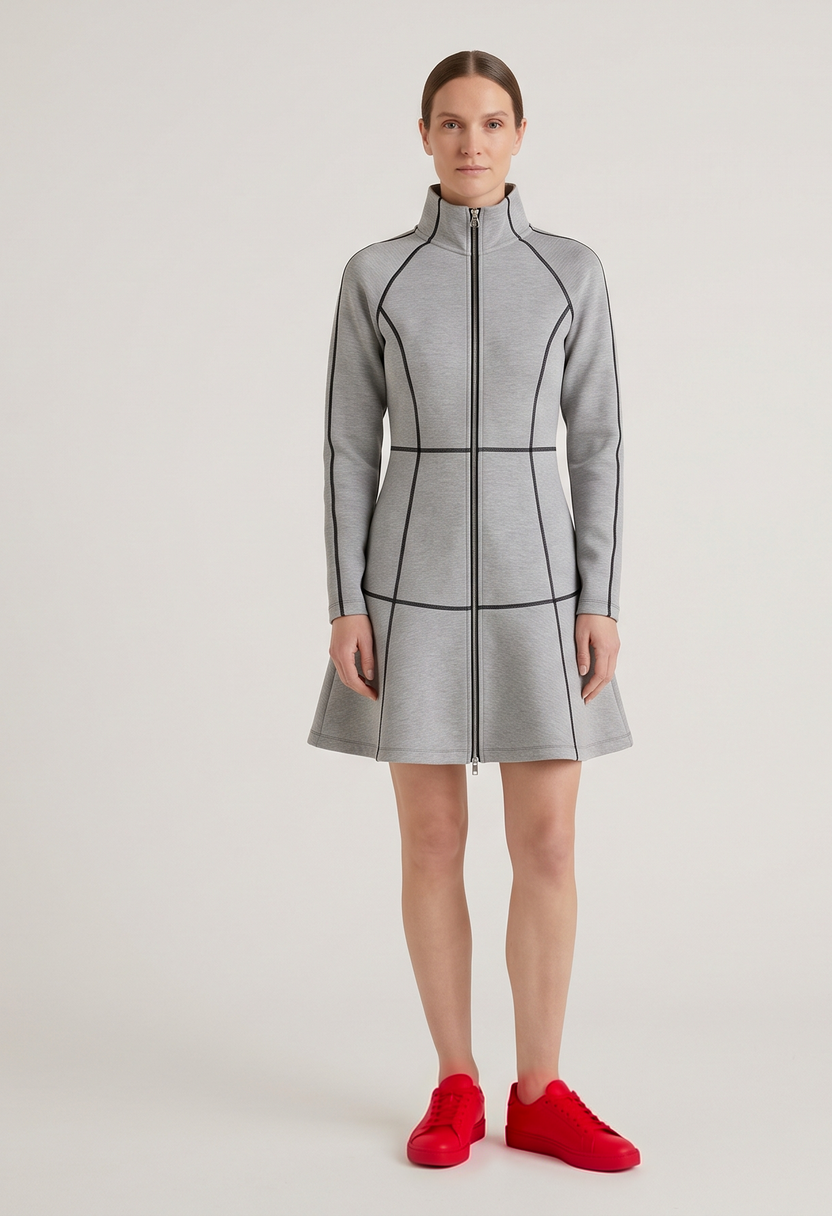
What goes in, what comes out
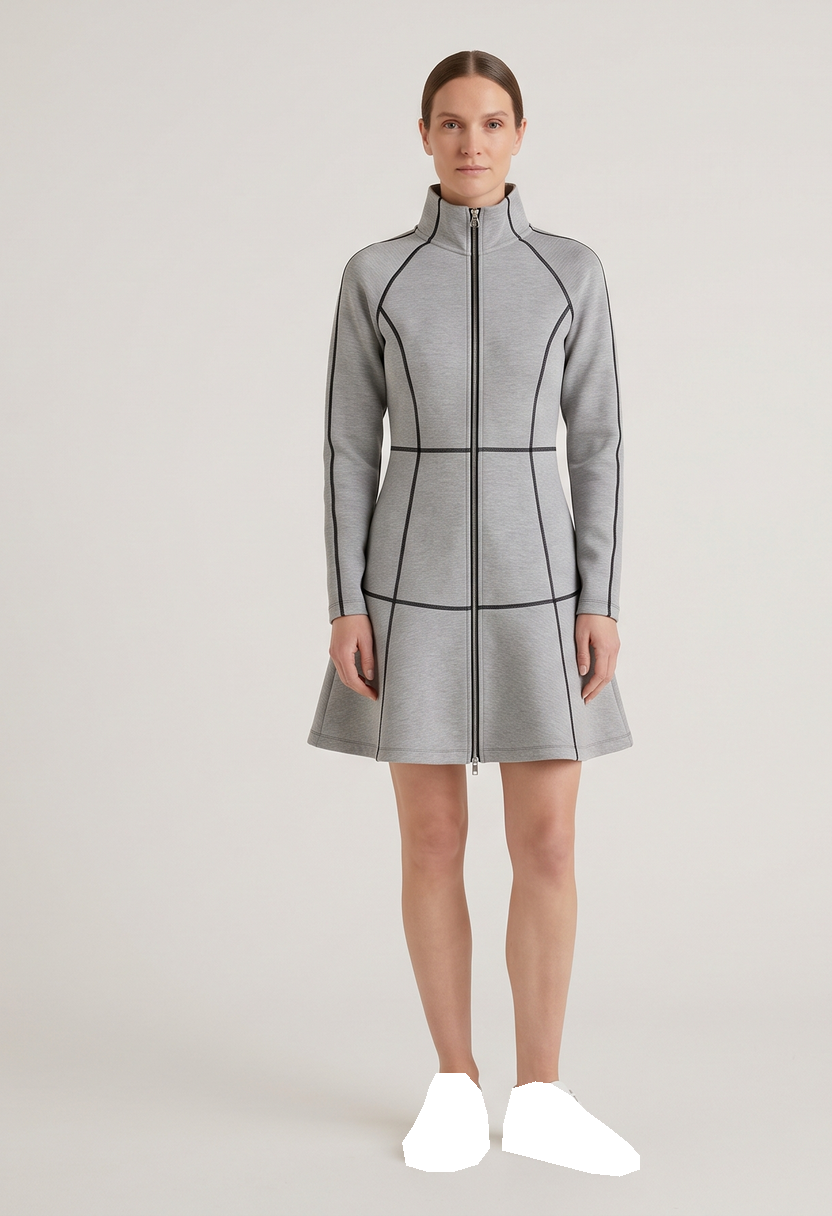
Mask and instructionPaint over both shoes. “Change both sneakers to bright red. Keep their shape, laces, soles and material.”
How the workflow works
Explained earlier:reference images and preparation size (03) · seed, guidance and steps · decode and save
Paint a filled mask
Right-click LoadImage and open the Mask Editor. Paint over the whole area you want to change, including its edges, then save the mask to the node.
- Fill the area. The mask is the painted pixels themselves. If you draw only an outline around an object, only that thin outline is selected and the inside stays protected
- Leave editing space. The new content can only appear inside the mask. For a colour change, painting the object is enough. For a change of shape or size, such as a flat shoe becoming a boot, also paint the space the new object will need
- In the mask preview, white means editable and black means preserved
The download includes an example mask over both shoes. Loading a different photo removes it, so paint a new one.
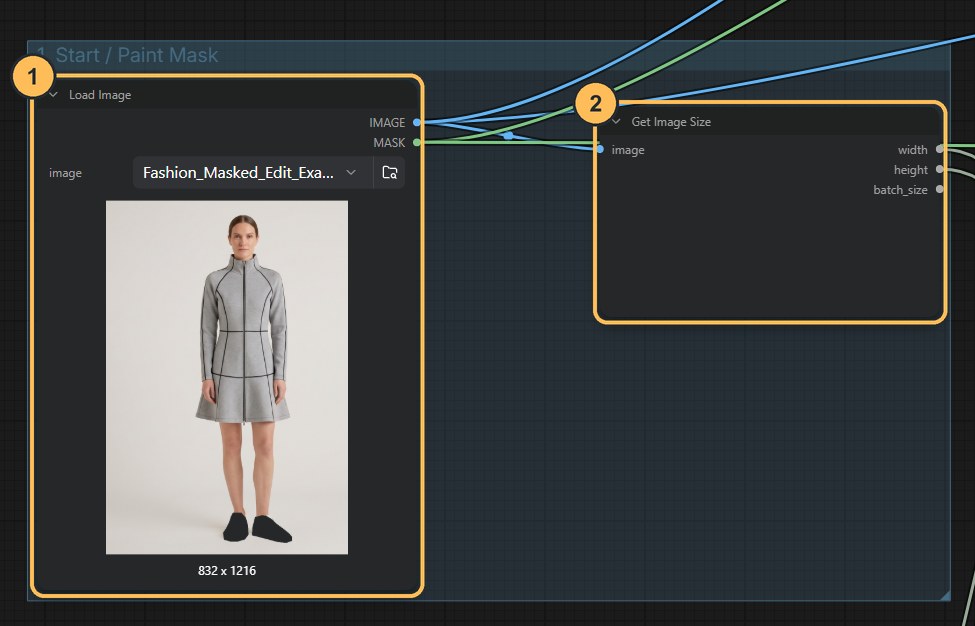
- Load ImageRight-click here to open the Mask Editor and paint the area to change.
- Get Image SizeMeasures your original photo so the result can be matched to it.
Describe one change
In the positive CLIPTextEncode node, state the change and what to keep, for example: change both sneakers to bright red, keep their shape, laces, soles and material. Make one change per run.
Change: one word, such as the colour. Keep fixed: the image, the mask and the seed. Inspect: the edges of the masked area as well as the change itself.
Generate a candidate, then composite
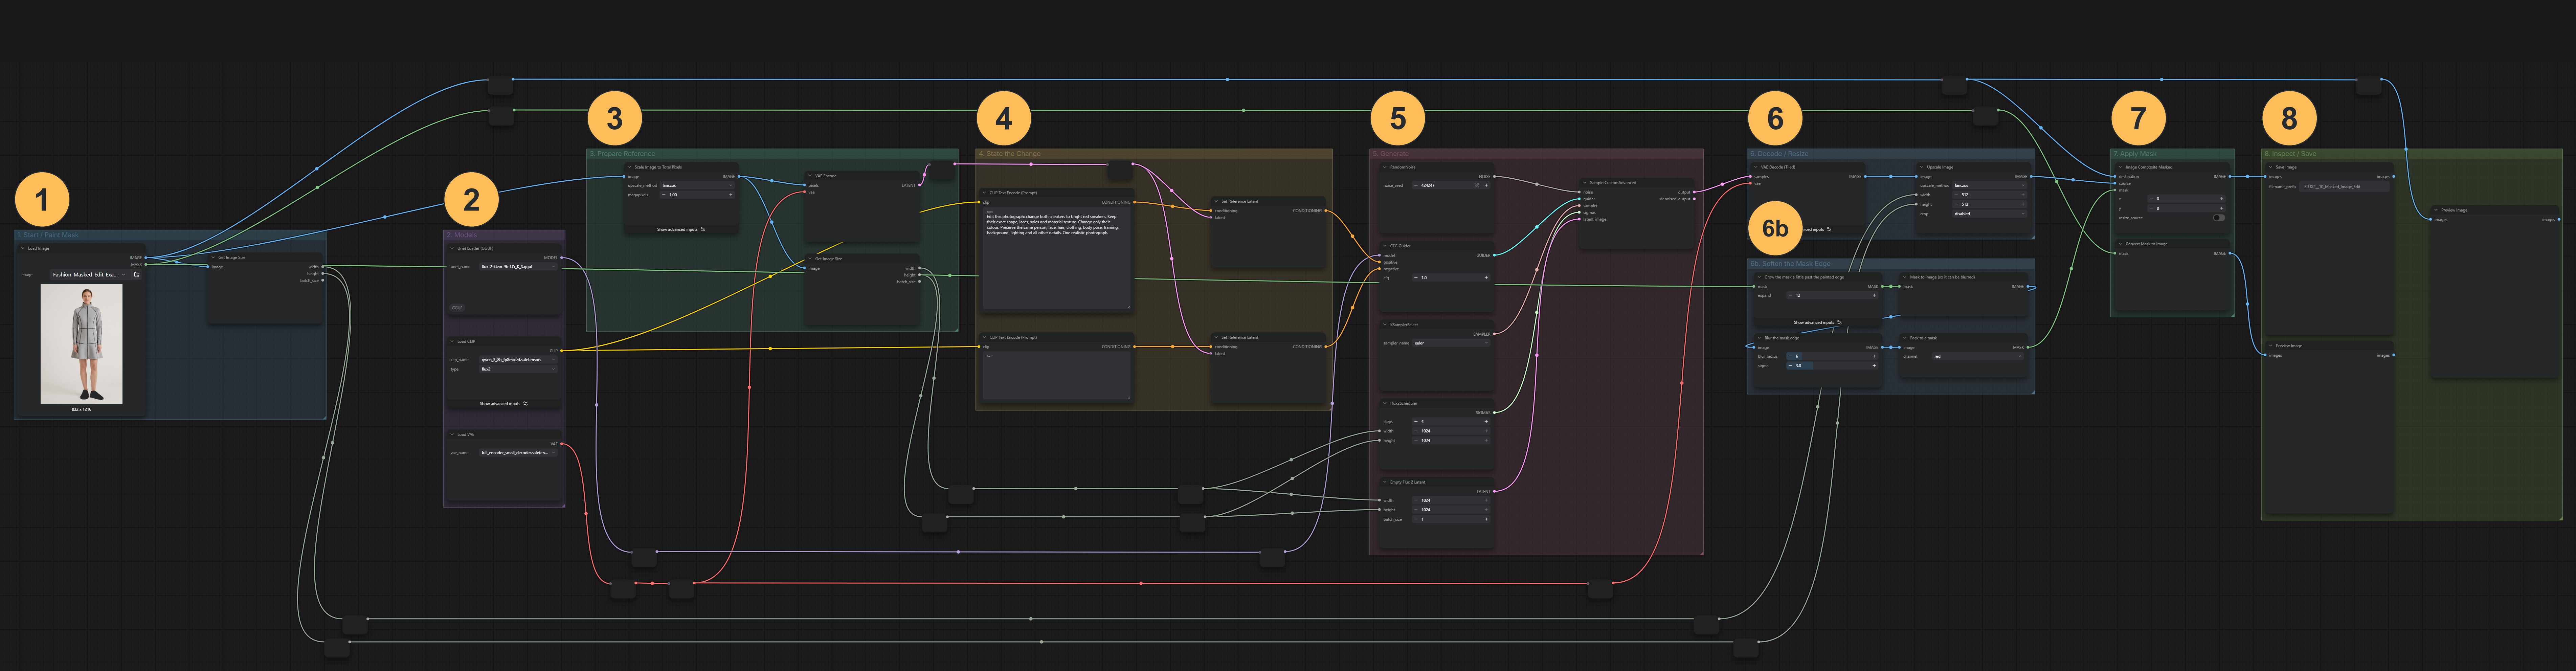
The edit happens in two separate operations. The second one is called compositing, which means pasting part of one image onto another:
- Generate. FLUX.2 receives the original photo as a reference and your instruction, and generates a complete new image, the edited candidate. The model is not restricted to the mask at this point, so small things elsewhere in the candidate can differ from the original.
- Composite. ImageCompositeMasked copies only the masked region of the candidate onto the original photo.
Before the paste, the workflow grows the mask slightly and blurs its edge. A hard-edged paste shows as a line, and if the model moved the object a little, a tight mask leaves part of the old one visible. The soft, slightly larger mask hides both.
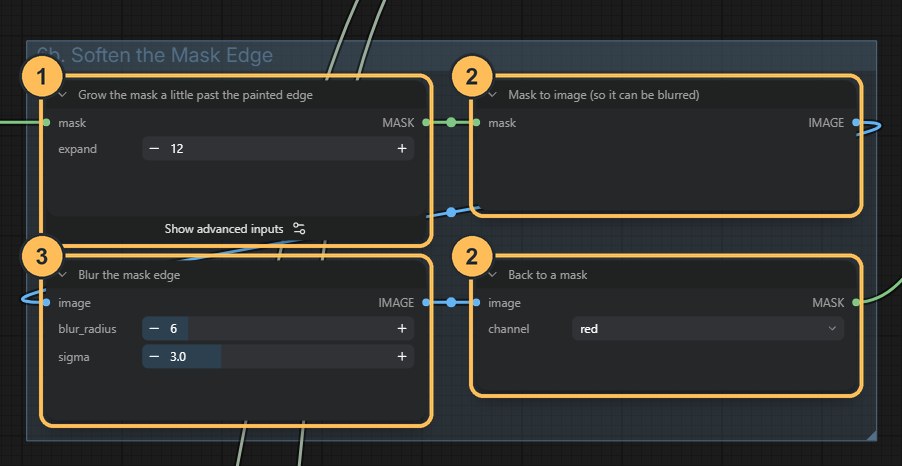
Group 6b: growing and softening the mask. - Grow maskExtends the mask a few pixels past what you painted.
- ConvertTurns the mask into an image and back, so it can be blurred.
- BlurSoftens the edge so the paste blends in.
The second operation is what keeps everything outside the mask unchanged. That protection comes from the compositing, not from the generator. This workflow uses the ordinary image model and then pastes the result in. It does not use an inpainting model, which is a model made only for filling in painted areas.
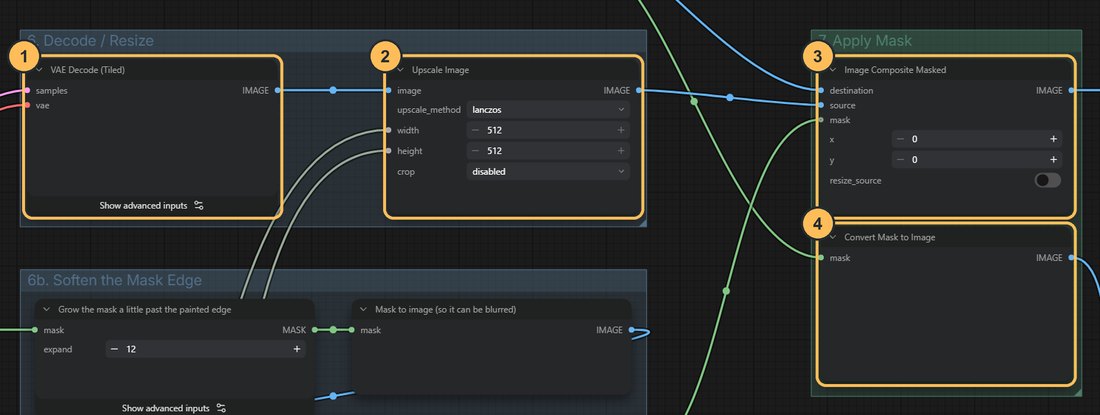
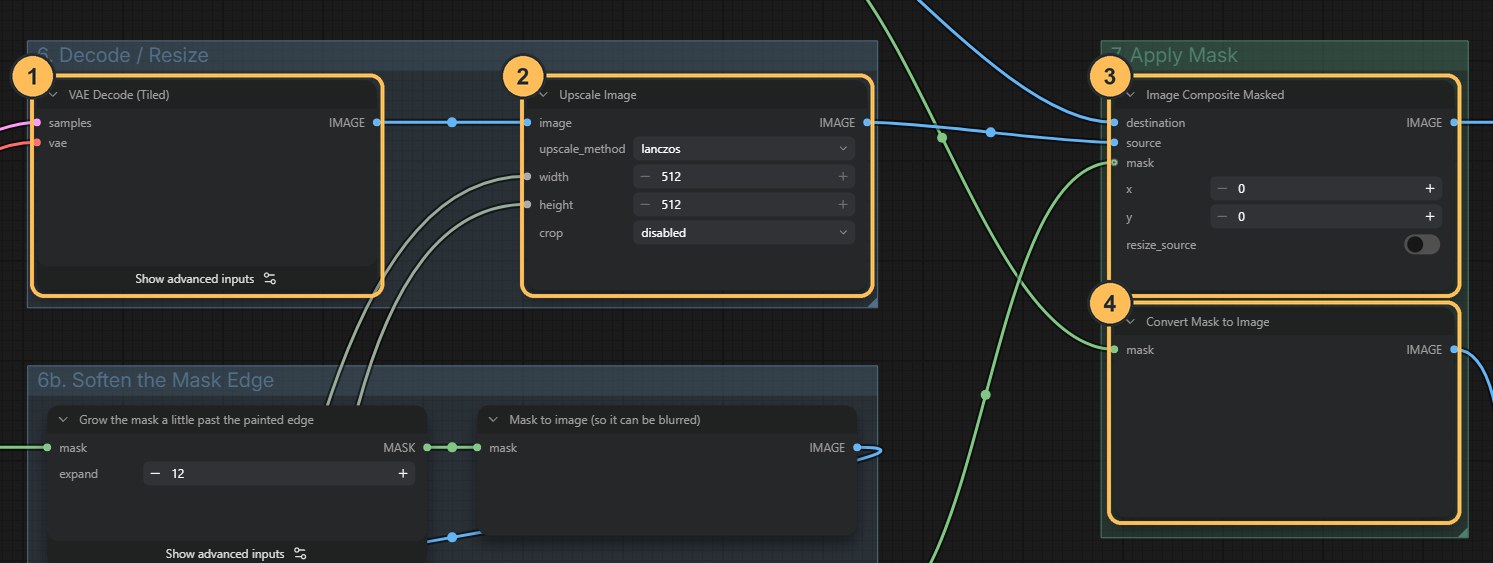
- DecodeTurns the edited candidate into pixels.
- ResizeMatches the candidate to the size of your original photo.
- Image Composite MaskedPastes only the masked region onto the original.
- Mask to imageLets you preview the mask: white changes, black stays.
How the sizes are set
You do not type an image size in this workflow. The reference is scaled to about 1 megapixel, and its width and height are measured and passed by connections into the two nodes that set the picture size. The numbers still visible in those two nodes (1024 × 1024) are old defaults. They are overridden by the connected values and have no effect.
After decoding, the candidate is resized to the exact dimensions of your original photo, also by connection, so the masked region lines up when it is pasted back. The final image therefore has the original’s size.
Check the edges and save
An empty mask returns the original unchanged. A mask covering everything returns the whole candidate. The workflow uses the recommended 4 steps and CFG 1 with a fixed seed.
Check the result
- Colour and material are what you asked for
- The shape is unchanged, if you asked for that
- No halo, blur or visible seam along the painted edge
- The object did not shift position inside the mask, leaving part of the old one visible
- If the edit looks cut off, the mask was too tight. Repaint it with more room, or raise the Grow value in group 6b
Edits to photos of people need permissionA masked edit can be hard to detect. Edit photos of real people only with their permission, and disclose the edit where it matters. Use it responsibly.
Download the workflow
- A_Masked_Image_Edit.jsonMasked edit workflow
- Fashion_Masked_Edit_Example.pngThe example photo. Put it in ComfyUI’s input folder, or load your own
Click a filename to download it, or right-click it and choose Save link as. Keep the .json ending. Then drag the file onto the ComfyUI canvas, or use Workflow → Open.