08 · Editorial series
Consistent Editorial
Create a series of five editorial images, indoors and outdoors, in which the same person wears the same outfit. The process has two stages: first make and review a neutral fitting image, then use it to generate the scenes.
- You’ll learn
- Why a reviewed fitting reference comes before the scenes, what role each of the three references plays, and how to separate what must stay fixed from what is allowed to change.
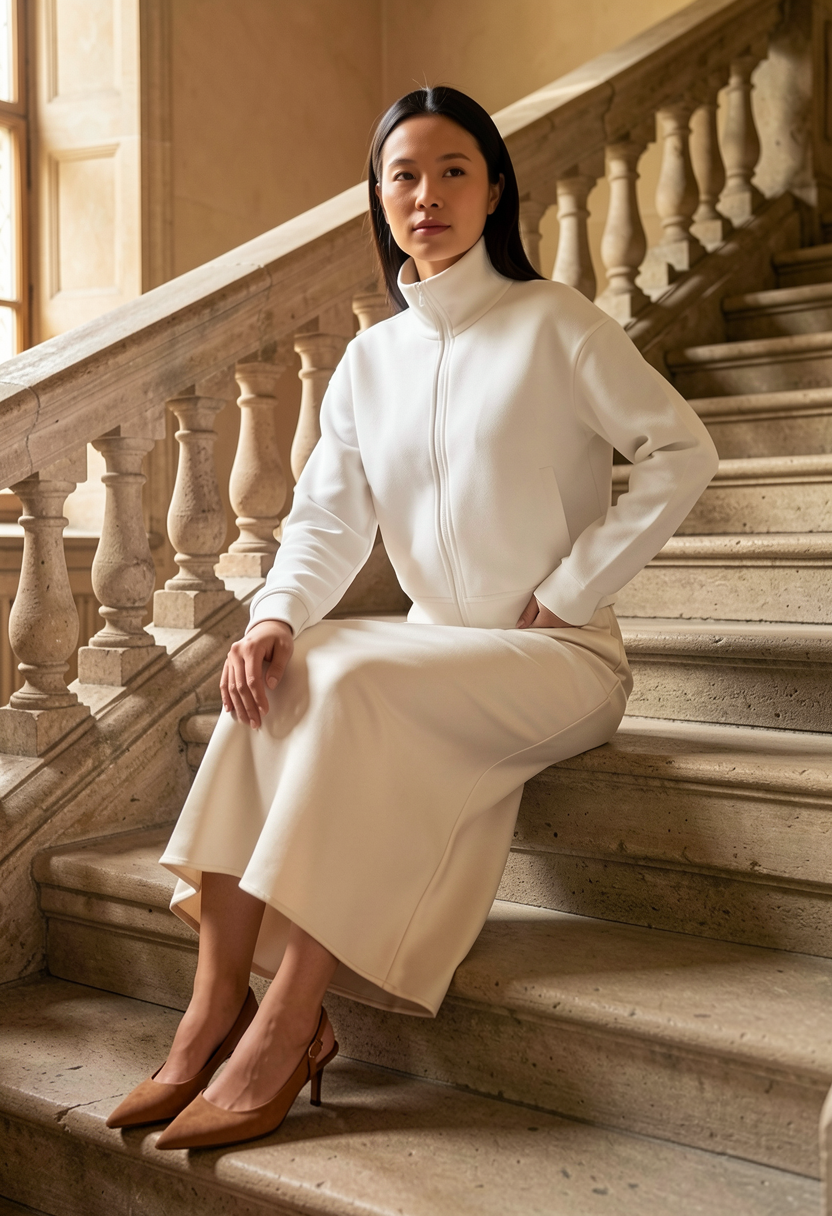
What goes in, what comes out
Stage 1 · Fitting reference
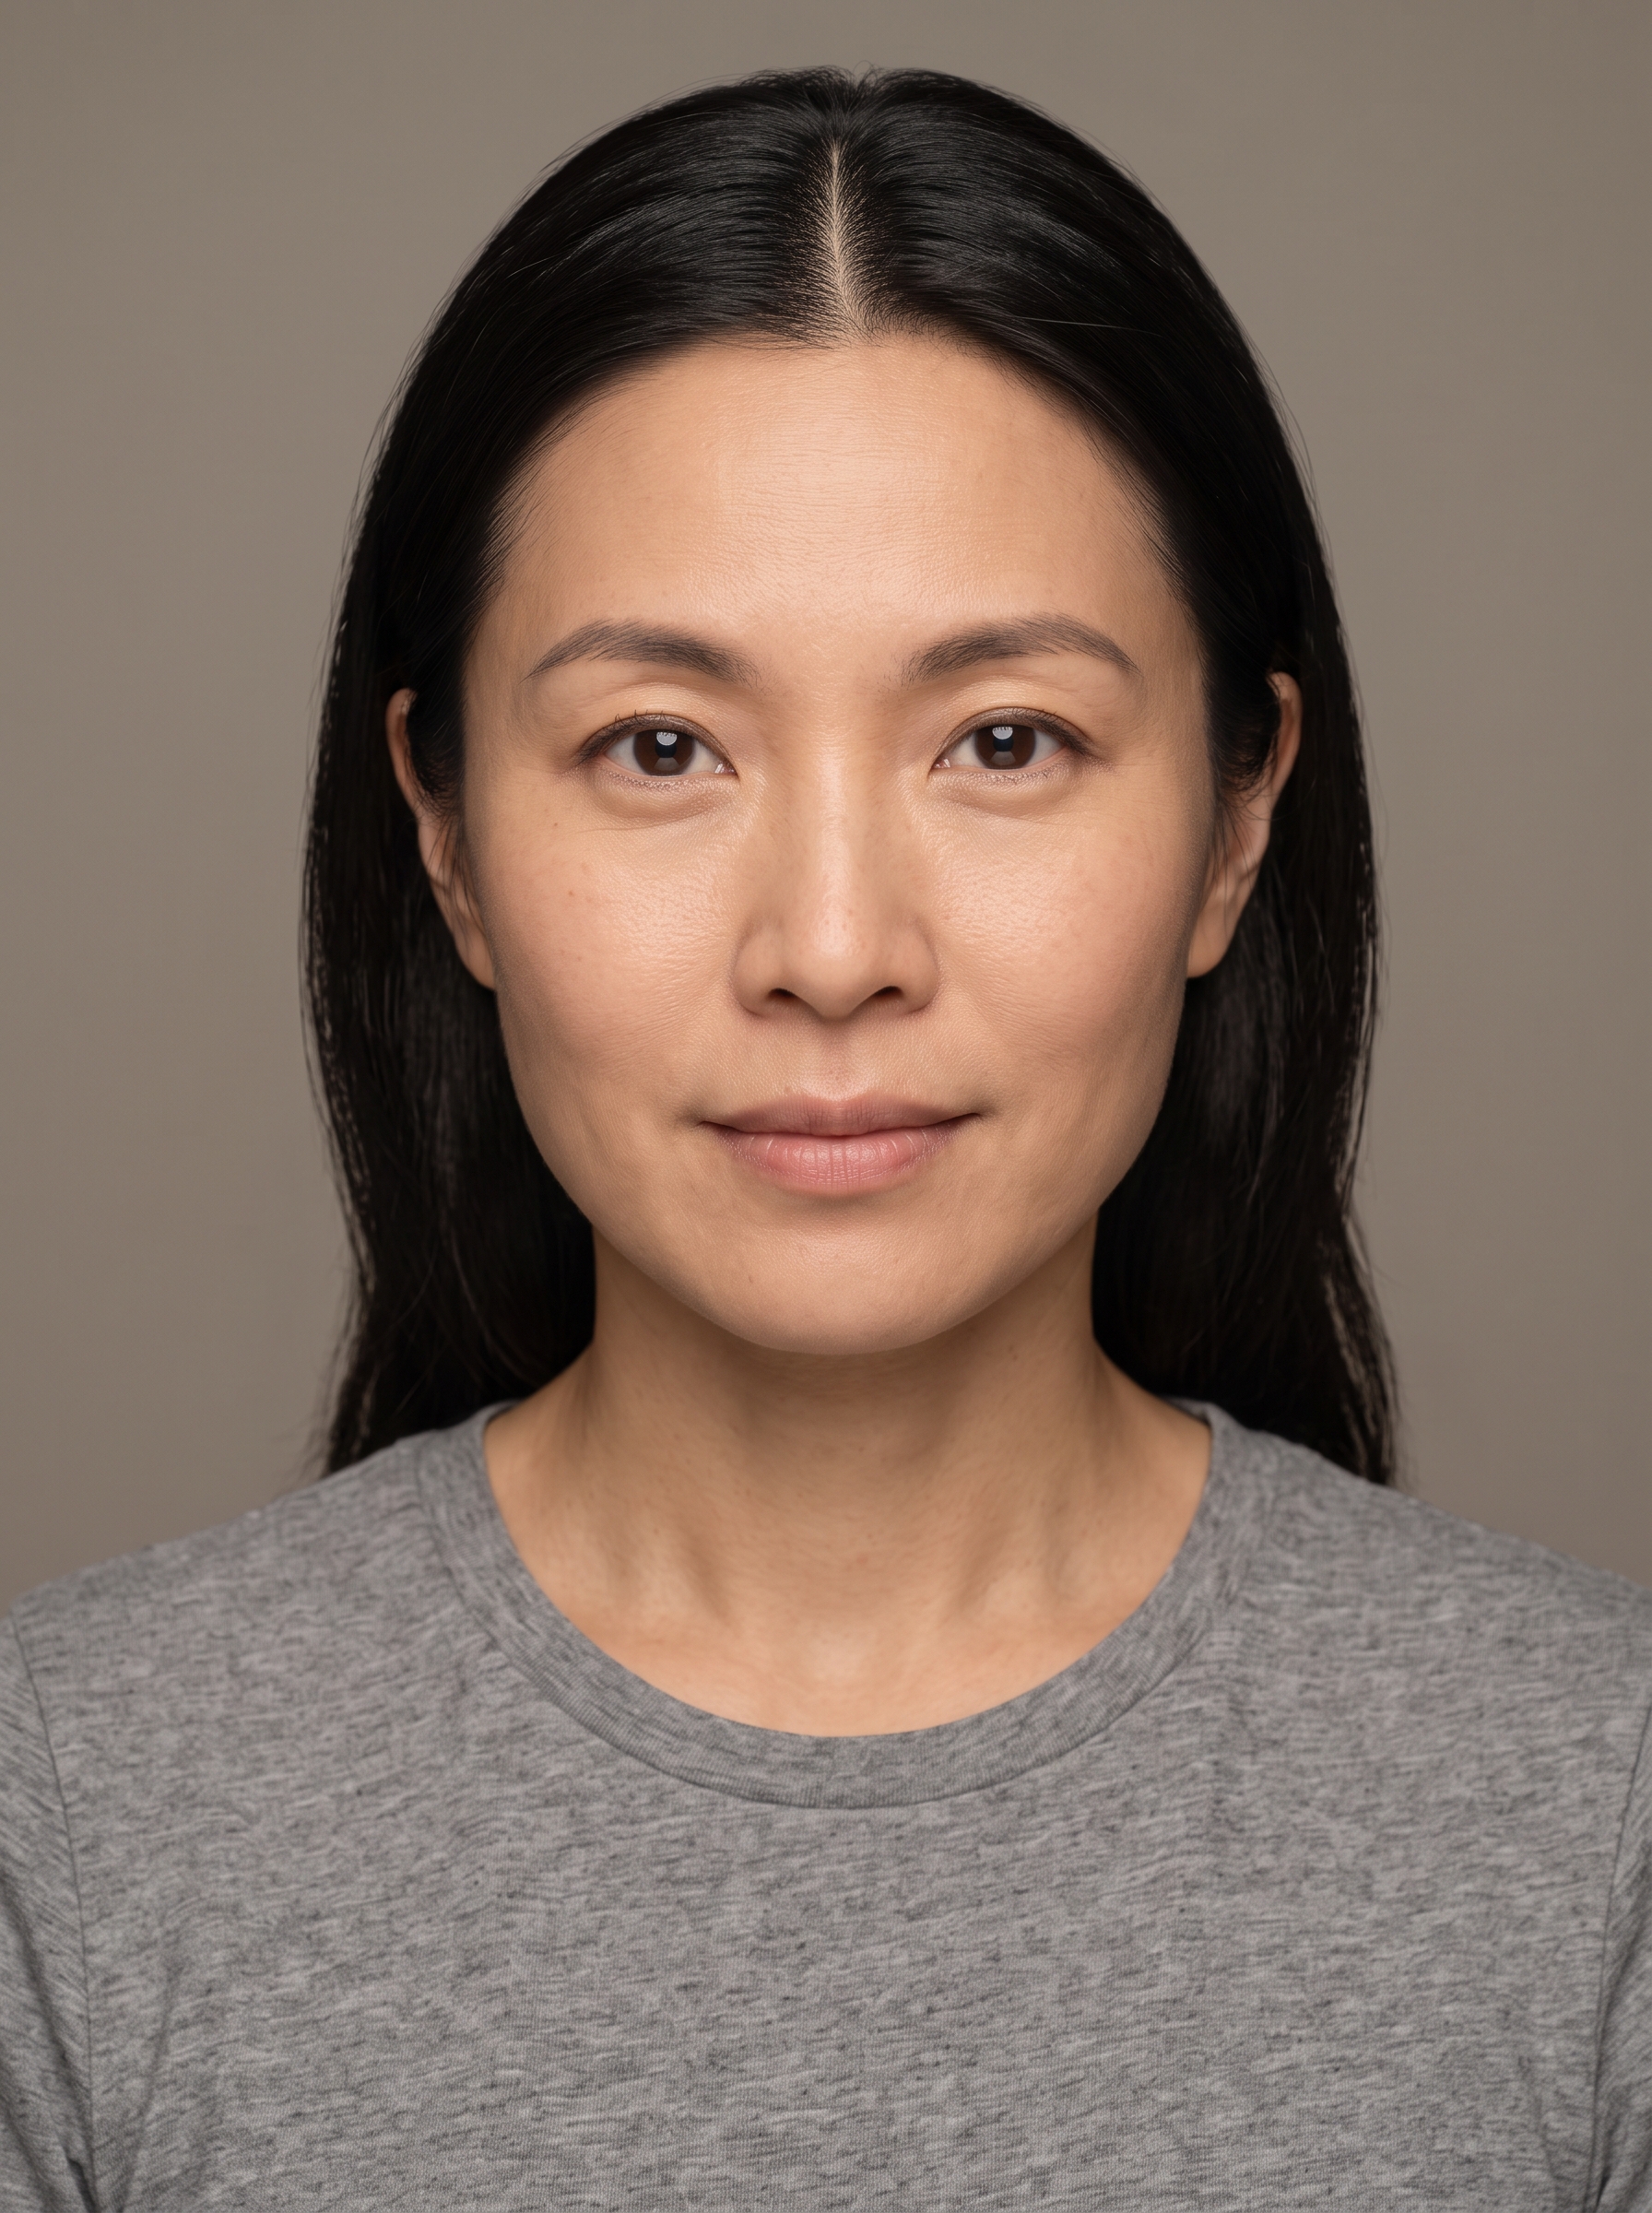
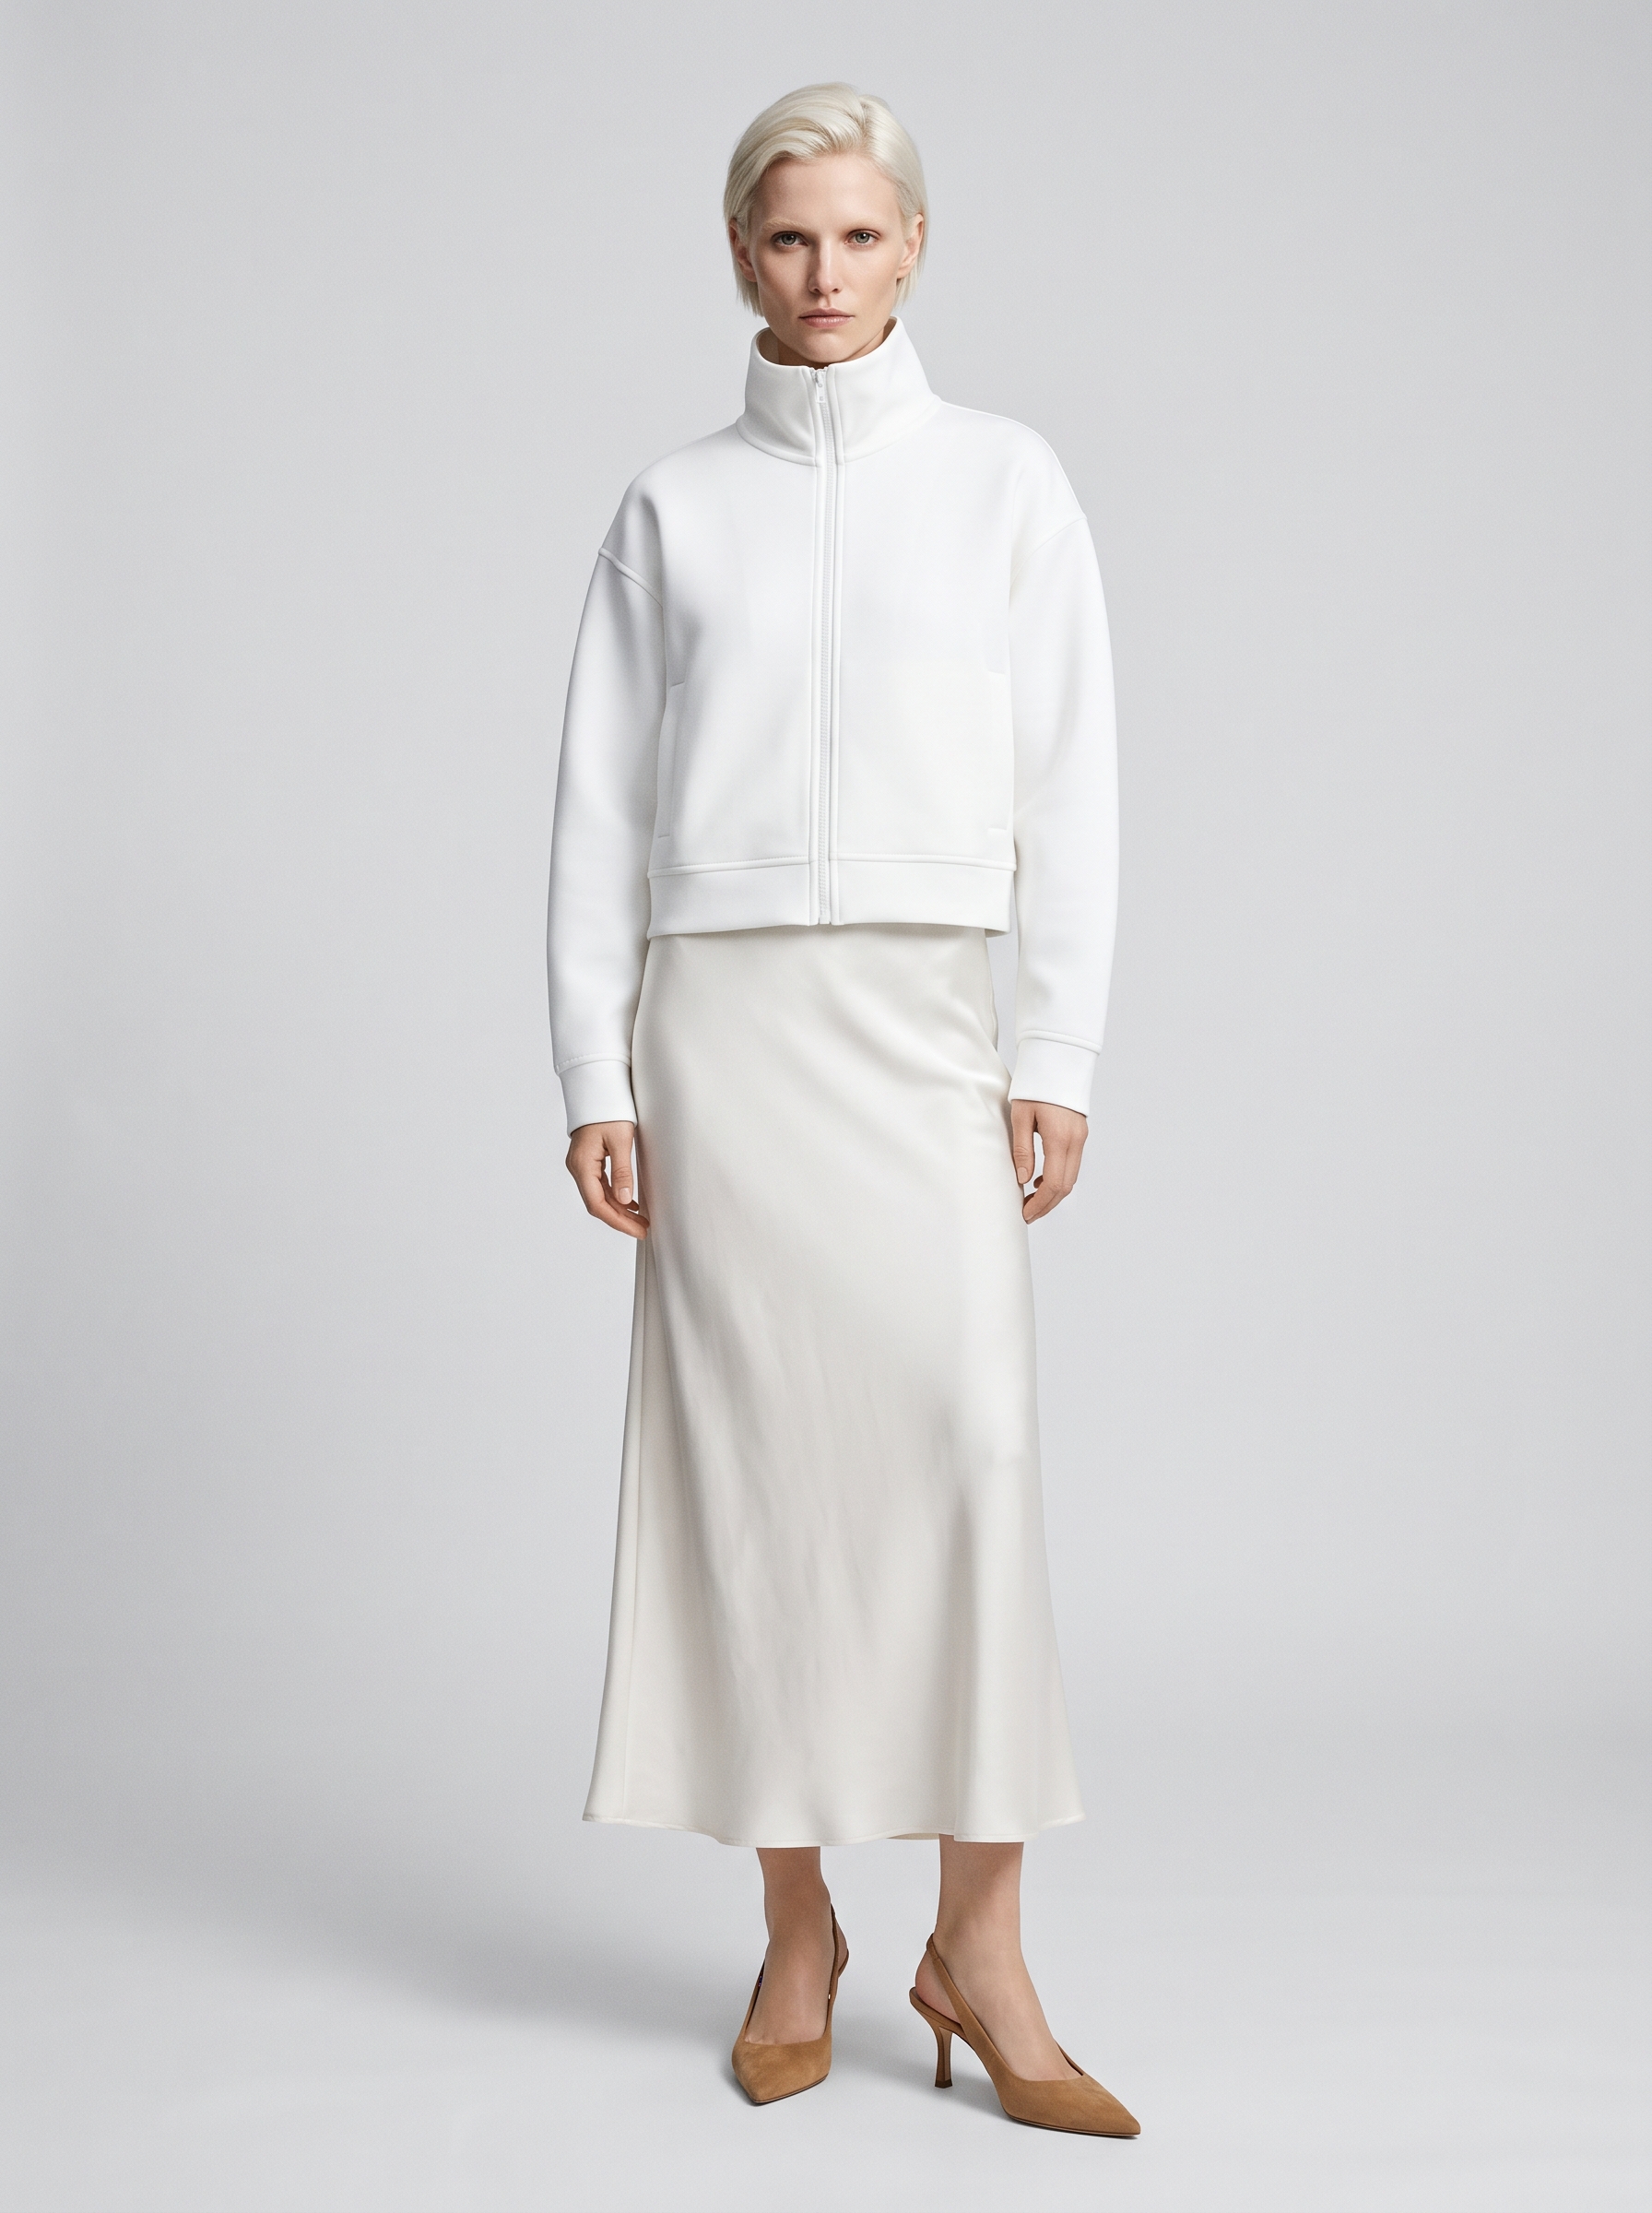
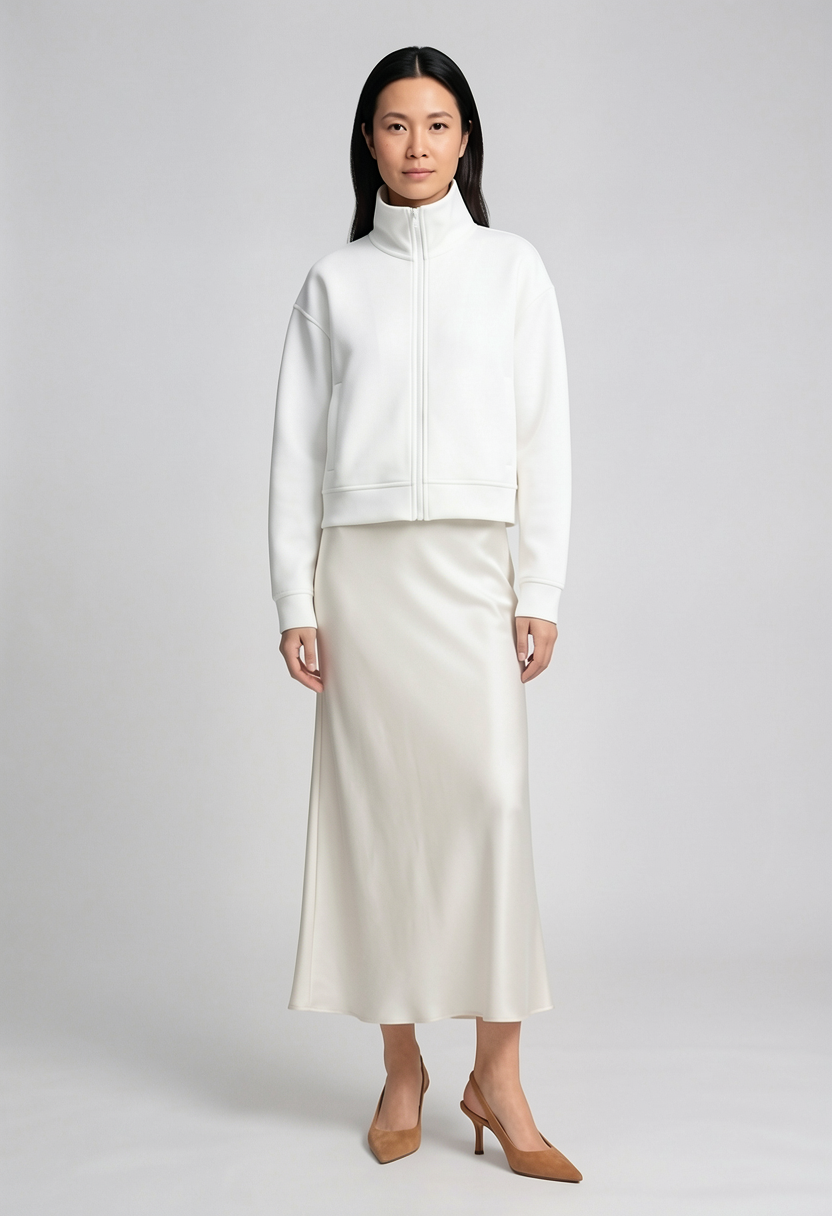
Stage 2 · Editorial scenes
Three referencesThe reviewed fitting image, the outfit photo without its face, and the jacket detail crop.
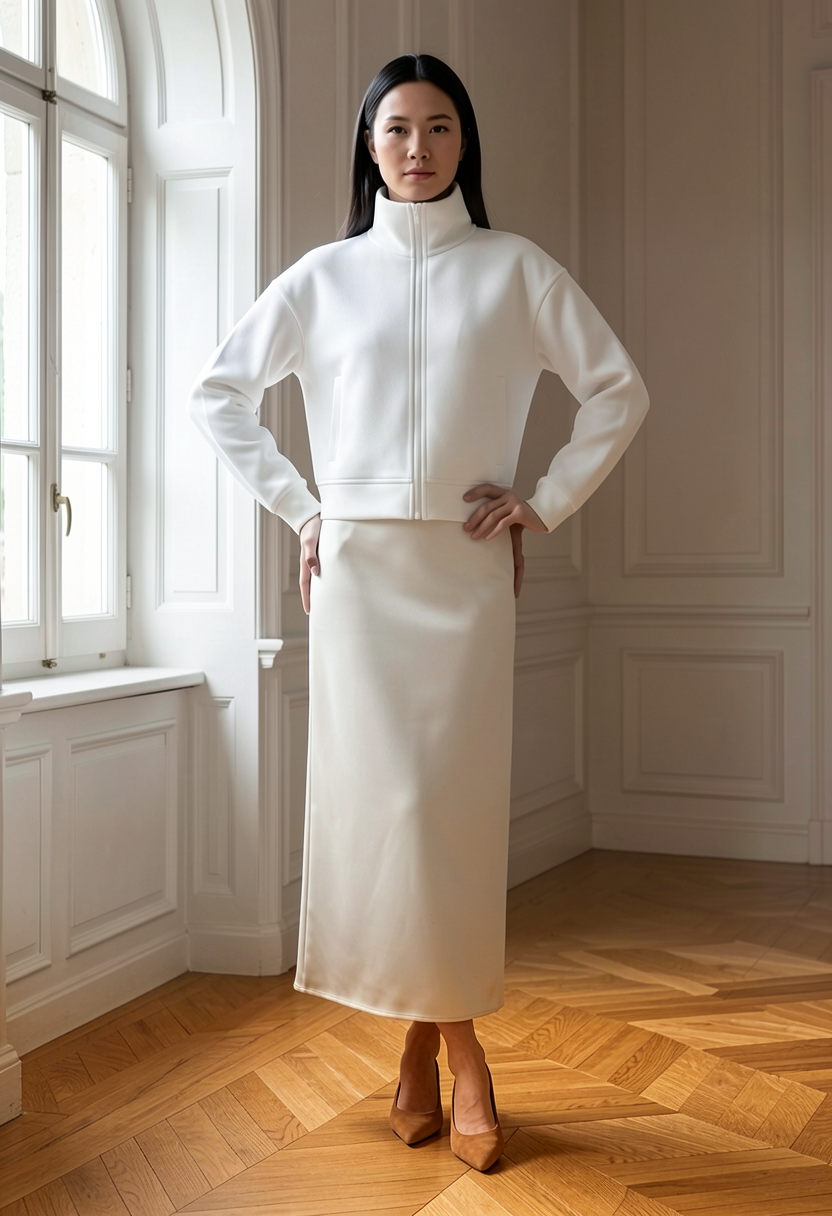
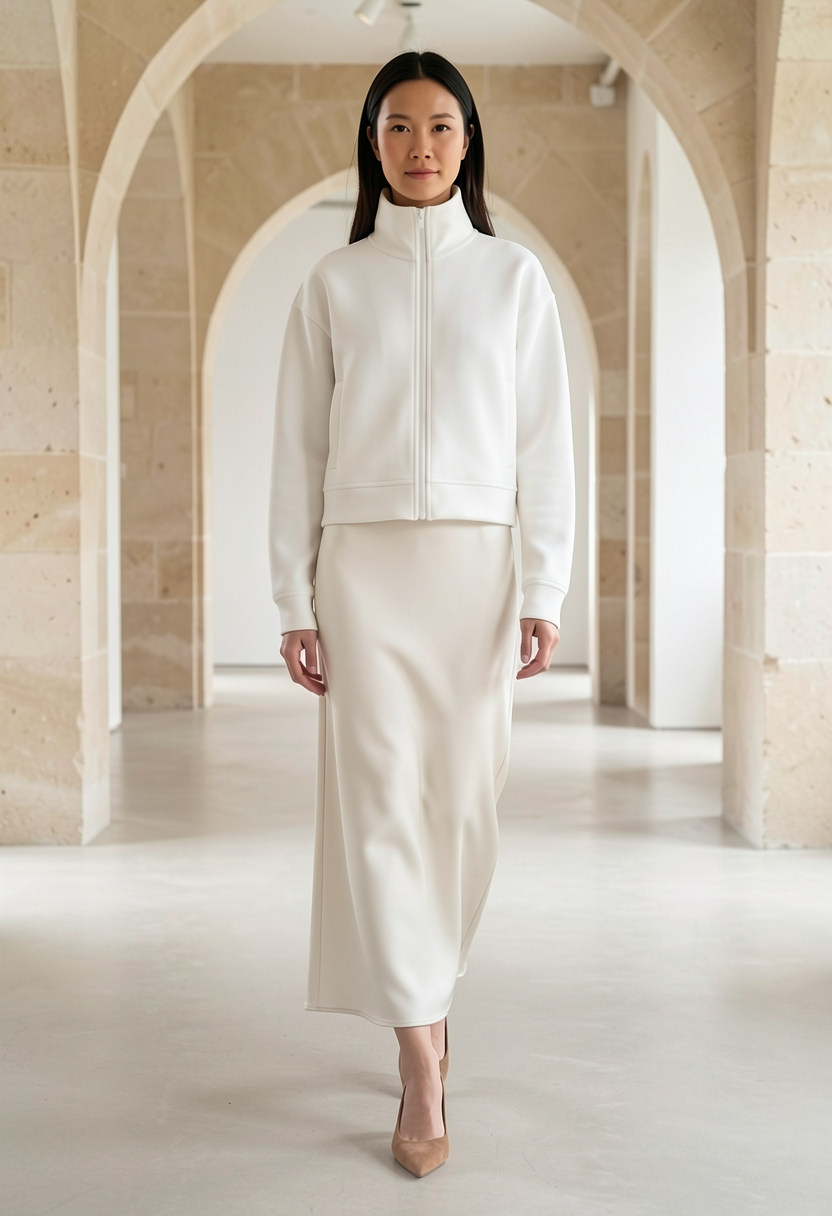
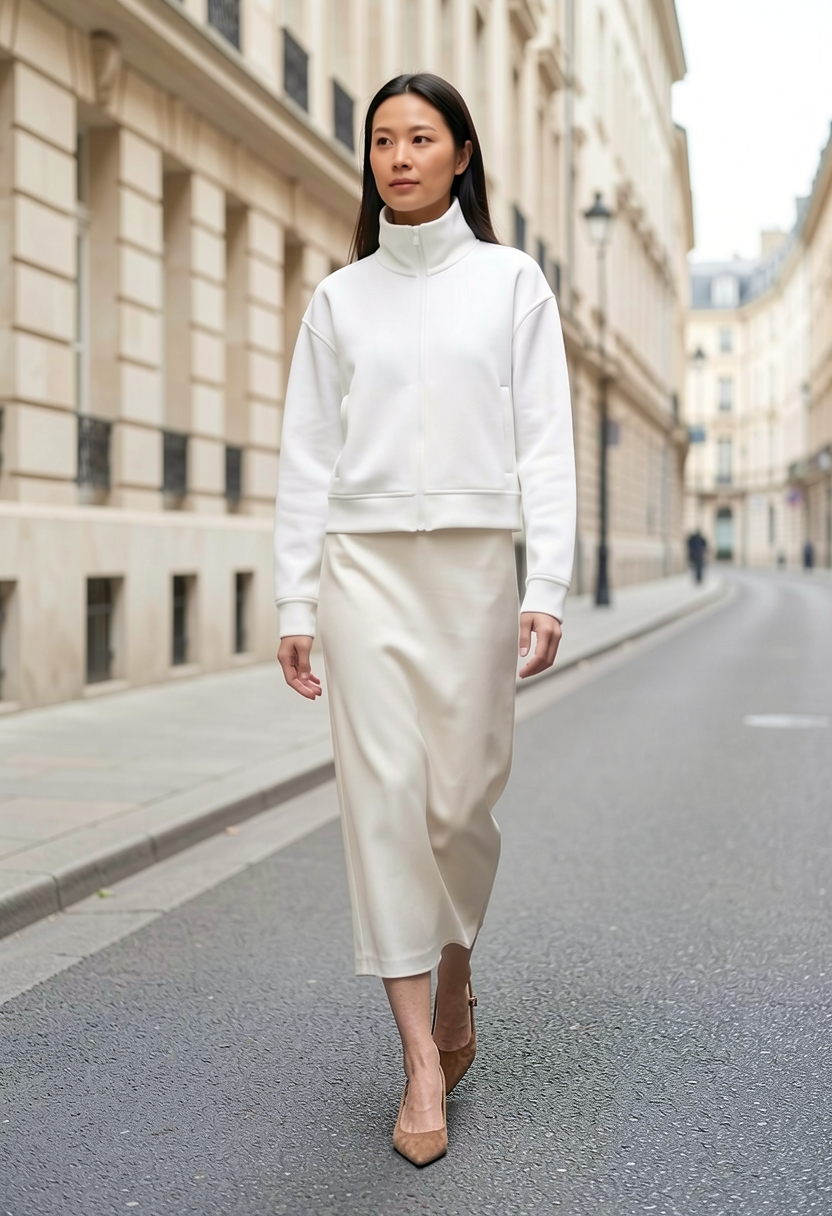
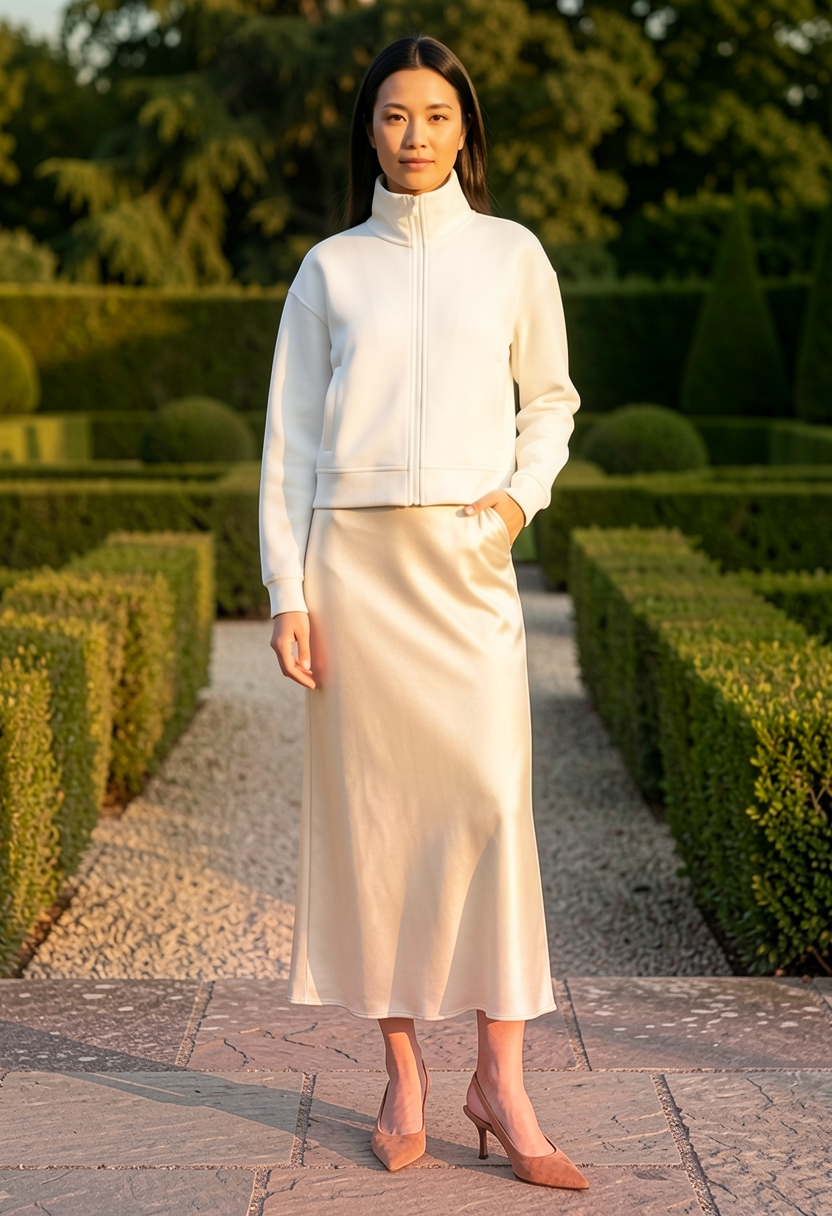
All five scenes come from one run of the stage 2 workflow as saved.
How the workflow works
Explained earlier:identity and outfit references (05) · one reference, several branches (06) · show it, and say it (07) · seed, guidance and steps
Stage 1 · Make and review the fitting reference
Open A_Fitting_Reference.json
This workflow combines three references into one neutral, full-body studio image of the person wearing the outfit: the identity portrait, the outfit photo, and a close crop of the jacket taken from that outfit photo.
The outfit photo is cropped below the chin first. The outfit photo shows another person. If her face stays in the reference, the model sometimes copies it and the result shows the wrong person. A Bounding Box and crop node in group 1b remove the head, so the identity portrait is the only face the model sees. The jacket detail crop also starts below the chin.
Each crop is set by a Bounding Box node, which holds four numbers describing a rectangle. The saved values fit the example outfit photo. If you load a different outfit photo, adjust both boxes and check their previews.
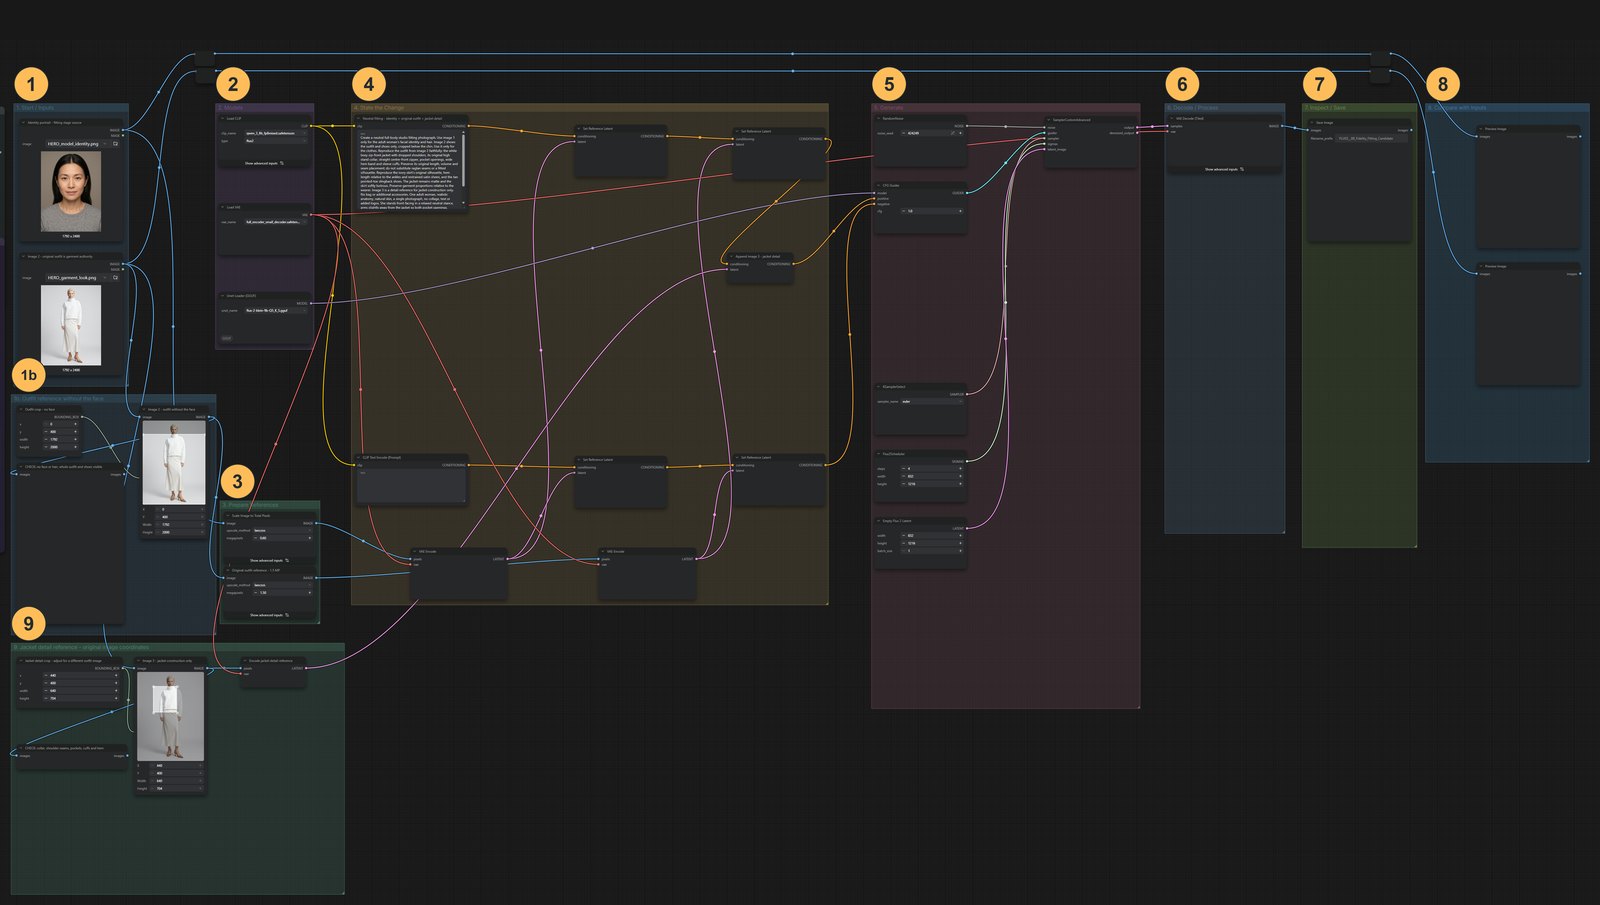
Stage 1 workflow, with its groups numbered. Click to enlarge.1Start / Inputs1bOutfit reference without the face2Models3Prepare References4State the Change5Generate6Decode / Process7Inspect / Save8Compare with Inputs9Jacket detail reference - original image coordinates 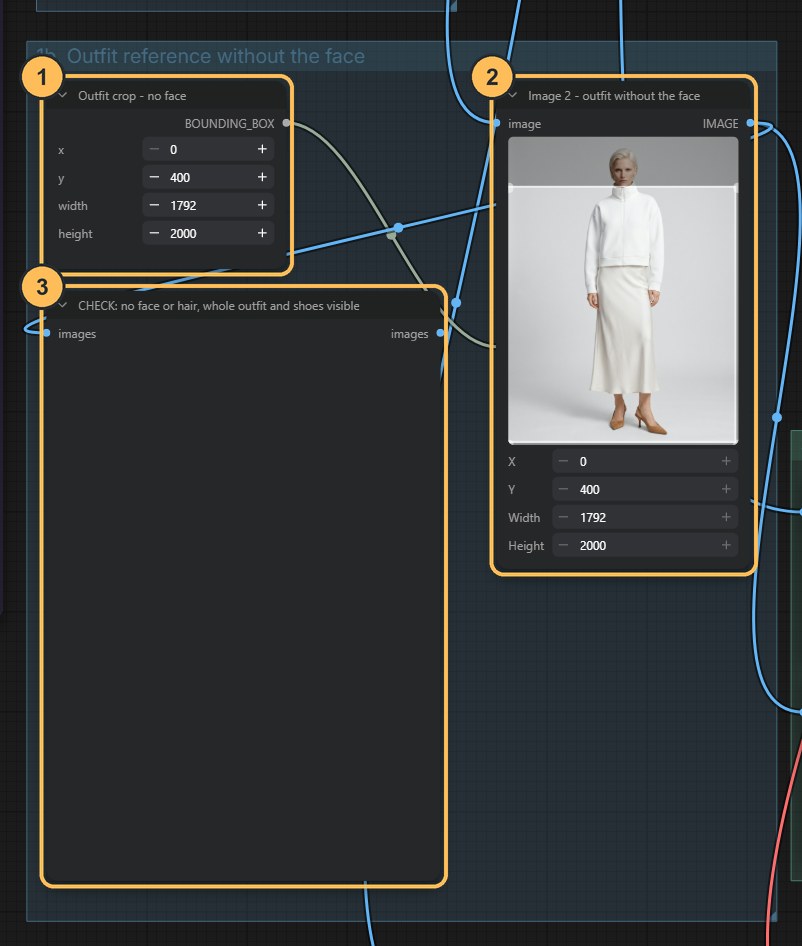
Group 1b: the outfit photo without its face. - Bounding boxMarks the part of the outfit photo to keep: everything below the chin.
- CropThe outfit without the face. This is used as image 2.
- CheckPreview of the crop. No face or hair should be visible.
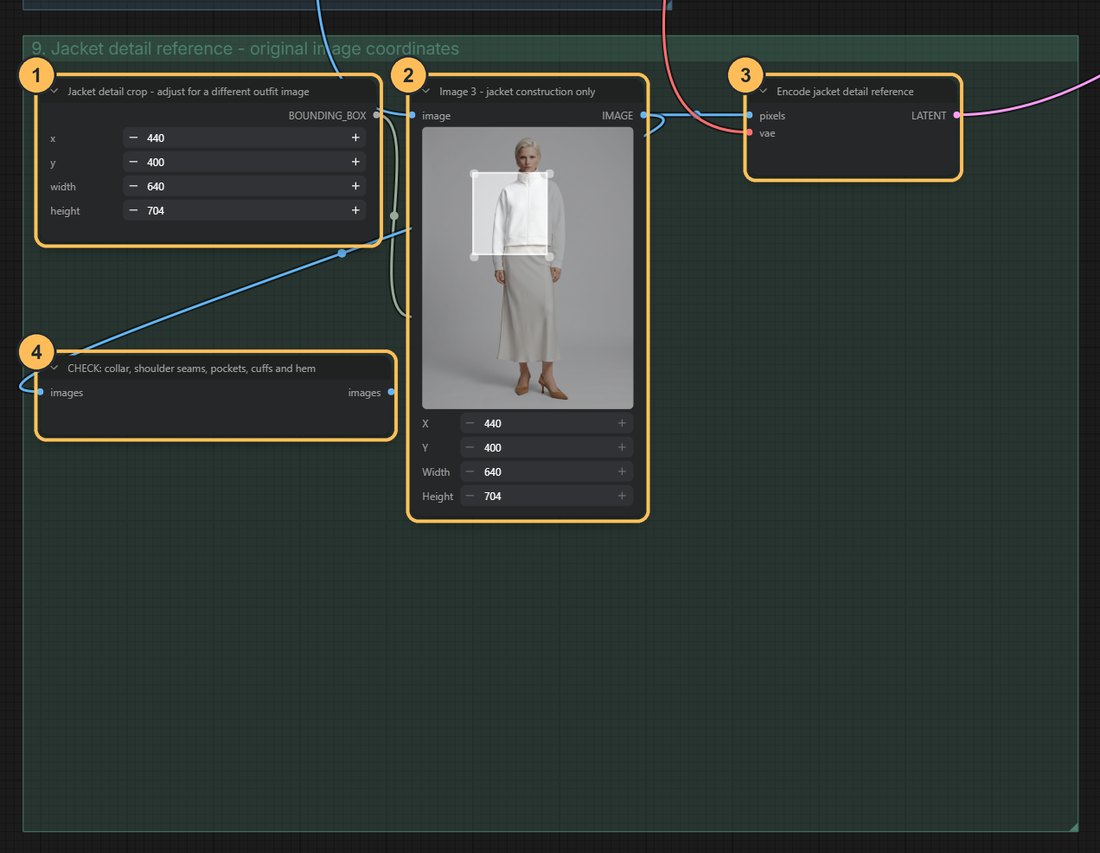
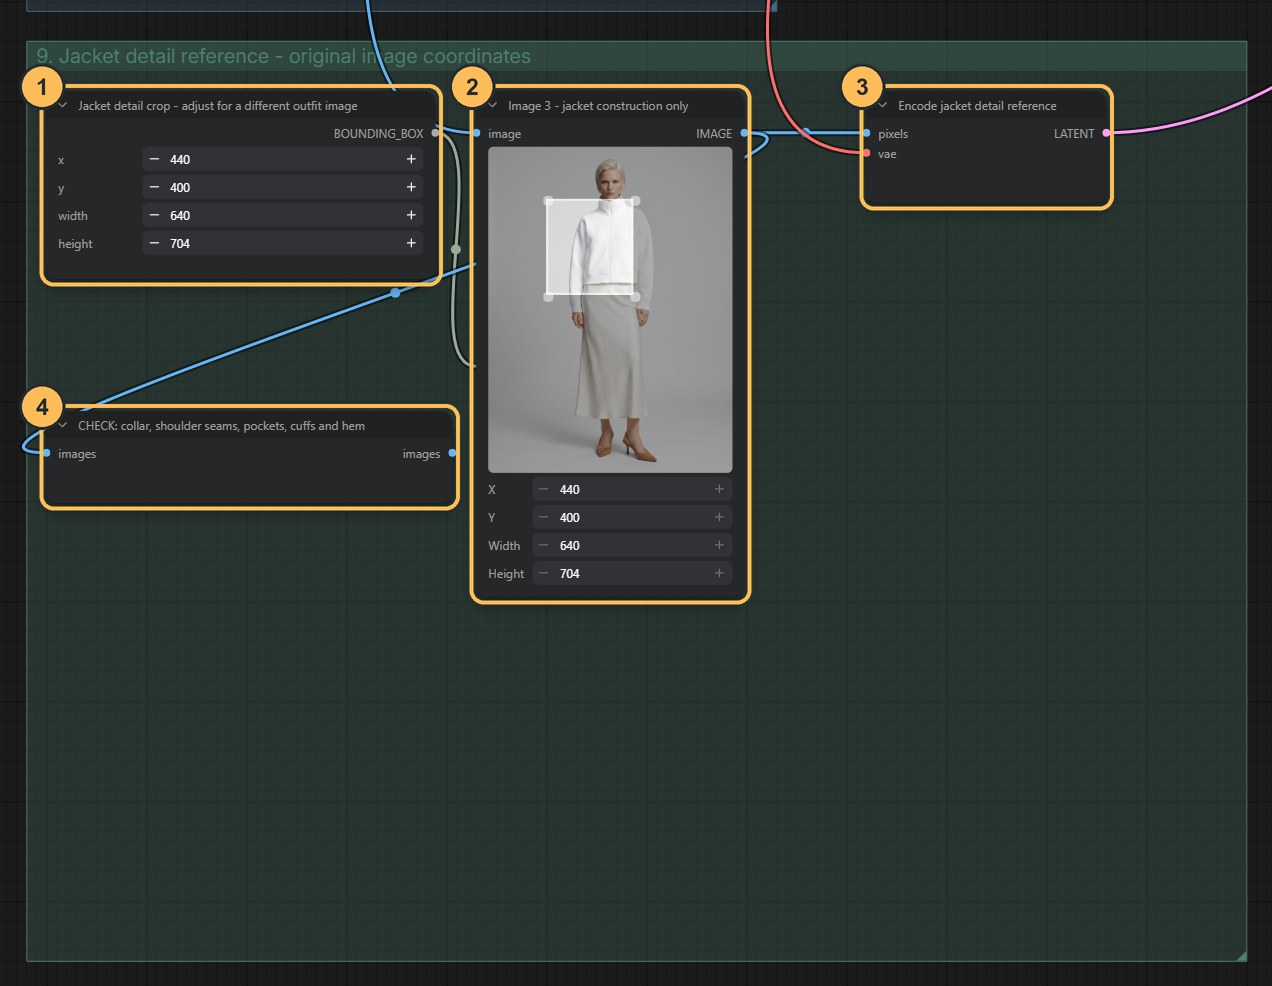
Group 9: the jacket detail crop. - Bounding boxSets which part of the outfit photo is cut out.
- CropThe jacket detail, used as image 3.
- EncodeConverts the crop into a reference.
- CheckPreview of the crop. Look at it before you run.
Review it like a fitting
Run it, then inspect the result before going further: facial identity, hair, body proportions, shoulder seams, collar, zip, pocket placement, cuffs, hem, skirt length and shoes. If something is wrong, change the seed (the number that sets the random starting point) and run again. Repeat until you have one image you accept.
This step matters because every scene in stage 2 copies the person from this image. An error approved here appears in all three scenes.
Stage 2 · Generate the editorial scenes
Open B_Editorial_Scenes.json and load your fitting image
Load the image you approved into the node titled Image 1 - REVIEW fitting candidate. The download ships with an example,
08_editorial_fitting_candidate.png.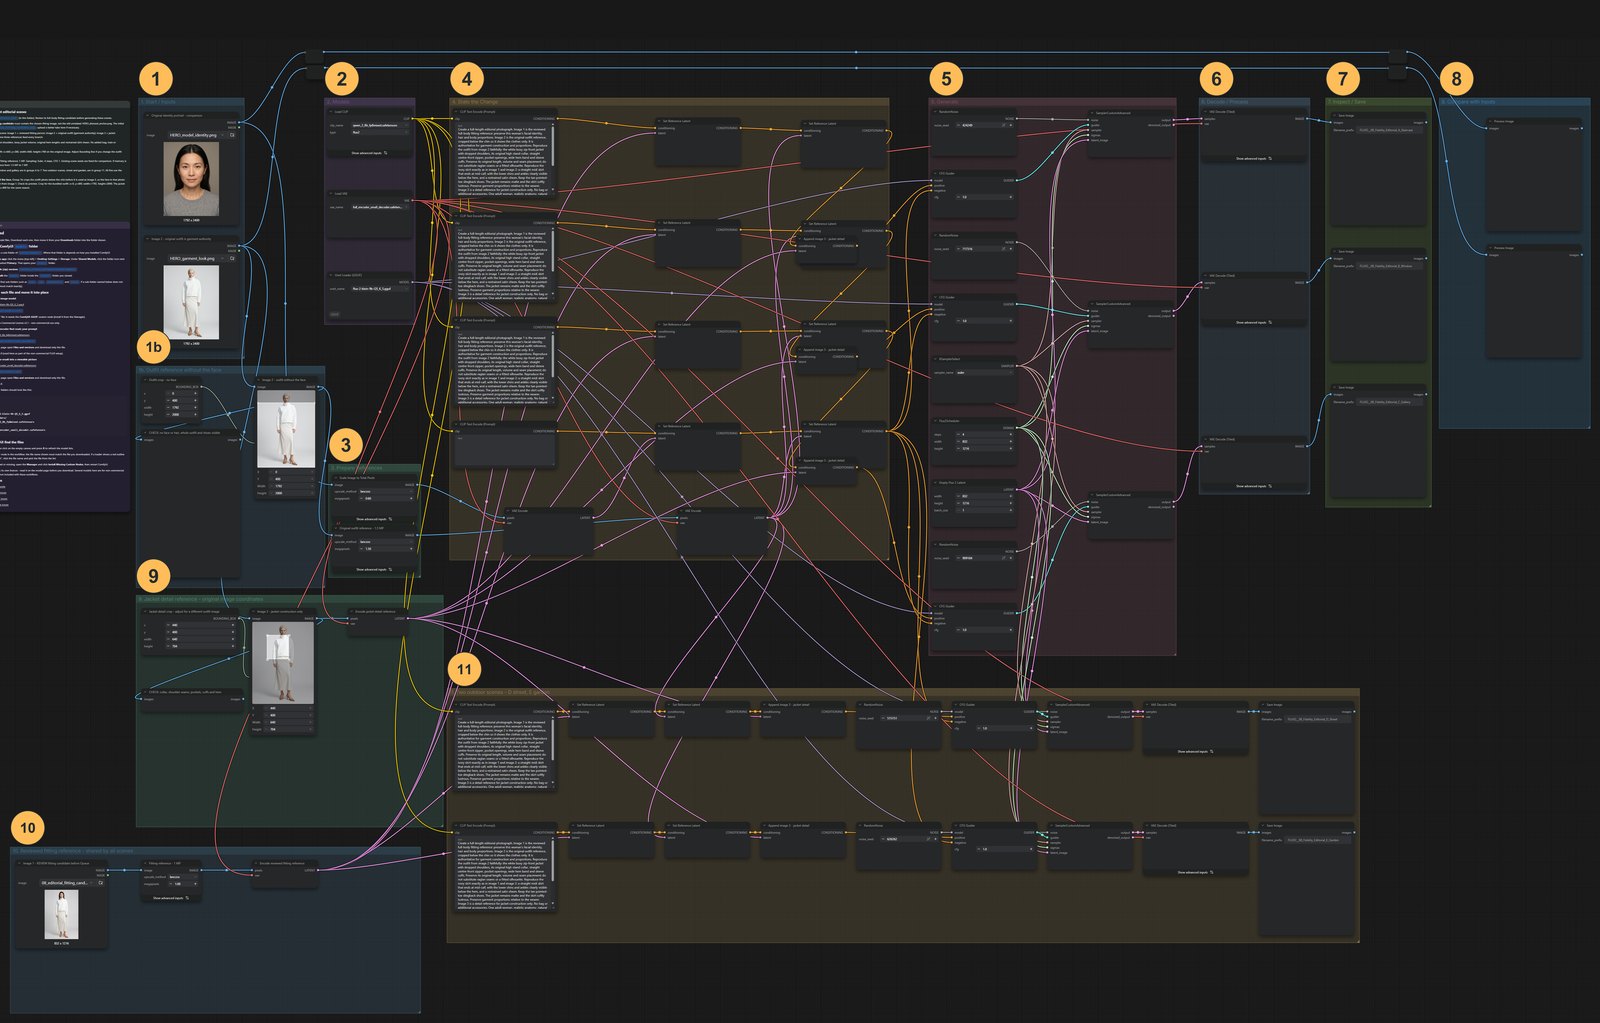
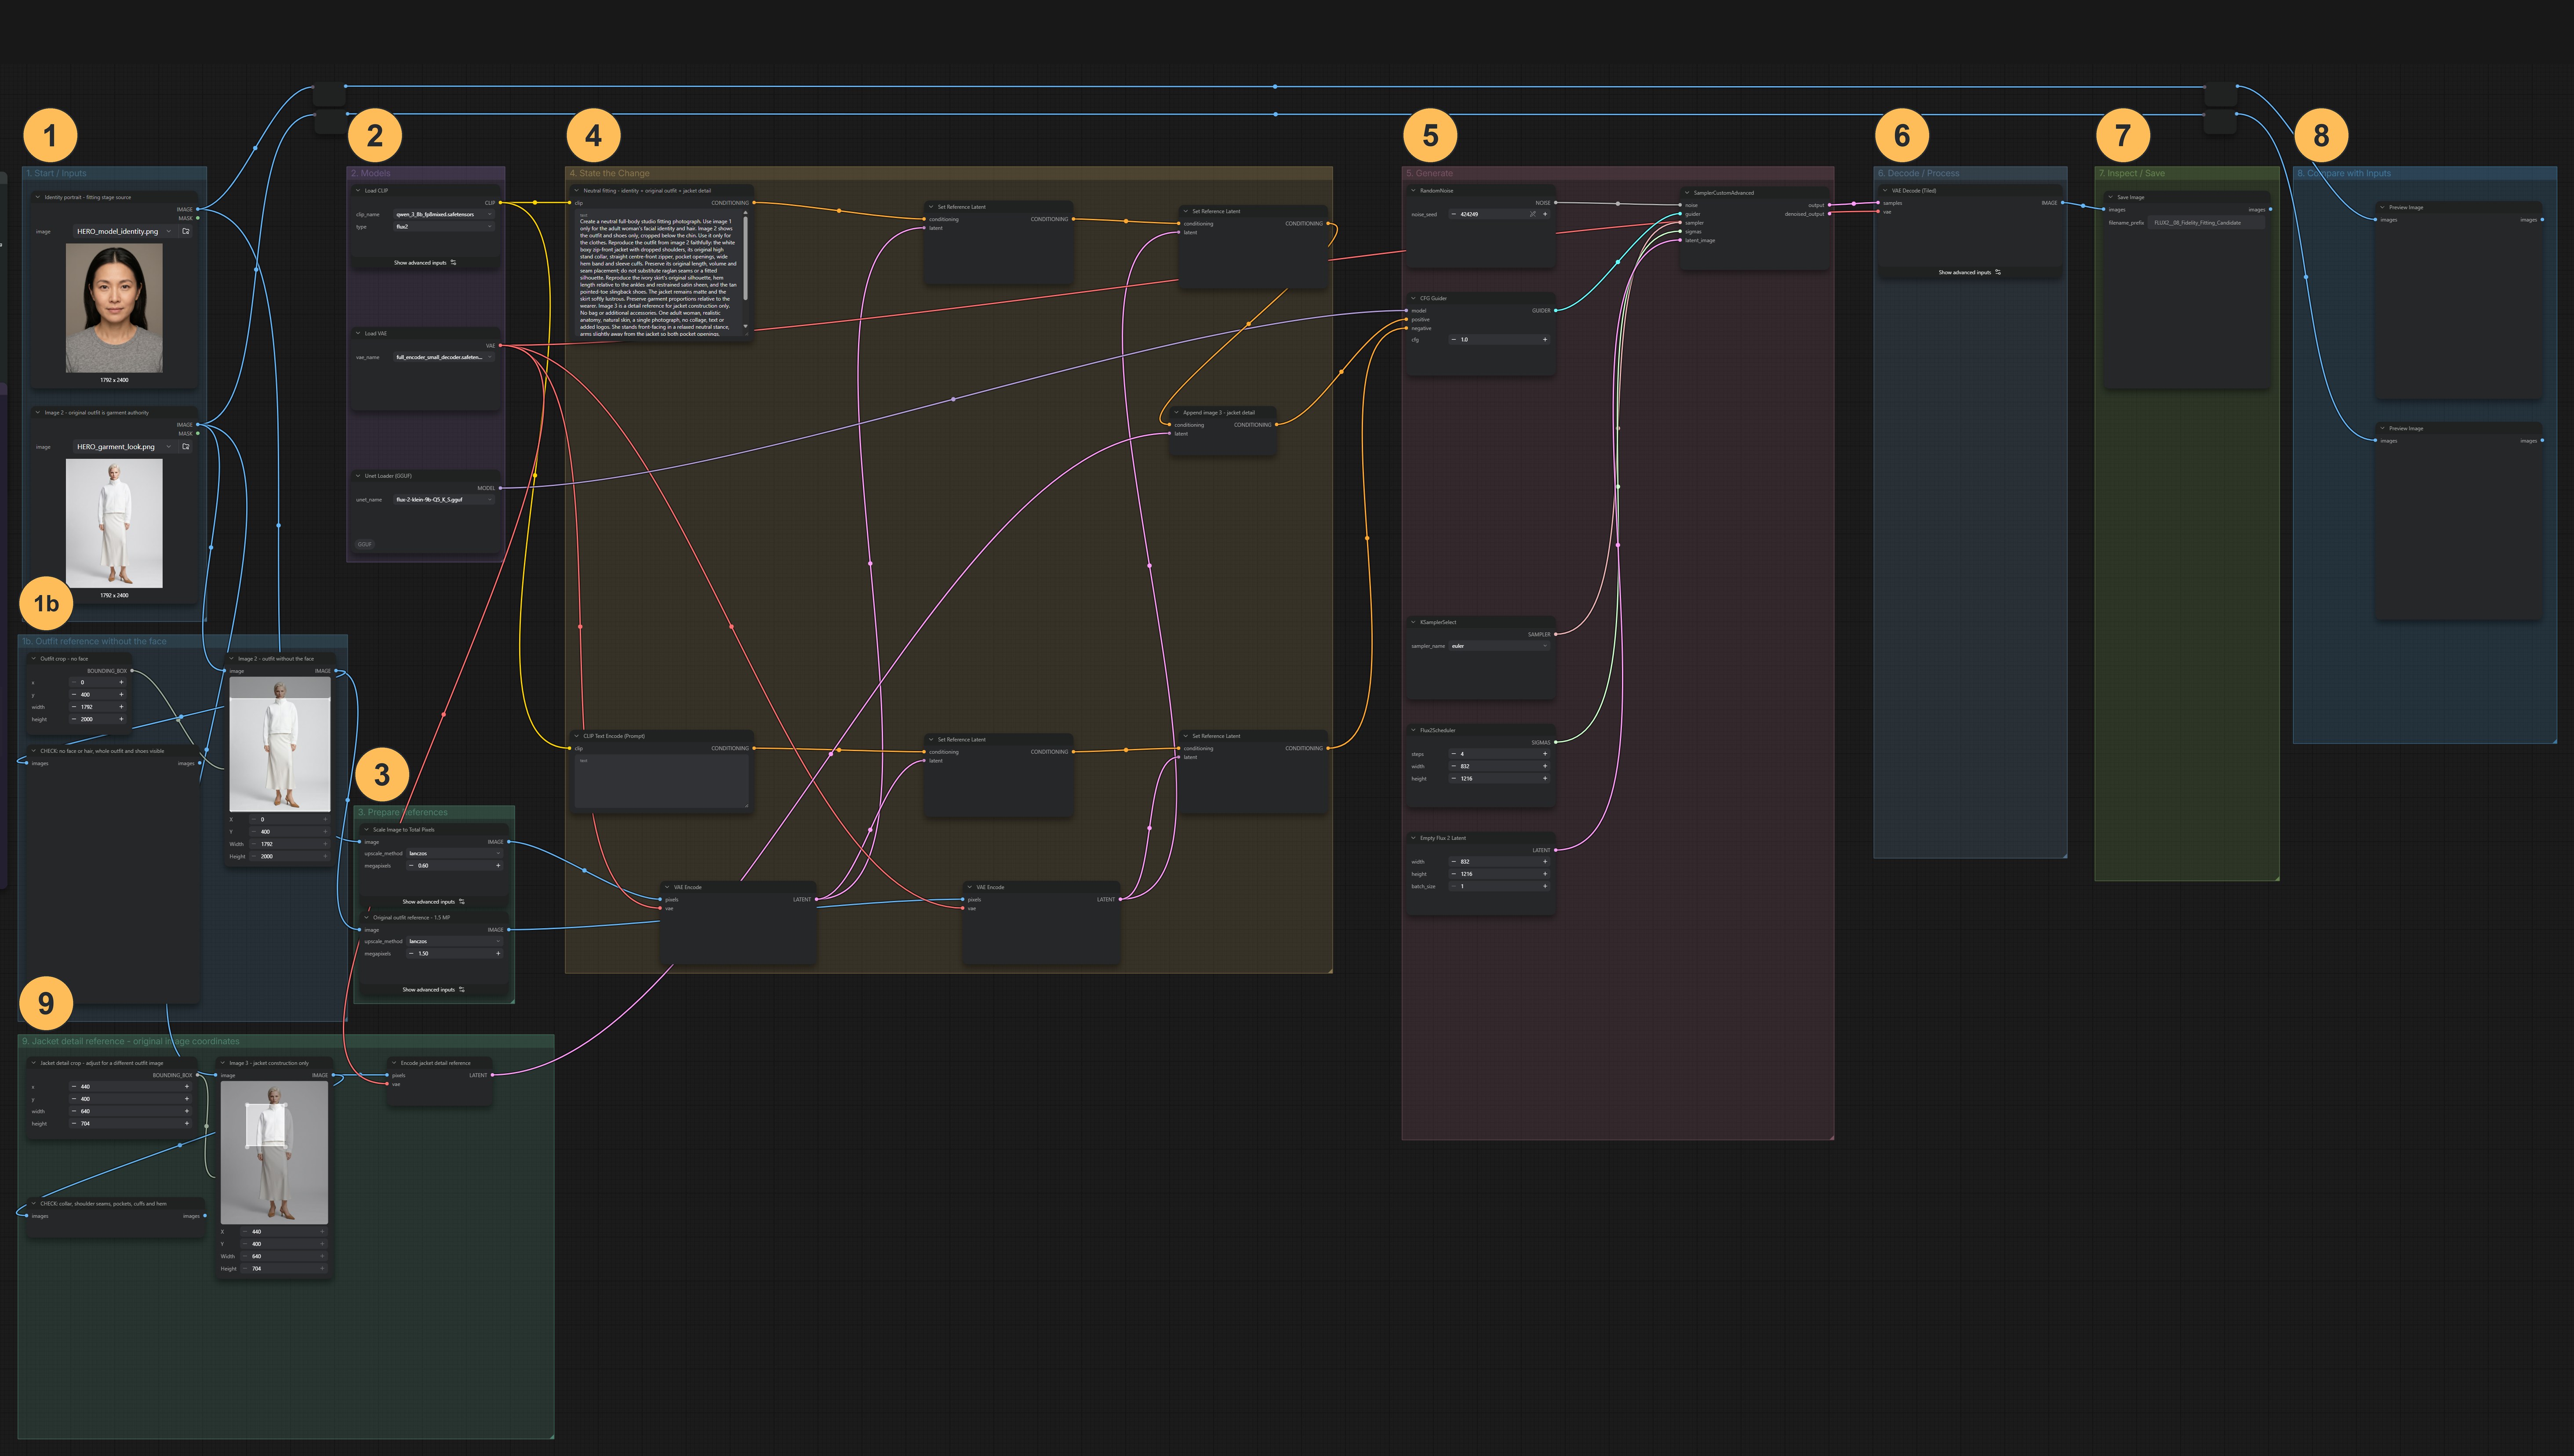
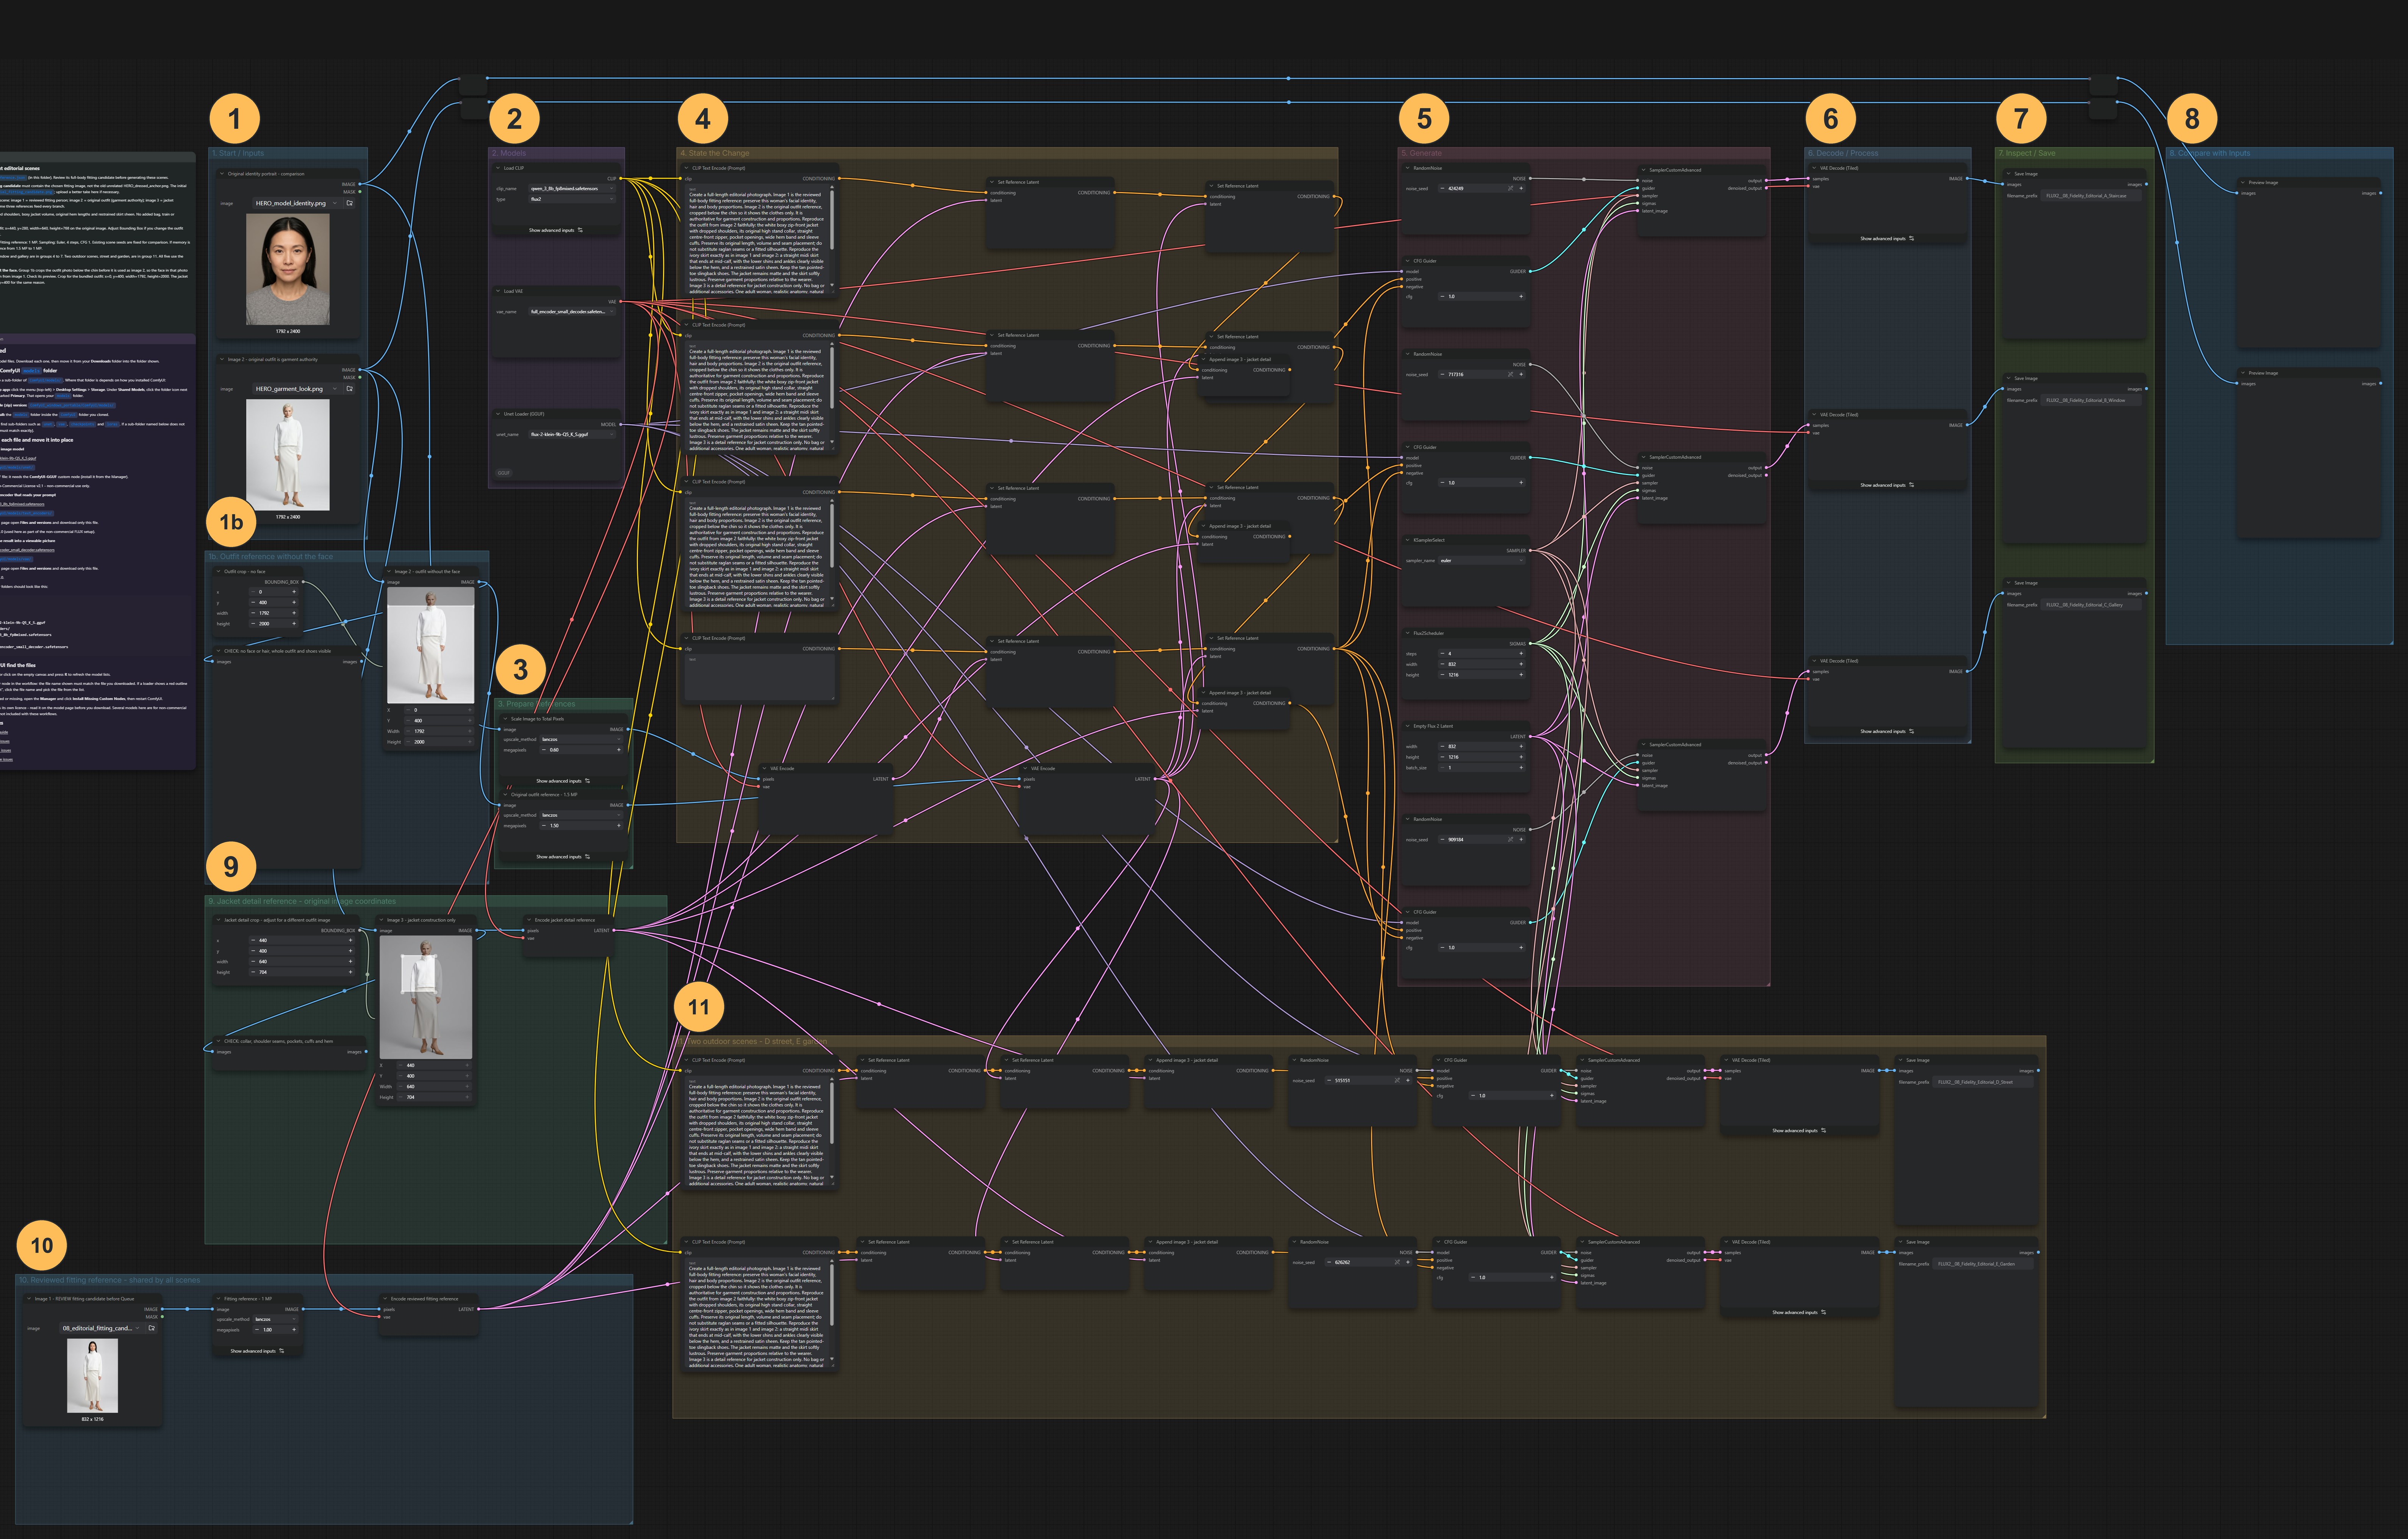
Stage 2 workflow, with its groups numbered. Click to enlarge.1Start / Inputs1bOutfit reference without the face2Models3Prepare References4State the Change5Generate6Decode / Process7Inspect / Save8Compare with Inputs9Jacket detail reference - original image coordinates10Reviewed fitting reference - shared by all scenes11Two outdoor scenes - D street, E garden 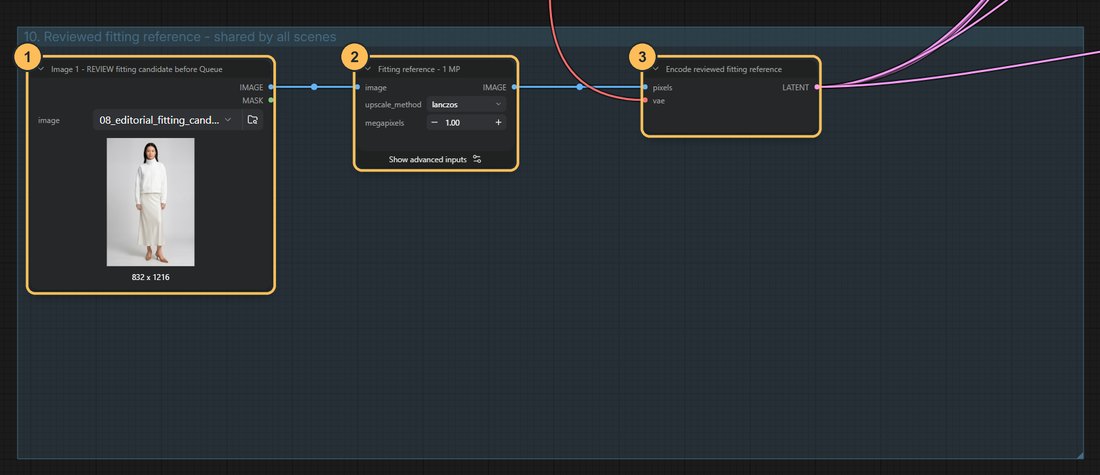
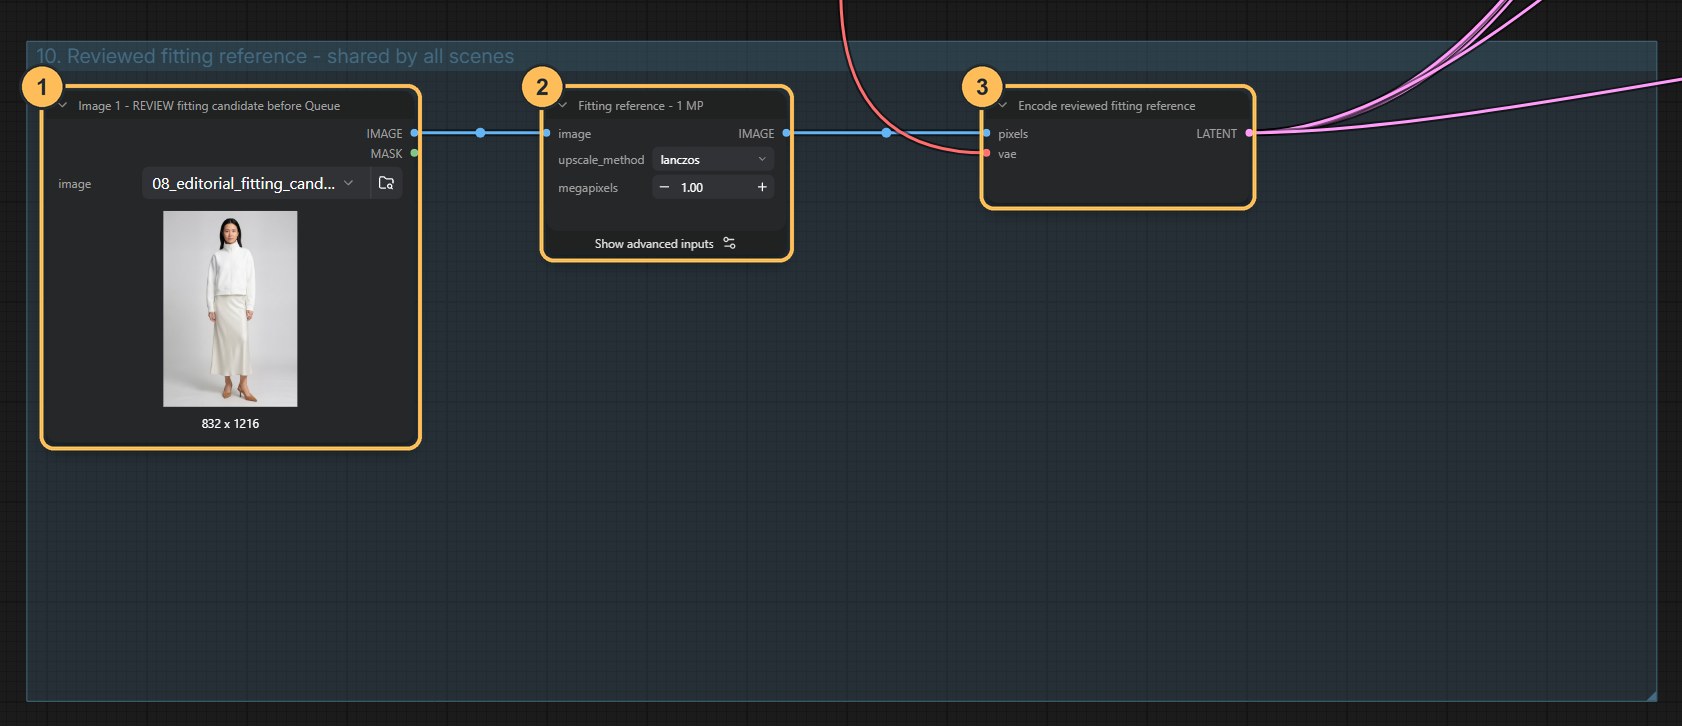
Group 10: where the fitting image is loaded. - Image 1Load your approved fitting image here.
- ResizePrepares it at 1 megapixel.
- EncodeConverts it into the reference shared by all three scenes.
The three reference roles
Reference What it is What it is used for Image 1 The reviewed fitting image of the person in the outfit The person: facial identity, hair and body proportions Image 2 The original outfit photo, cropped below the chin The clothing authority: garment construction and proportions. It has no face, so it cannot change who the person is Image 3 The jacket detail crop from the outfit photo Construction detail at close range: collar, zip, seams, pockets The same three references feed all five scene branches.
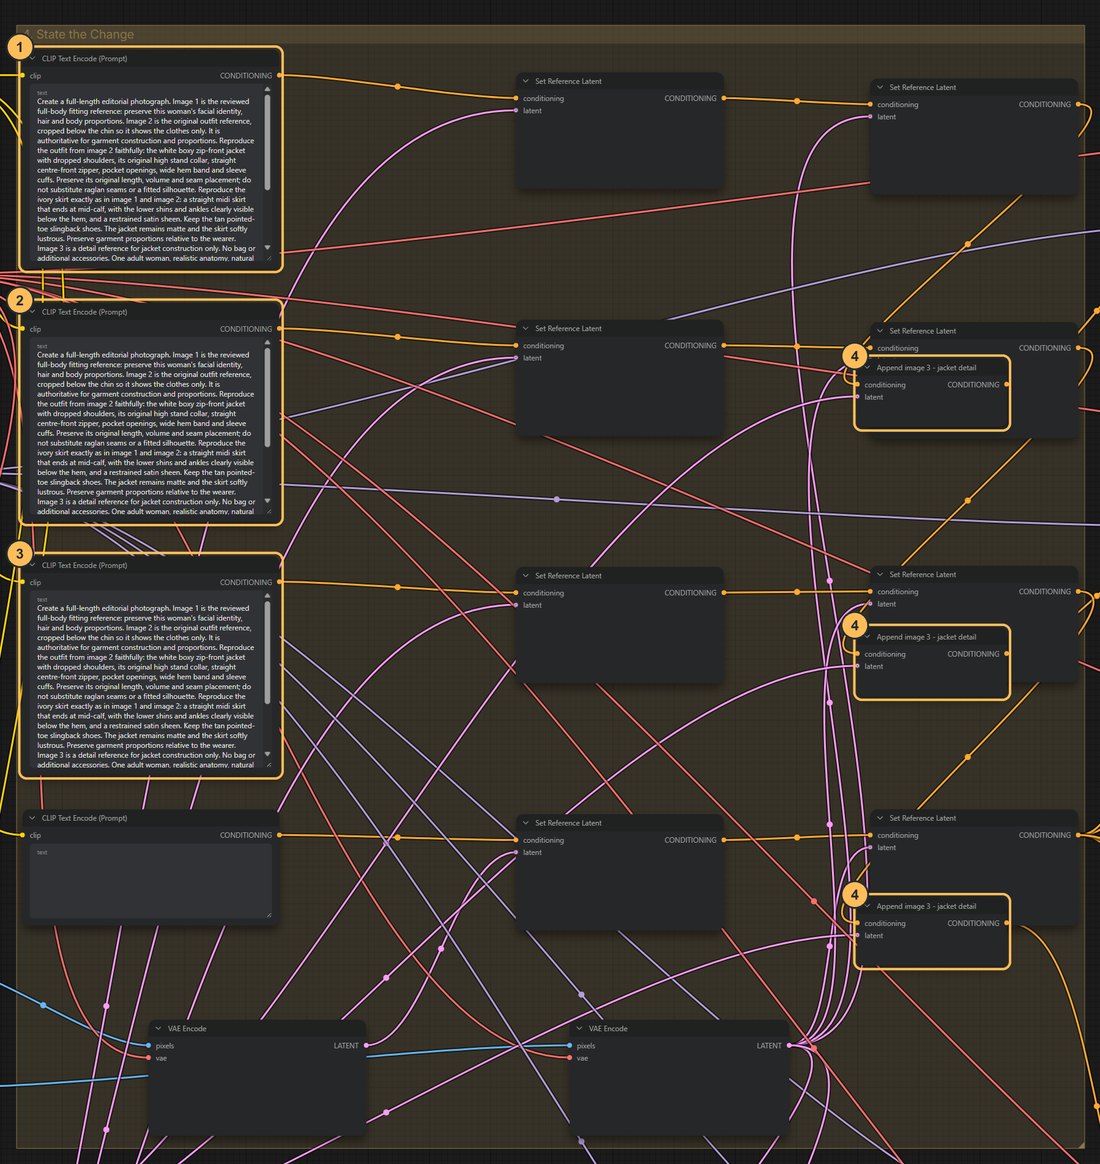
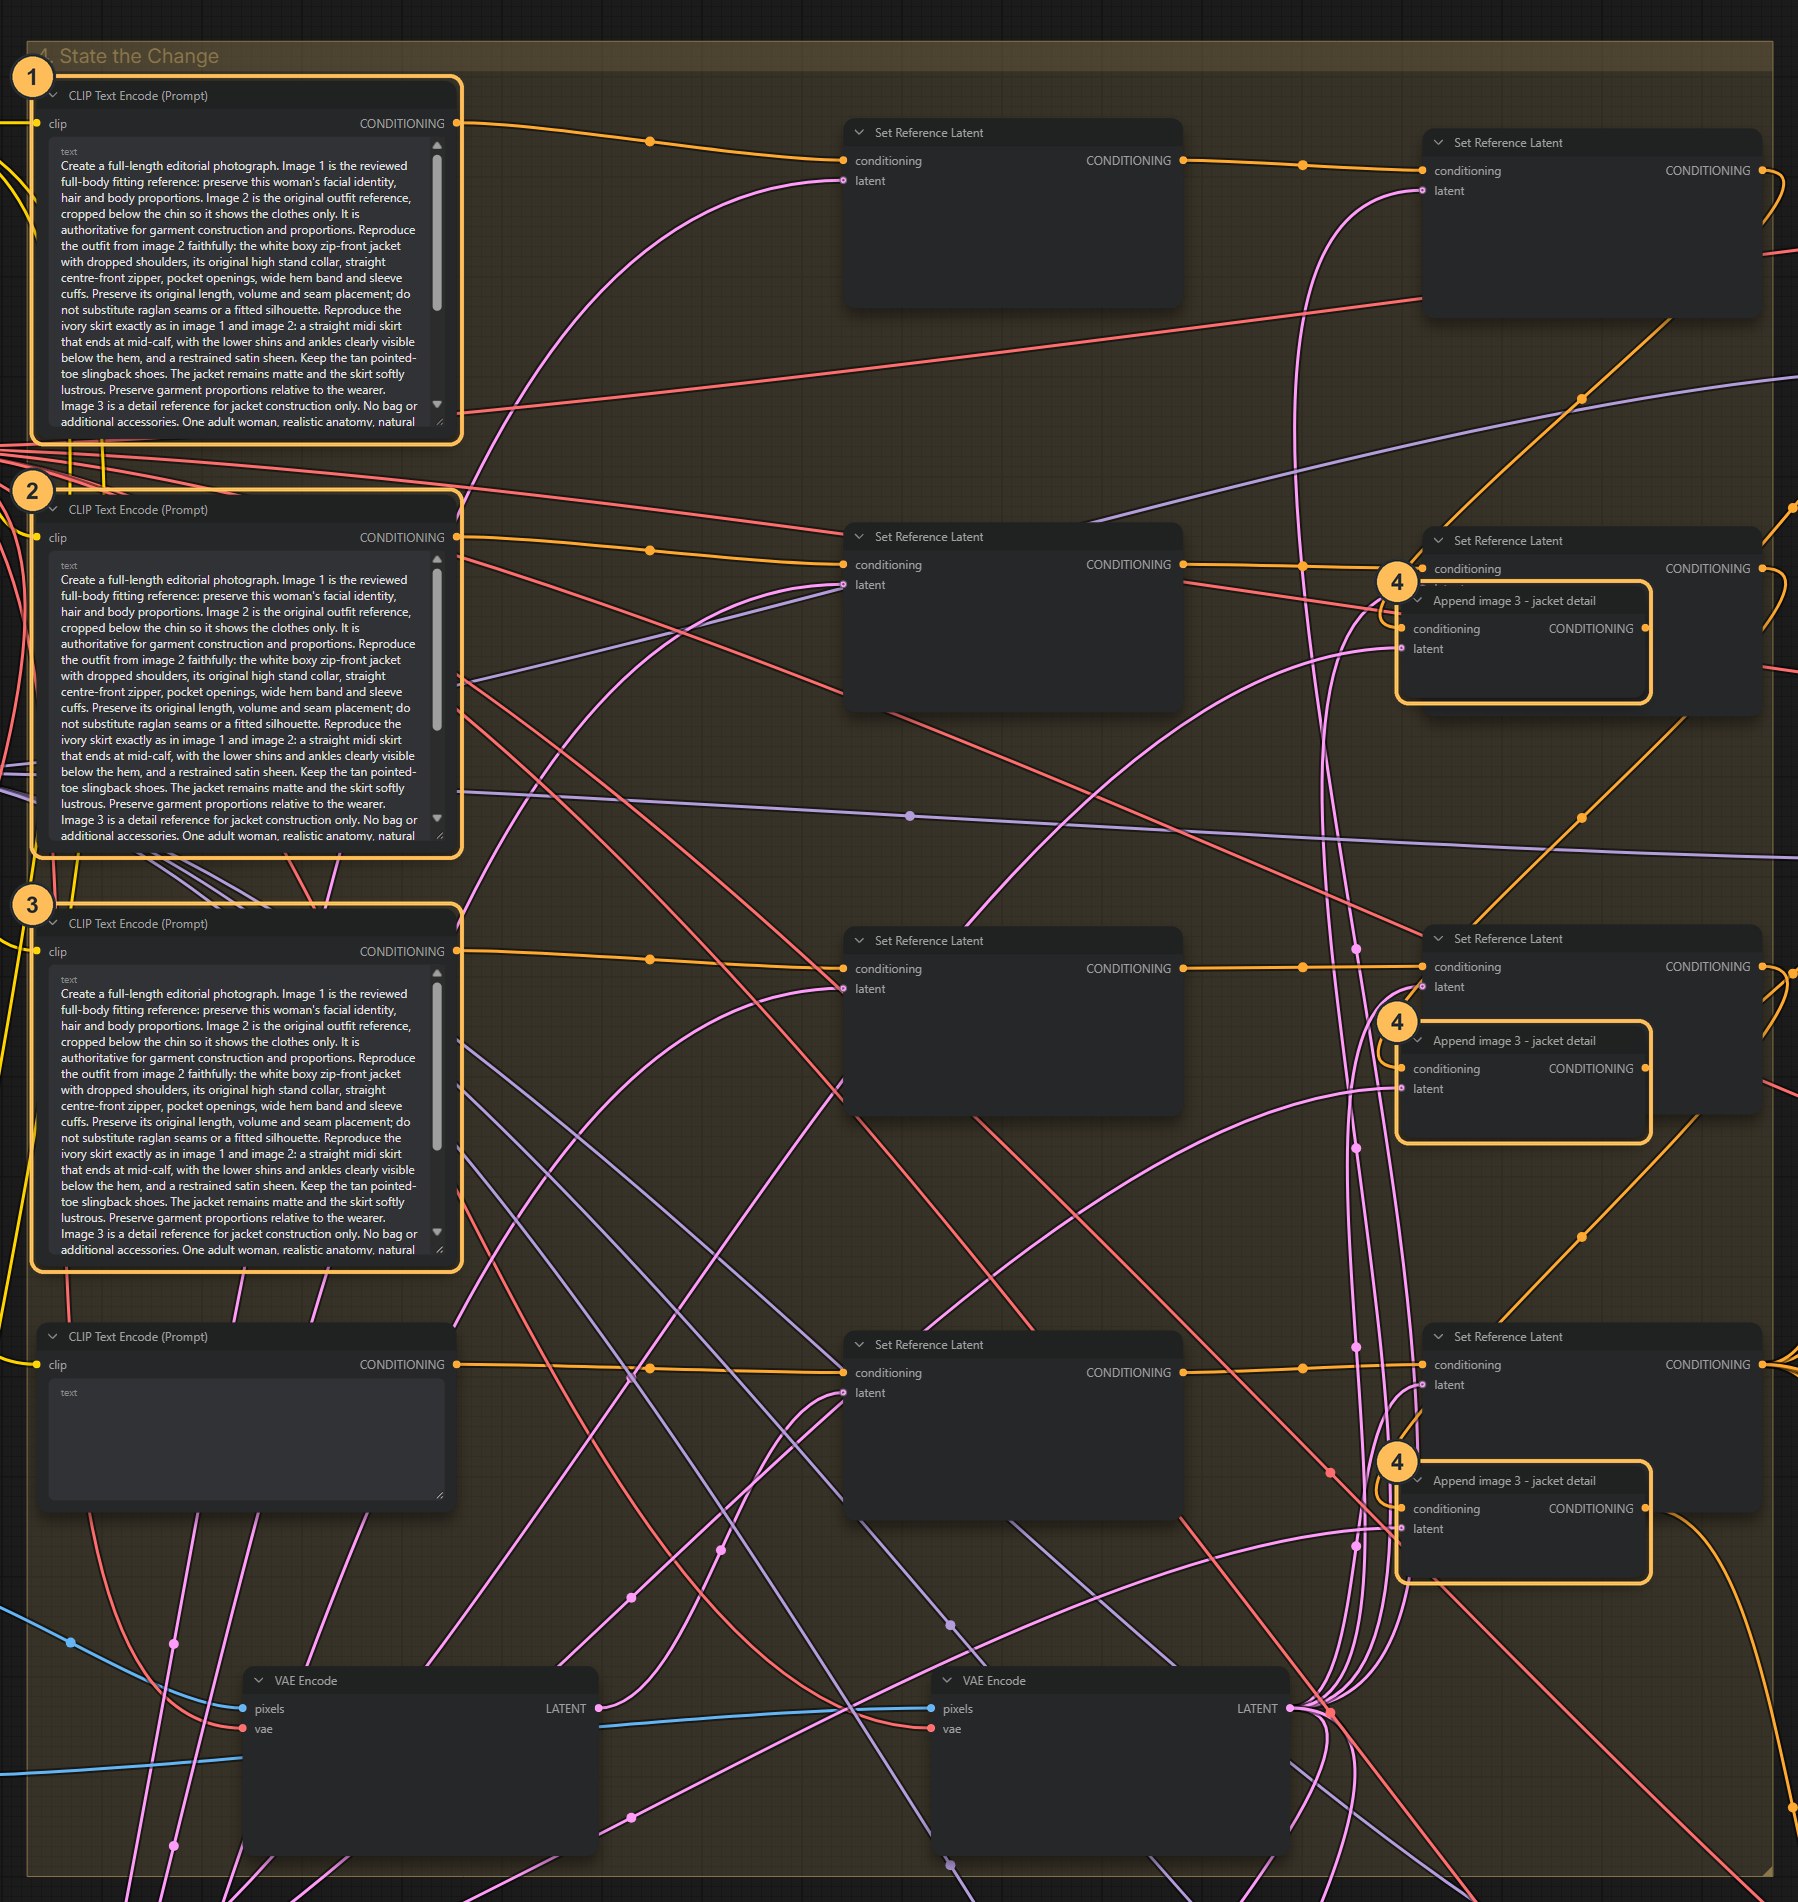
Group 4: the three indoor scene prompts. - Scene 1 promptStaircase.
- Scene 2 promptWindow.
- Scene 3 promptGallery.
- Add image 3Attaches the jacket detail to each scene.
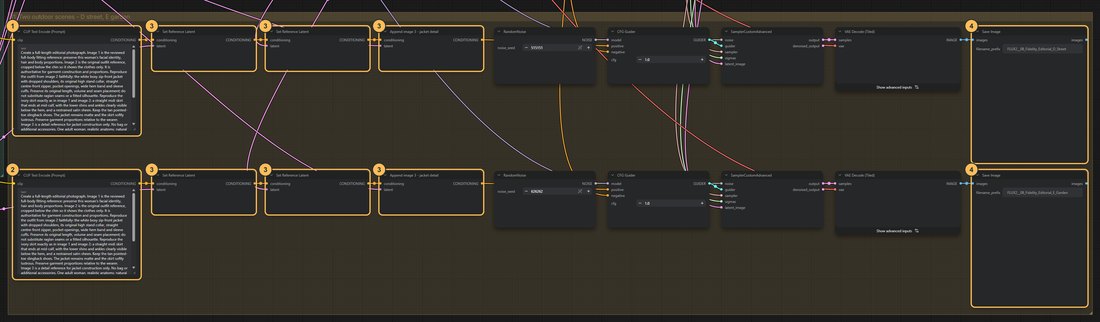
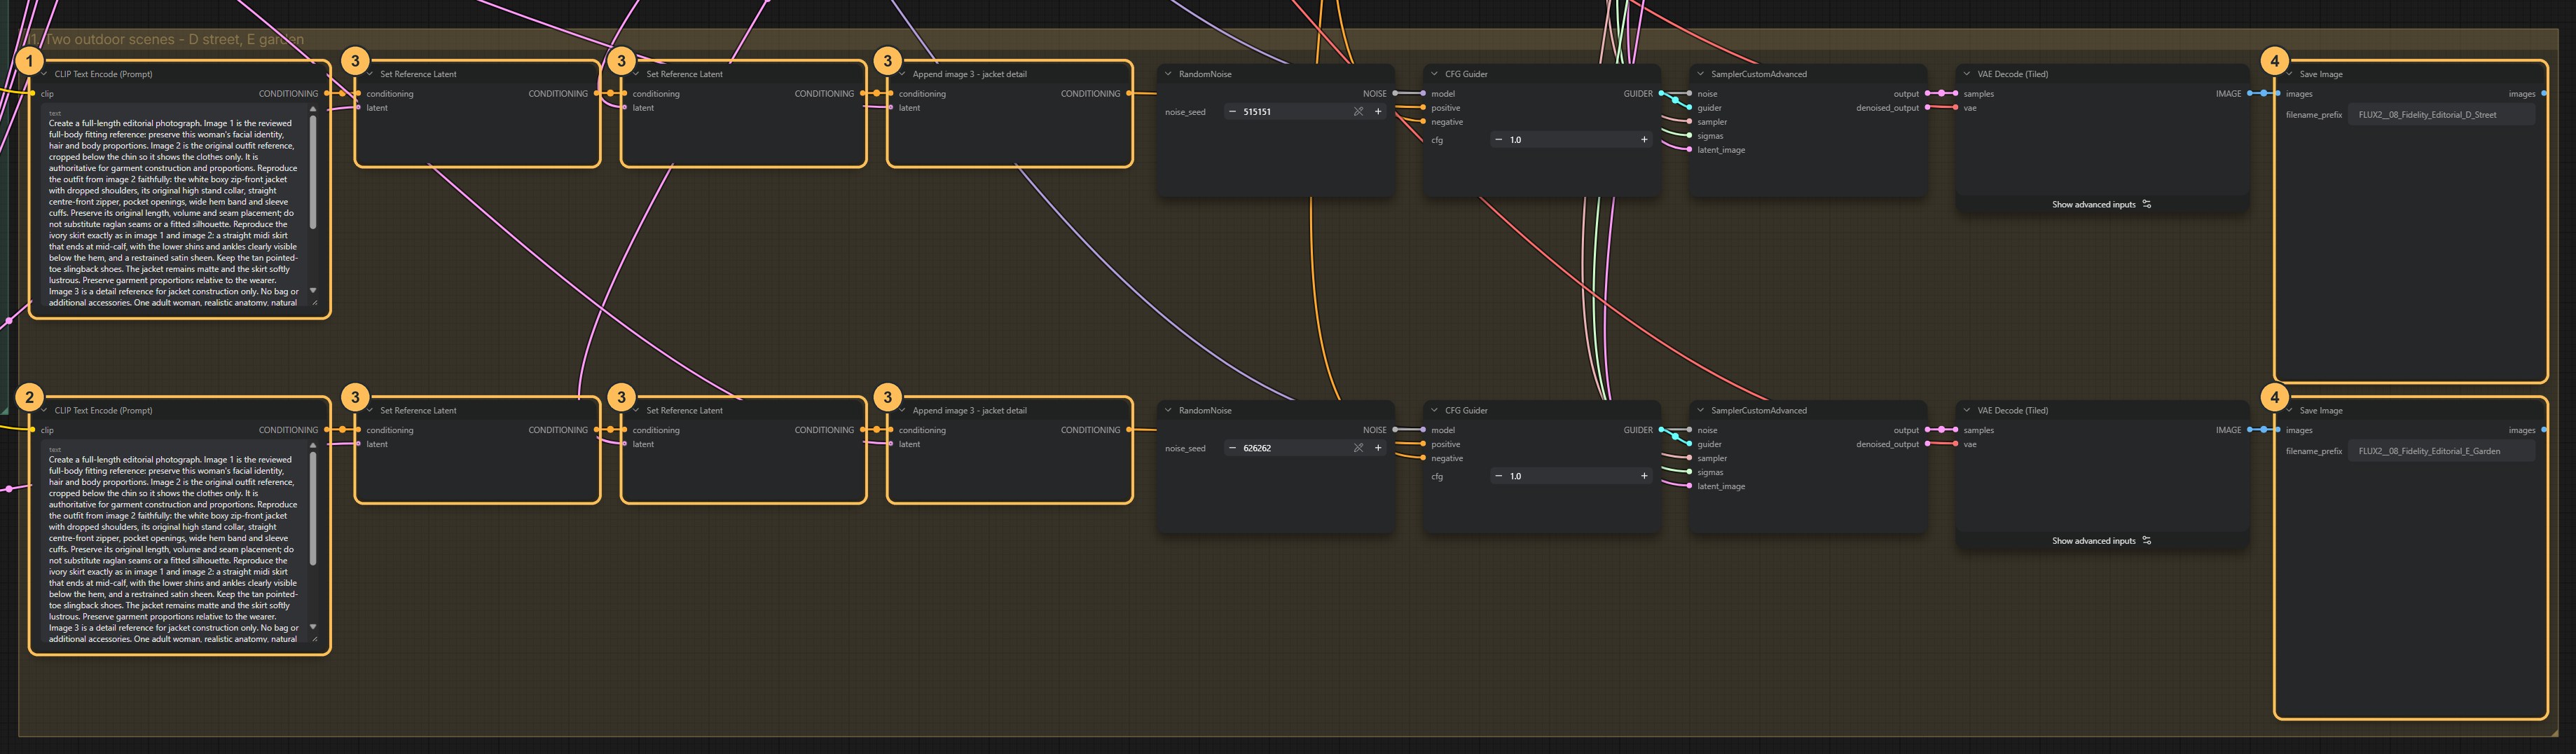
Group 11: the two outdoor scenes. - Scene 4 promptStreet.
- Scene 5 promptGarden.
- Reference latentsAttach the same three references as the indoor scenes.
- Save ImageOne file per scene.
What stays fixed and what changes
- Fixed in every scene: the three references, and the paragraph of the prompt that describes the person and the outfit, word for word
- Changes per scene: the location (staircase, window, gallery, street, garden), the pose and the lighting
The original outfit photo stays the authority for the clothing in every scene. The fitting image tells the model who is wearing it. The scene wording is the only part meant to vary. Decide in advance what may change (location, pose, light) and what may not (hem length, shoes, fabric). Then say the fixed things precisely. “Keep the original hem length” was not enough in testing: one scene came back with a floor-length skirt. “A midi skirt that ends at mid-calf, with the ankles clearly visible” held in all five.
Change: one scene’s location or light. Keep fixed: the references, the shared wording and the scene seeds. Inspect: whether the clothing stayed the same.
Run and review as a series
Each scene is generated separately, with its own seed. The model has no memory of the other scenes, so agreement between them comes only from the shared references and shared wording. Five Save Image nodes write the scenes with
A_Staircase,B_Window,C_Gallery,D_StreetandE_Gardenin their names. The two outdoor scenes sit in their own group below the others.The image size is 832 × 1216 and CFG is 1. Both files use the recommended 4 steps. If memory is tight, reduce the outfit reference from 1.5 megapixels to 1.
Check the result
- The same face and hair in every scene
- Jacket cut, skirt and shoes stay recognisable. A series can survive a different fold, but not different shoes
- Colours and material read the same under each light
- Poses vary, so the series does not feel copied
- View the five as thumbnails: is one warmer, or the figure a different size? The best single image is not always the best member of the set
A face belongs to someoneUse real faces only with permission for this purpose. Use it responsibly.
Download the workflow
- A_Fitting_Reference.jsonStage 1 · makes the neutral fitting image to review
- B_Editorial_Scenes.jsonStage 2 · five editorial scenes from the reviewed fitting image
- HERO_model_identity.png, HERO_garment_look.png, 08_editorial_fitting_candidate.pngThe example identity, outfit and fitting images. Put them in ComfyUI’s input folder, or load your own
Click a filename to download it, or right-click it and choose Save link as. Keep the .json ending. Then drag the file onto the ComfyUI canvas, or use Workflow → Open.