10 · 3D reconstruction
3D Multi-View Comparison
Turn front, side and back images of a look into 3D models. A 3D model made of many small triangles is called a mesh. The workflow on this page uses a method called TripoSG. Results from three other methods are shown next to it for comparison.
A 3D model made this way is a proposal about volume. It is not a measured garment or a sewing pattern. The TripoSG downloads are listed in Getting Started.
- You’ll learn
- How to make a 3D model from an image with TripoSG, how it differs from three other methods, and why shape and surface colour are judged separately.
What goes in, what comes out
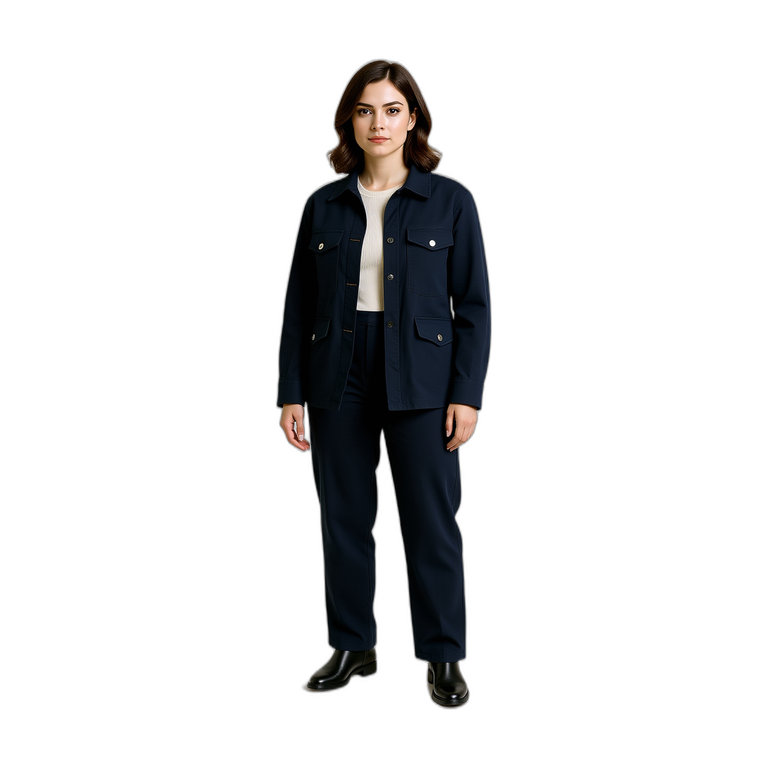
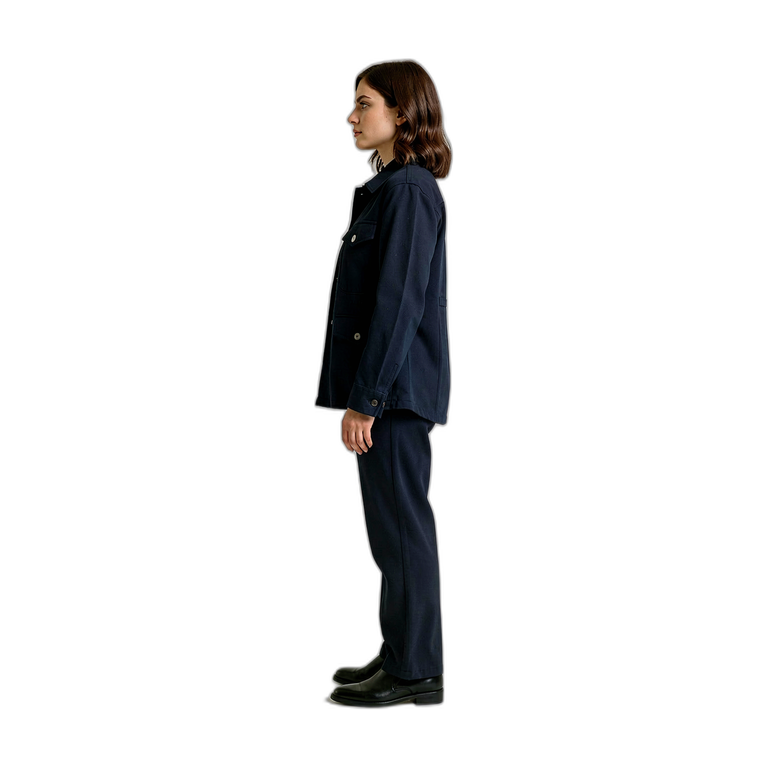
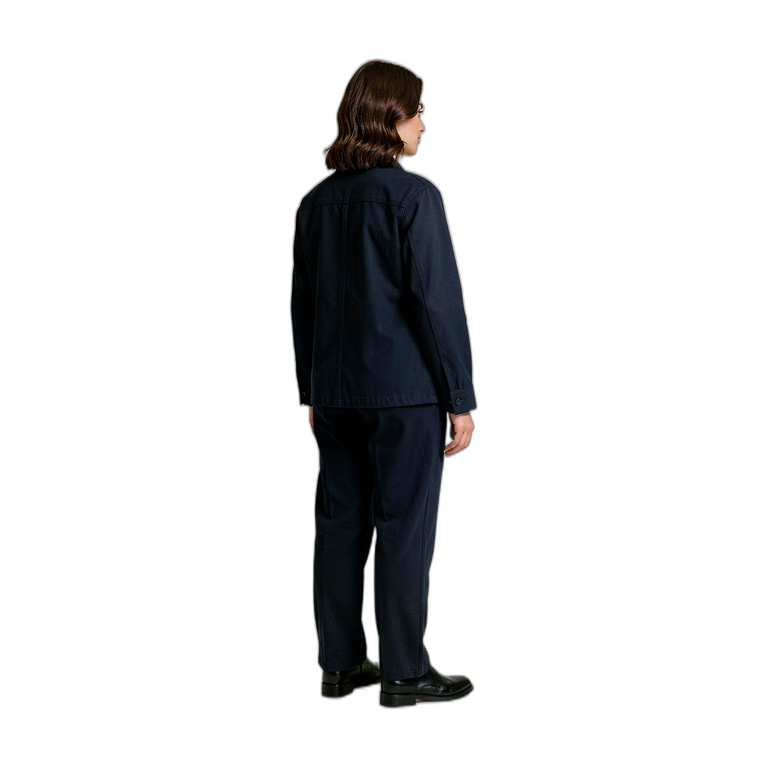
TripoSGOne 3D model per view, saved as .glb files, a common 3D format.
How the workflow works
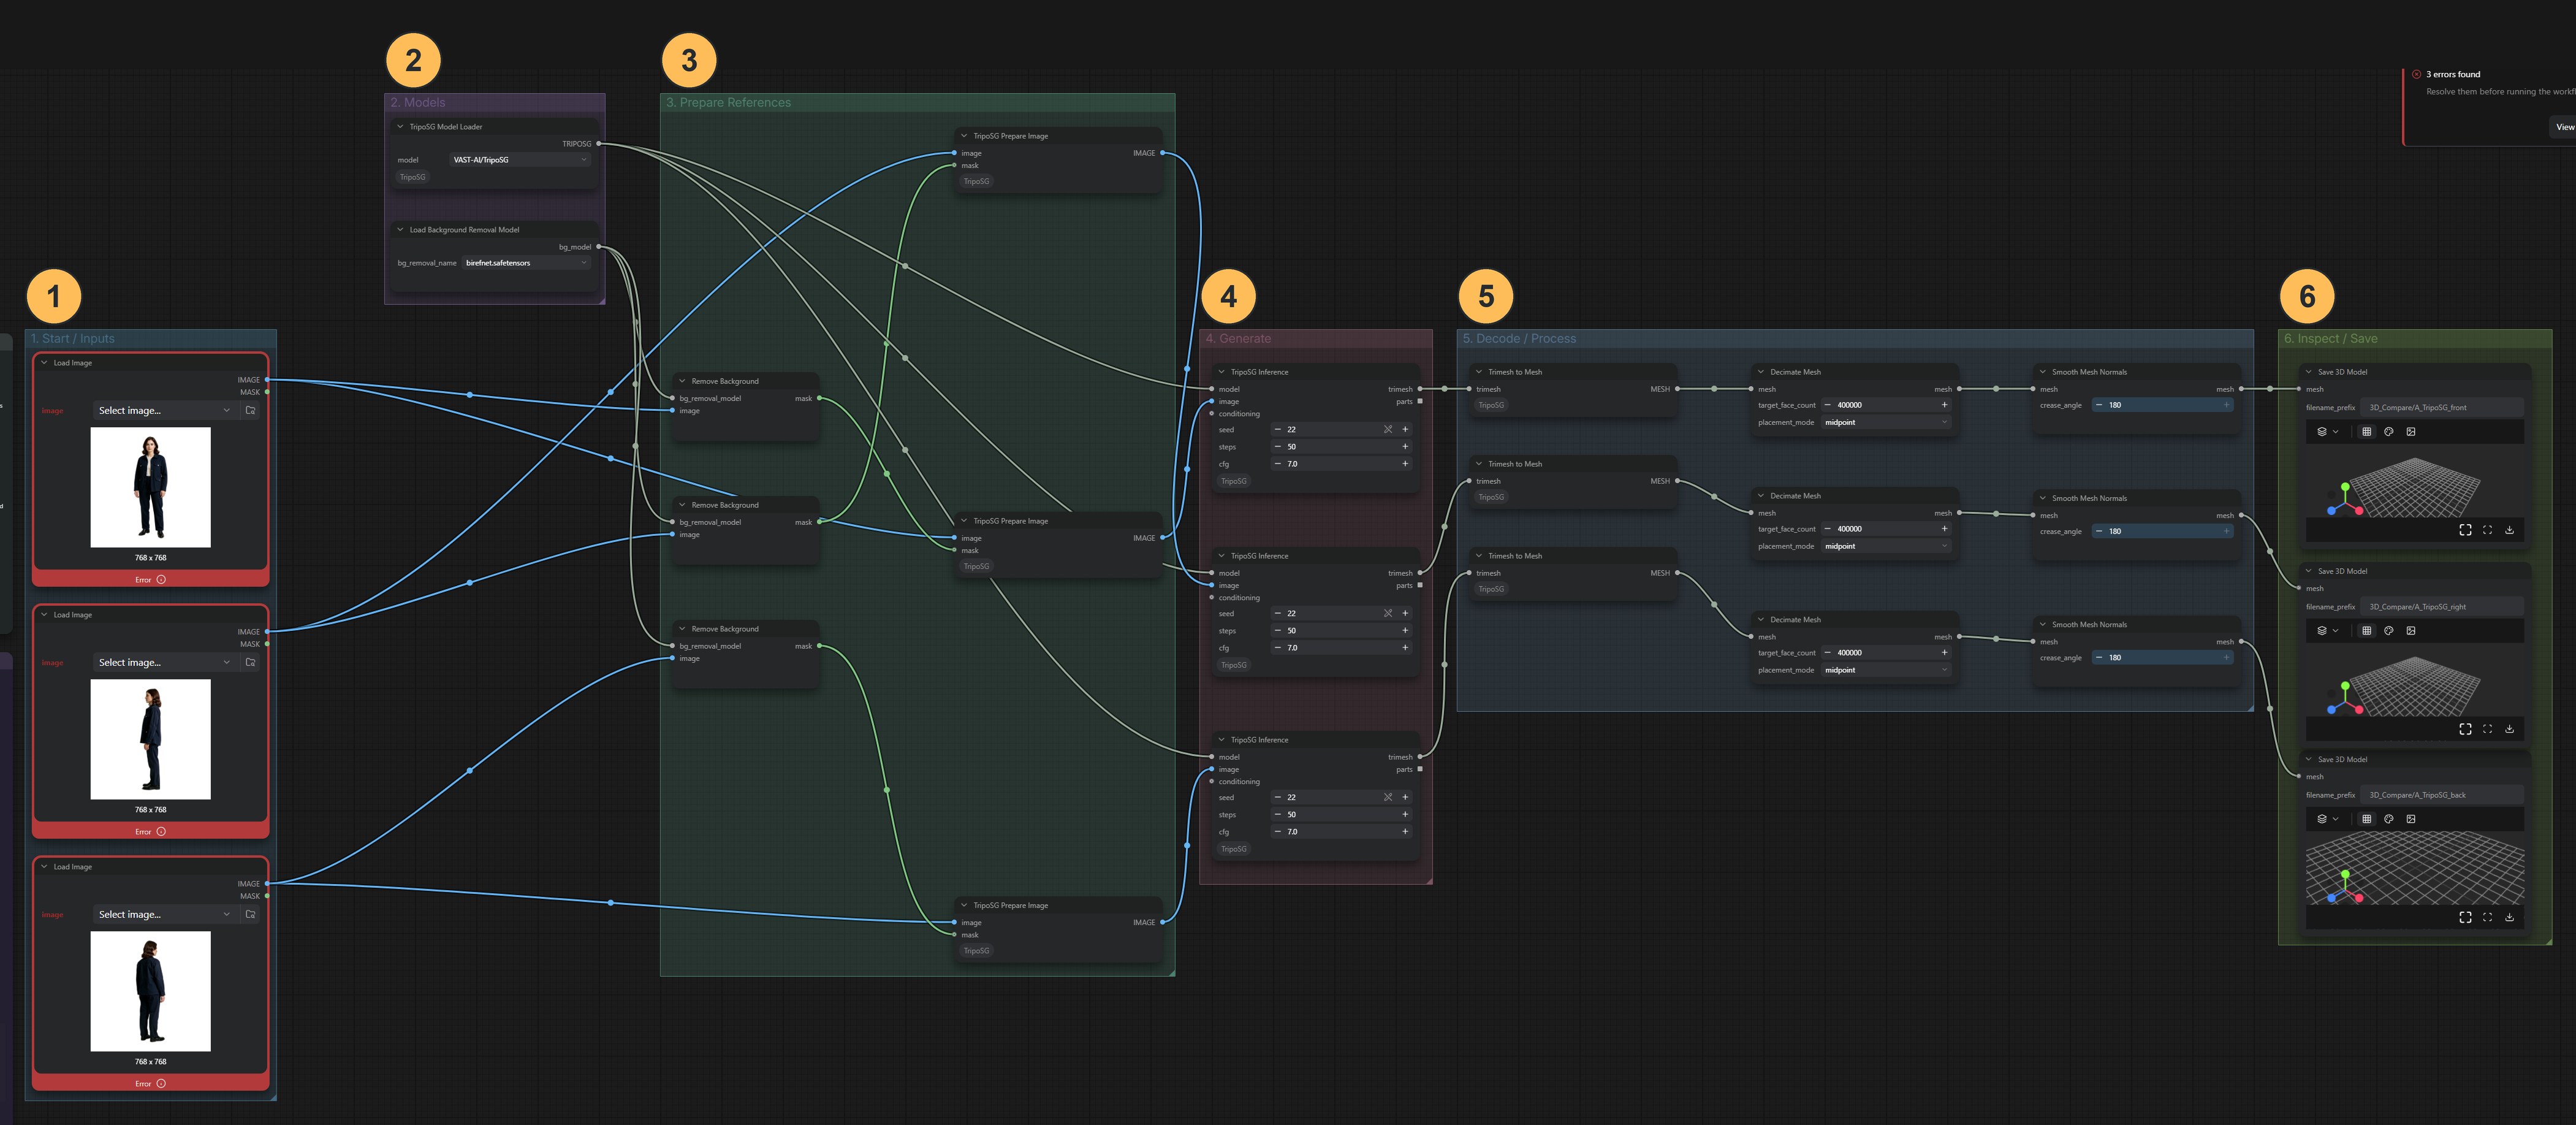
Explained earlier:generating further views (06) · front, side and back product views (07)
Prepare matching views
Use front, side and back images of the same look with consistent scale and framing. A natural pose keeps the real drape. A T-pose, with the arms held straight out, separates the arms more cleanly but loses the drape.
The workflow first removes the background from each image. Check that result before anything else. Background left in the mask can grow into fins on the mesh, and a mask that cuts into a sleeve removes the sleeve.
Run TripoSG
TripoSG takes one image and builds one 3D model from it. The workflow runs it three times, once for each view, and saves three separate models. They are not merged into one. Each model has shape only, with no colour.
The main controls are the seed, the number of steps and the guidance scale, plus the number of faces kept when the model is simplified. The workflow uses the developers’ default values, 50 steps and a guidance scale of 7. Keep them for your first run.
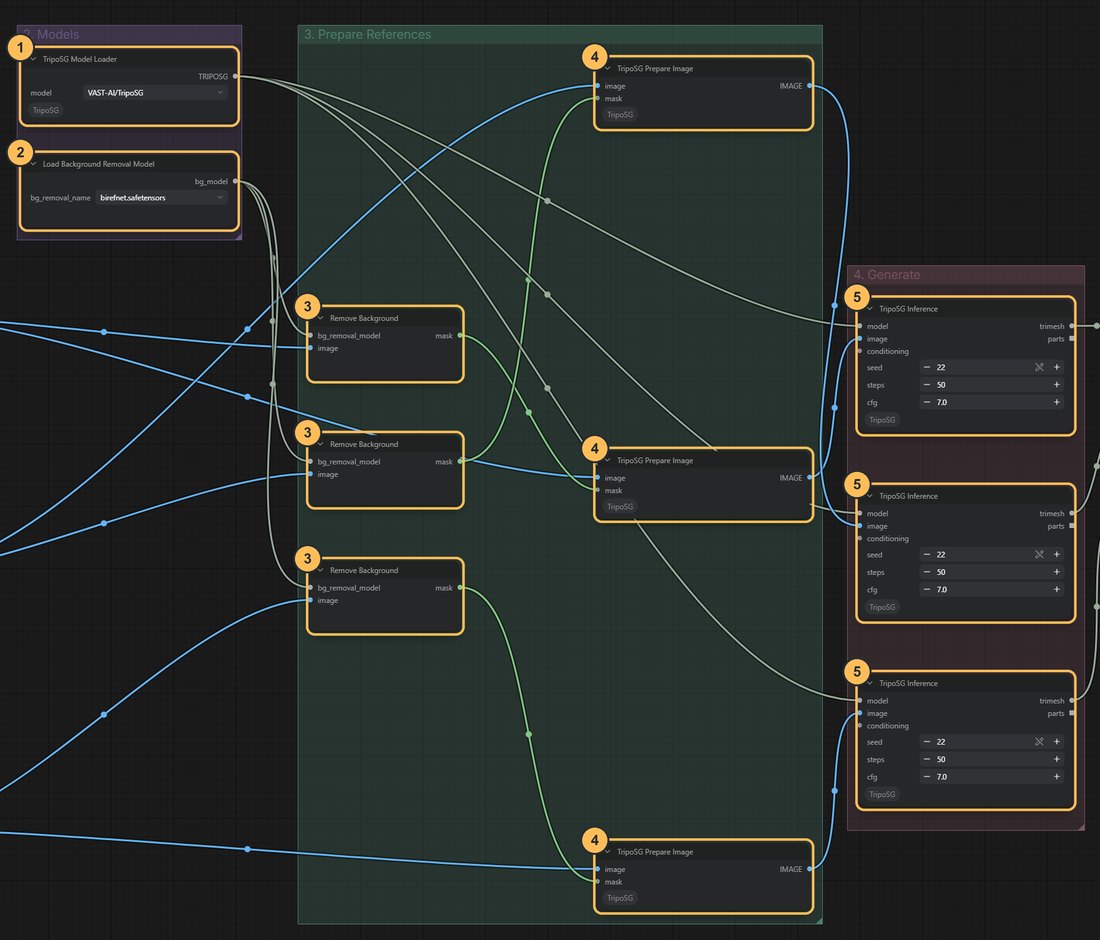
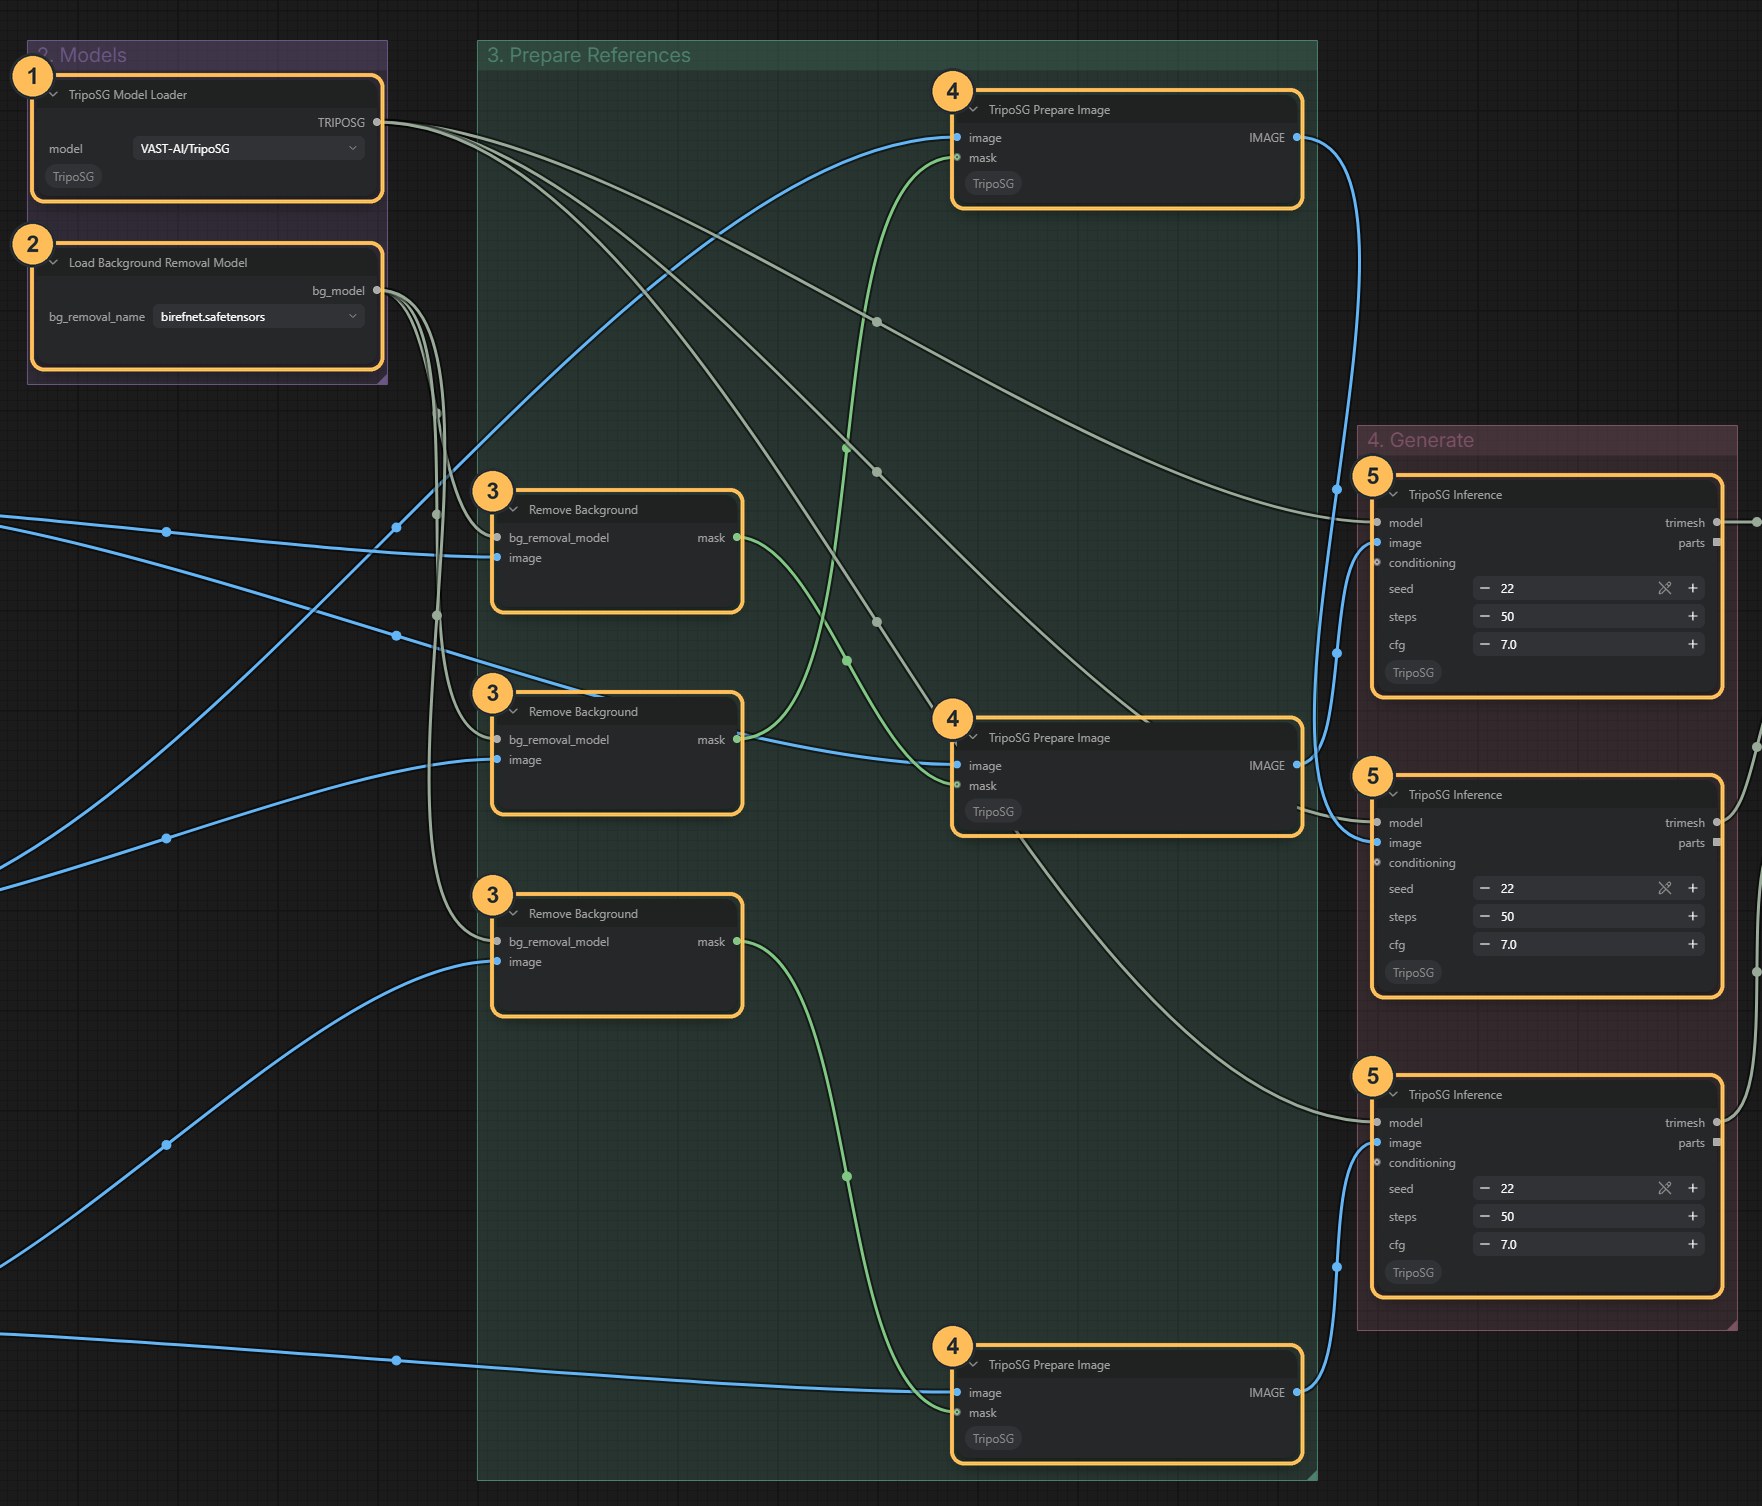
- TripoSG Model LoaderLoads the 3D model. It downloads itself on the first run.
- Background removal model
- Remove BackgroundCuts the subject out of each photo.
- Prepare ImageCentres the subject for TripoSG.
- TripoSG InferenceBuilds one 3D model from each view. Seed, steps and guidance are here.
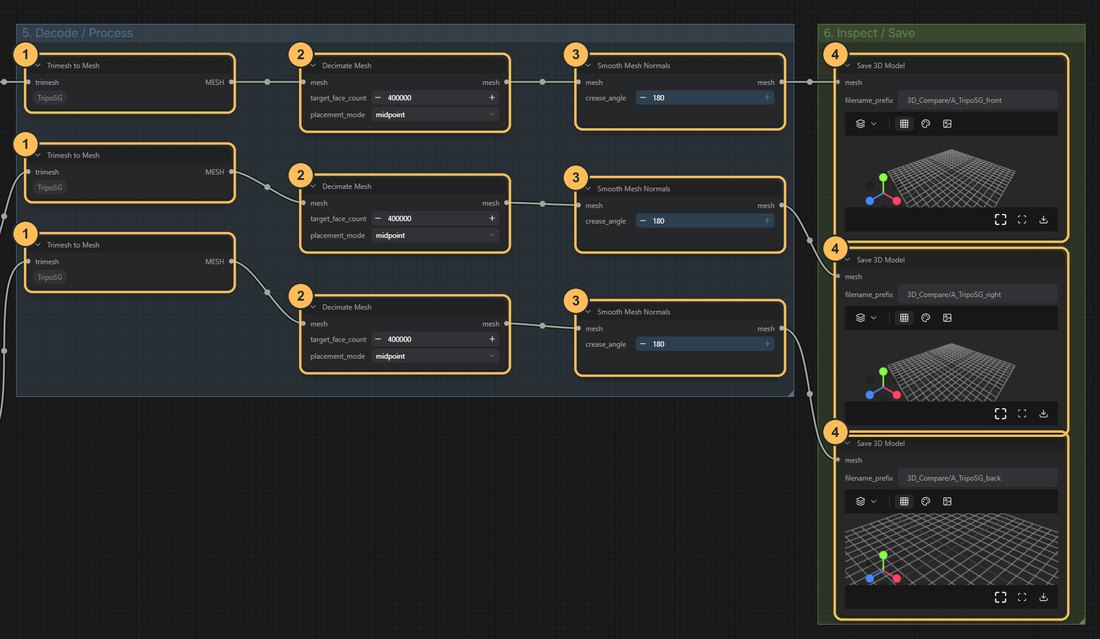
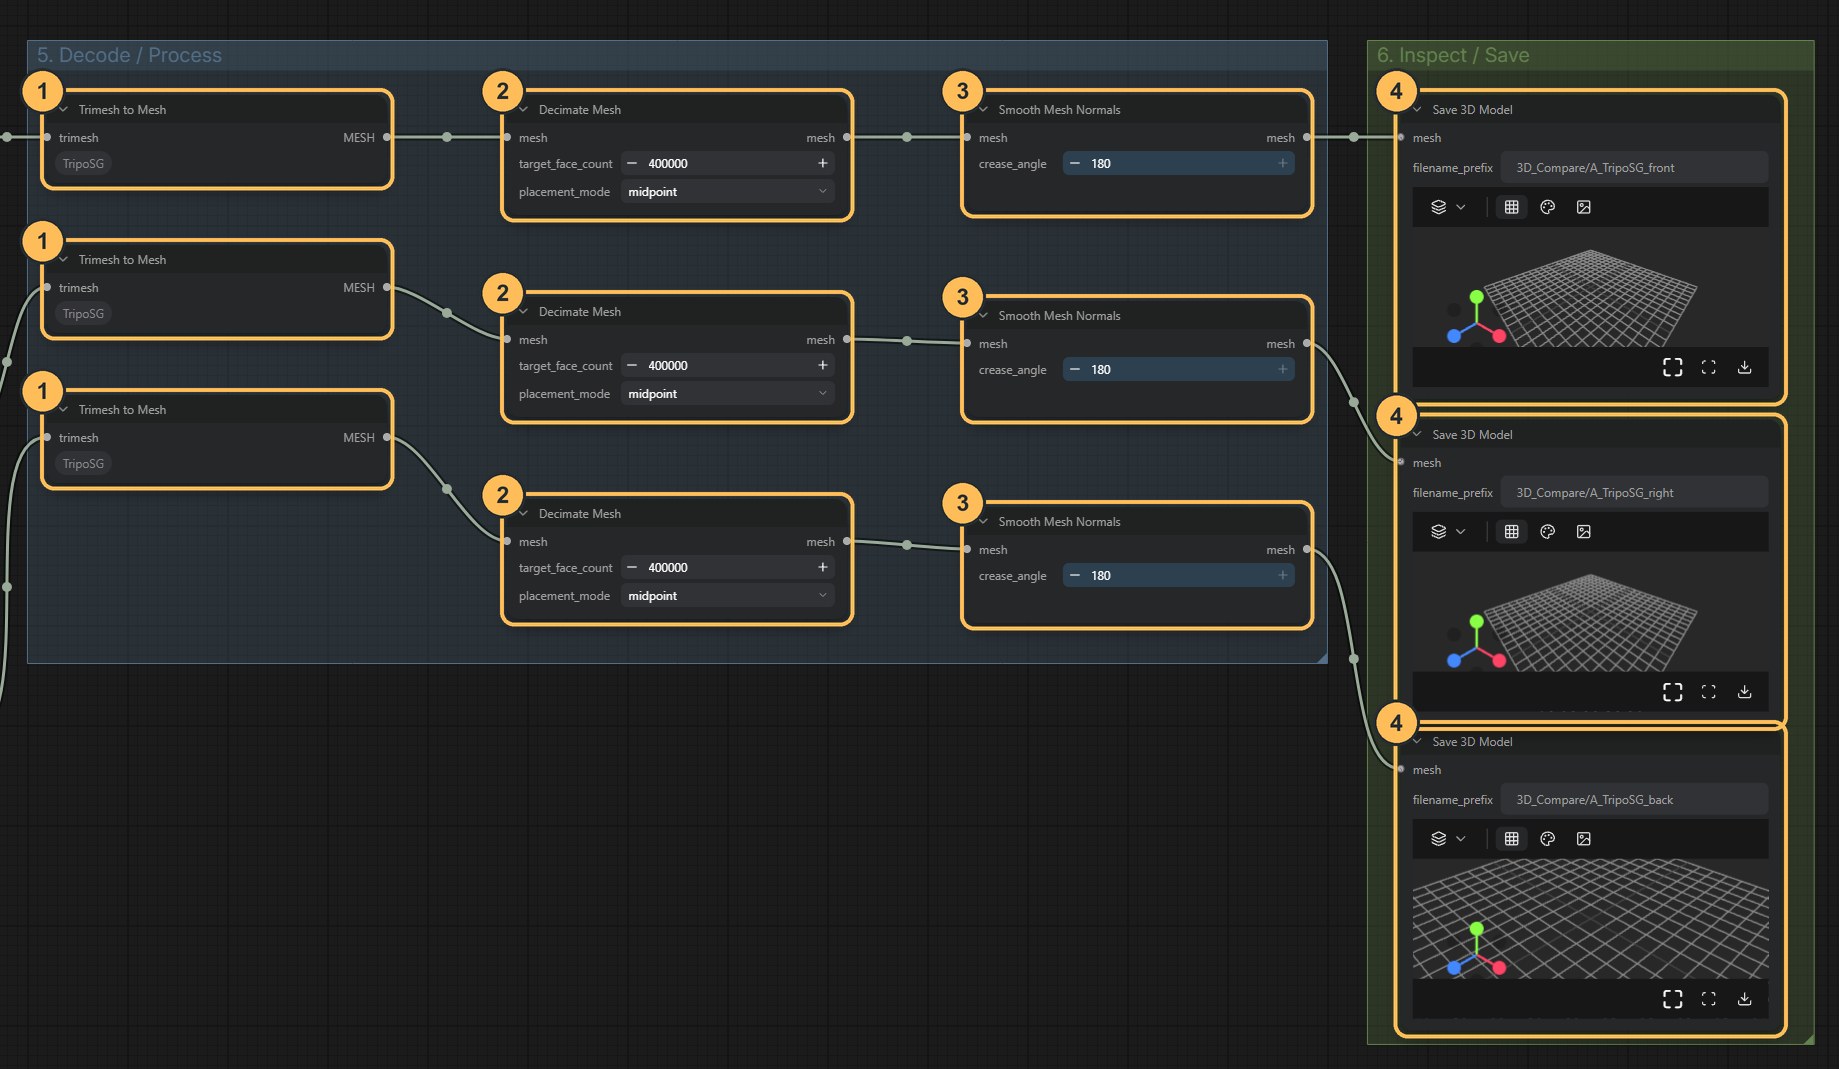
Groups 5 and 6: tidying and saving the models. - ConvertChanges the result into the 3D format ComfyUI uses.
- DecimateReduces the number of triangles so the file is lighter.
- Smooth normalsMakes the surface look smooth instead of faceted.
- Save 3D ModelSaves each model as a .glb file.
How the comparison methods differ
The other three methods are shown only for comparison. Between them, the four methods use the views in two different ways:
- Separate single-view reconstruction. The method takes one image and produces one mesh. Run on three views, it produces three unrelated meshes, one per view. Each mesh has to guess everything that its single image does not show. The three results are not fused
- Joint multi-view conditioning. The method takes the front, back and side images together and produces one mesh that is guided by all of them. The hidden sides are informed by real views instead of guessed
The four methods side by side
File Method How it uses the views What it saves Main controls A TripoSG (used here) Separate: one reconstruction per view Three meshes, geometry only Seed, steps, guidance scale, and the number of faces kept when the mesh is simplified B Hunyuan3D 2mv Joint: front, back and right together One mesh, geometry only Seed, steps and CFG on the sampler, the resolution used when decoding, and the mesh extraction threshold C Stable Fast 3D Separate: one reconstruction per view, each with its own mask image Three meshes, each with a texture Foreground ratio (how much of the frame the subject fills), texture resolution and target vertex count. It has no sampling steps D Pixal3D (textured) Joint: front, back and right together One mesh with a baked texture Several stages, each with its own sampler: structure, shape, then texture. Also the texture size There is no single recipe that applies to all four. A setting such as steps exists in some methods and not in others, and the same word can mean something different in each. Change settings only within one method, and read that workflow’s own notes first.
Hardware. Memory needs differ a great deal between the methods. Do not assume that a comparison method fits in 8 GB of graphics memory because the image workflows do.
Judge geometry and texture separately
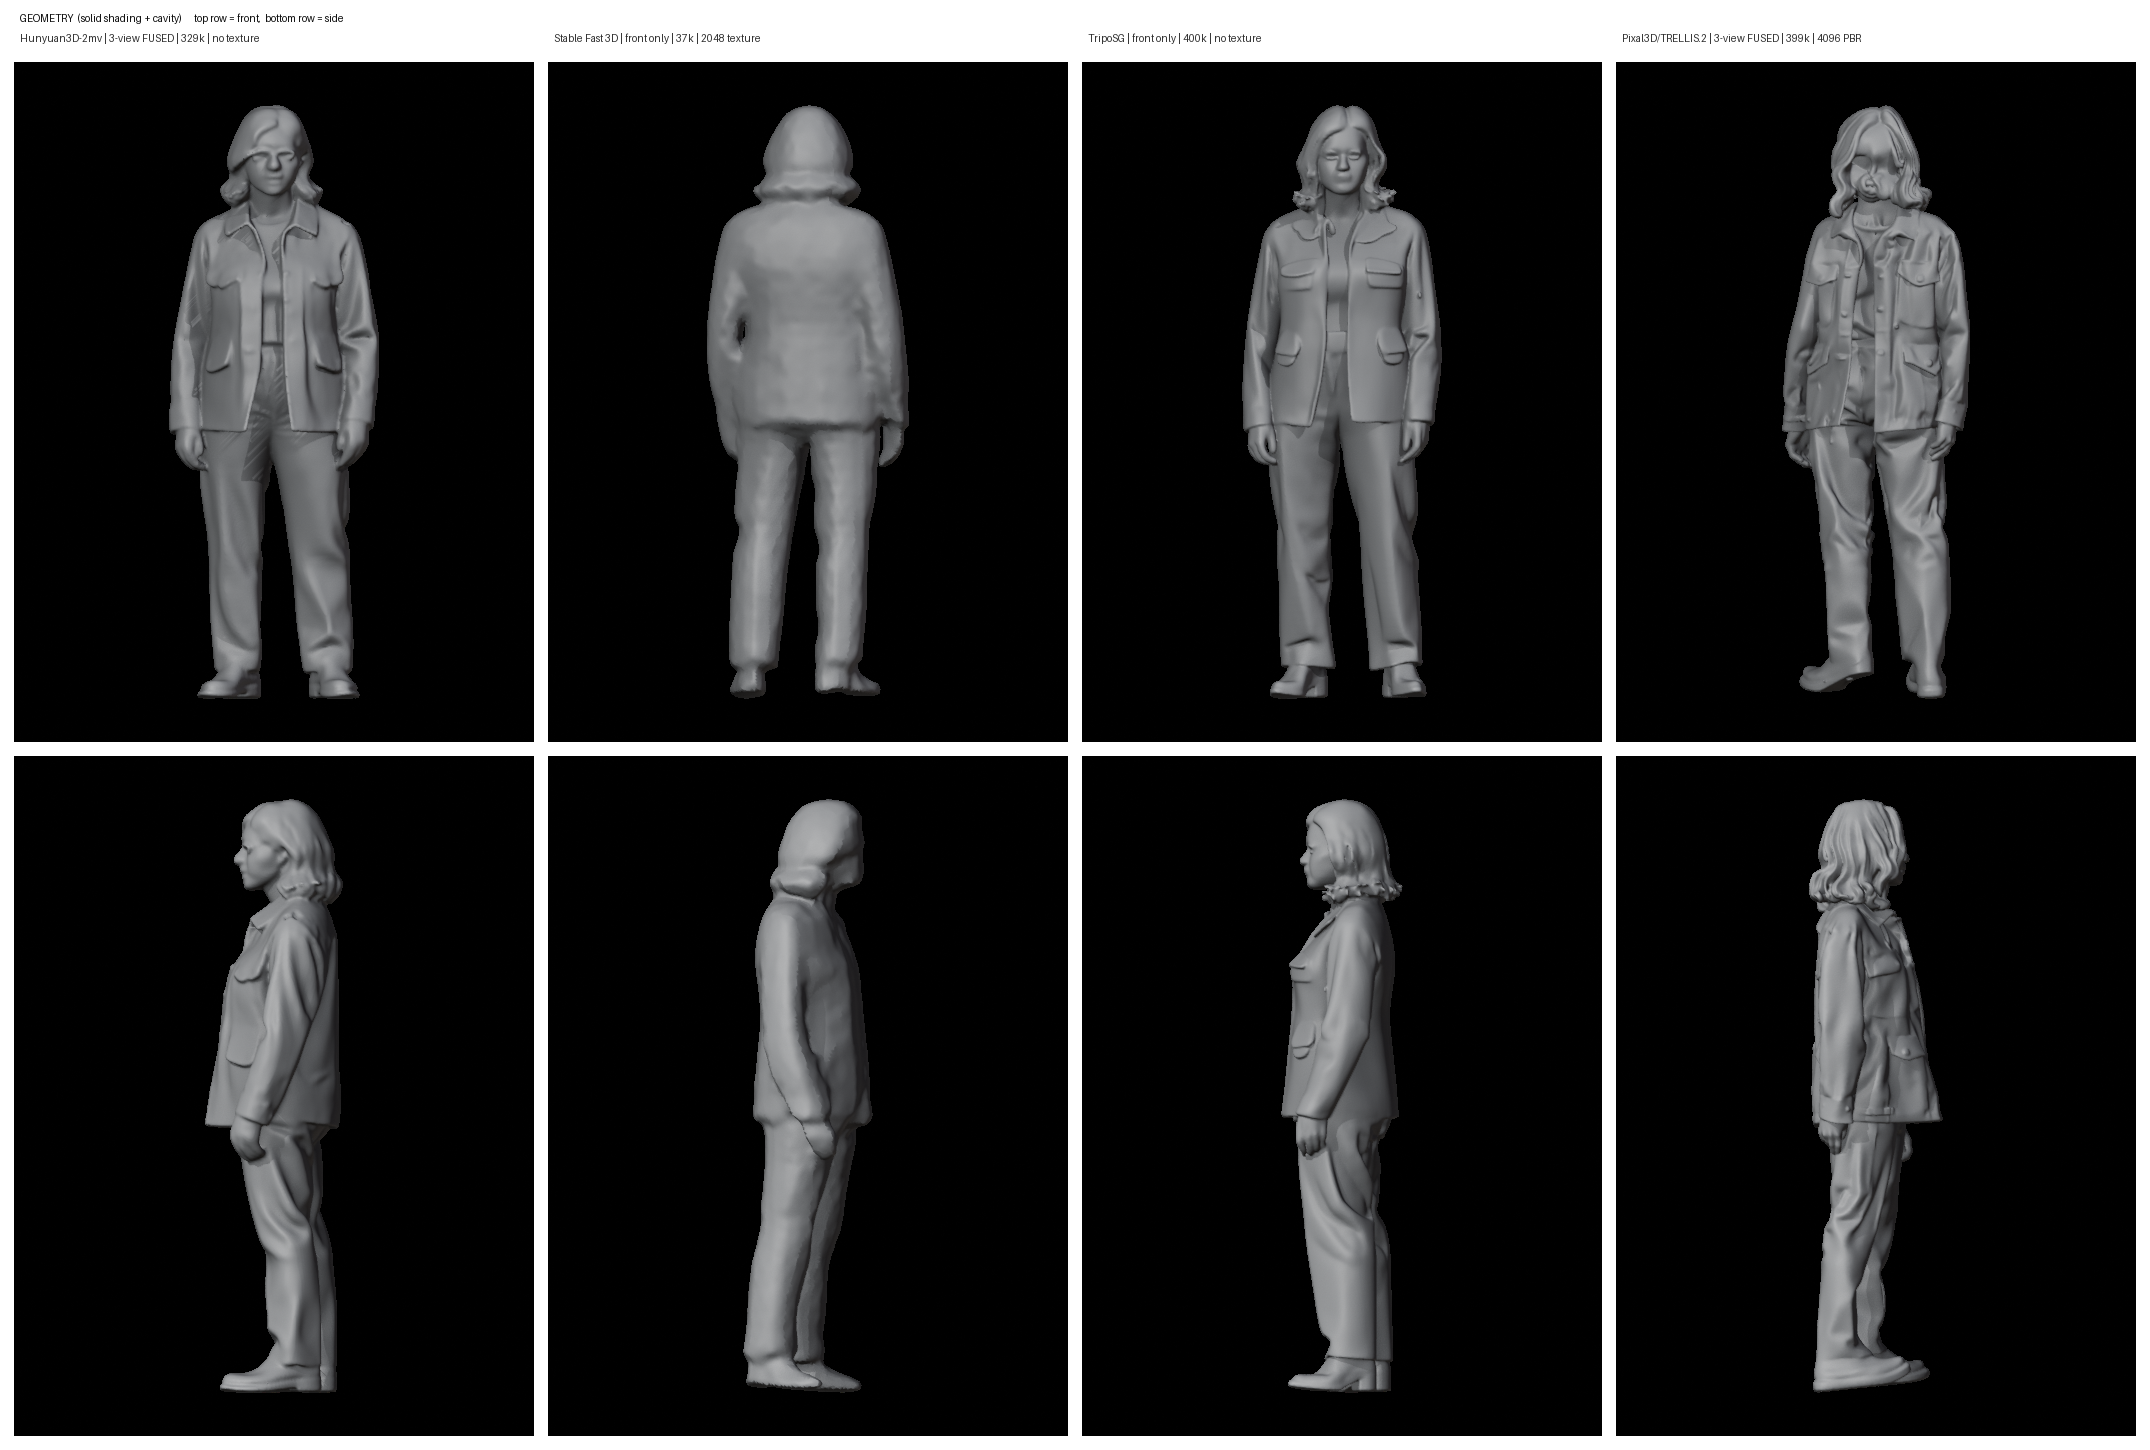
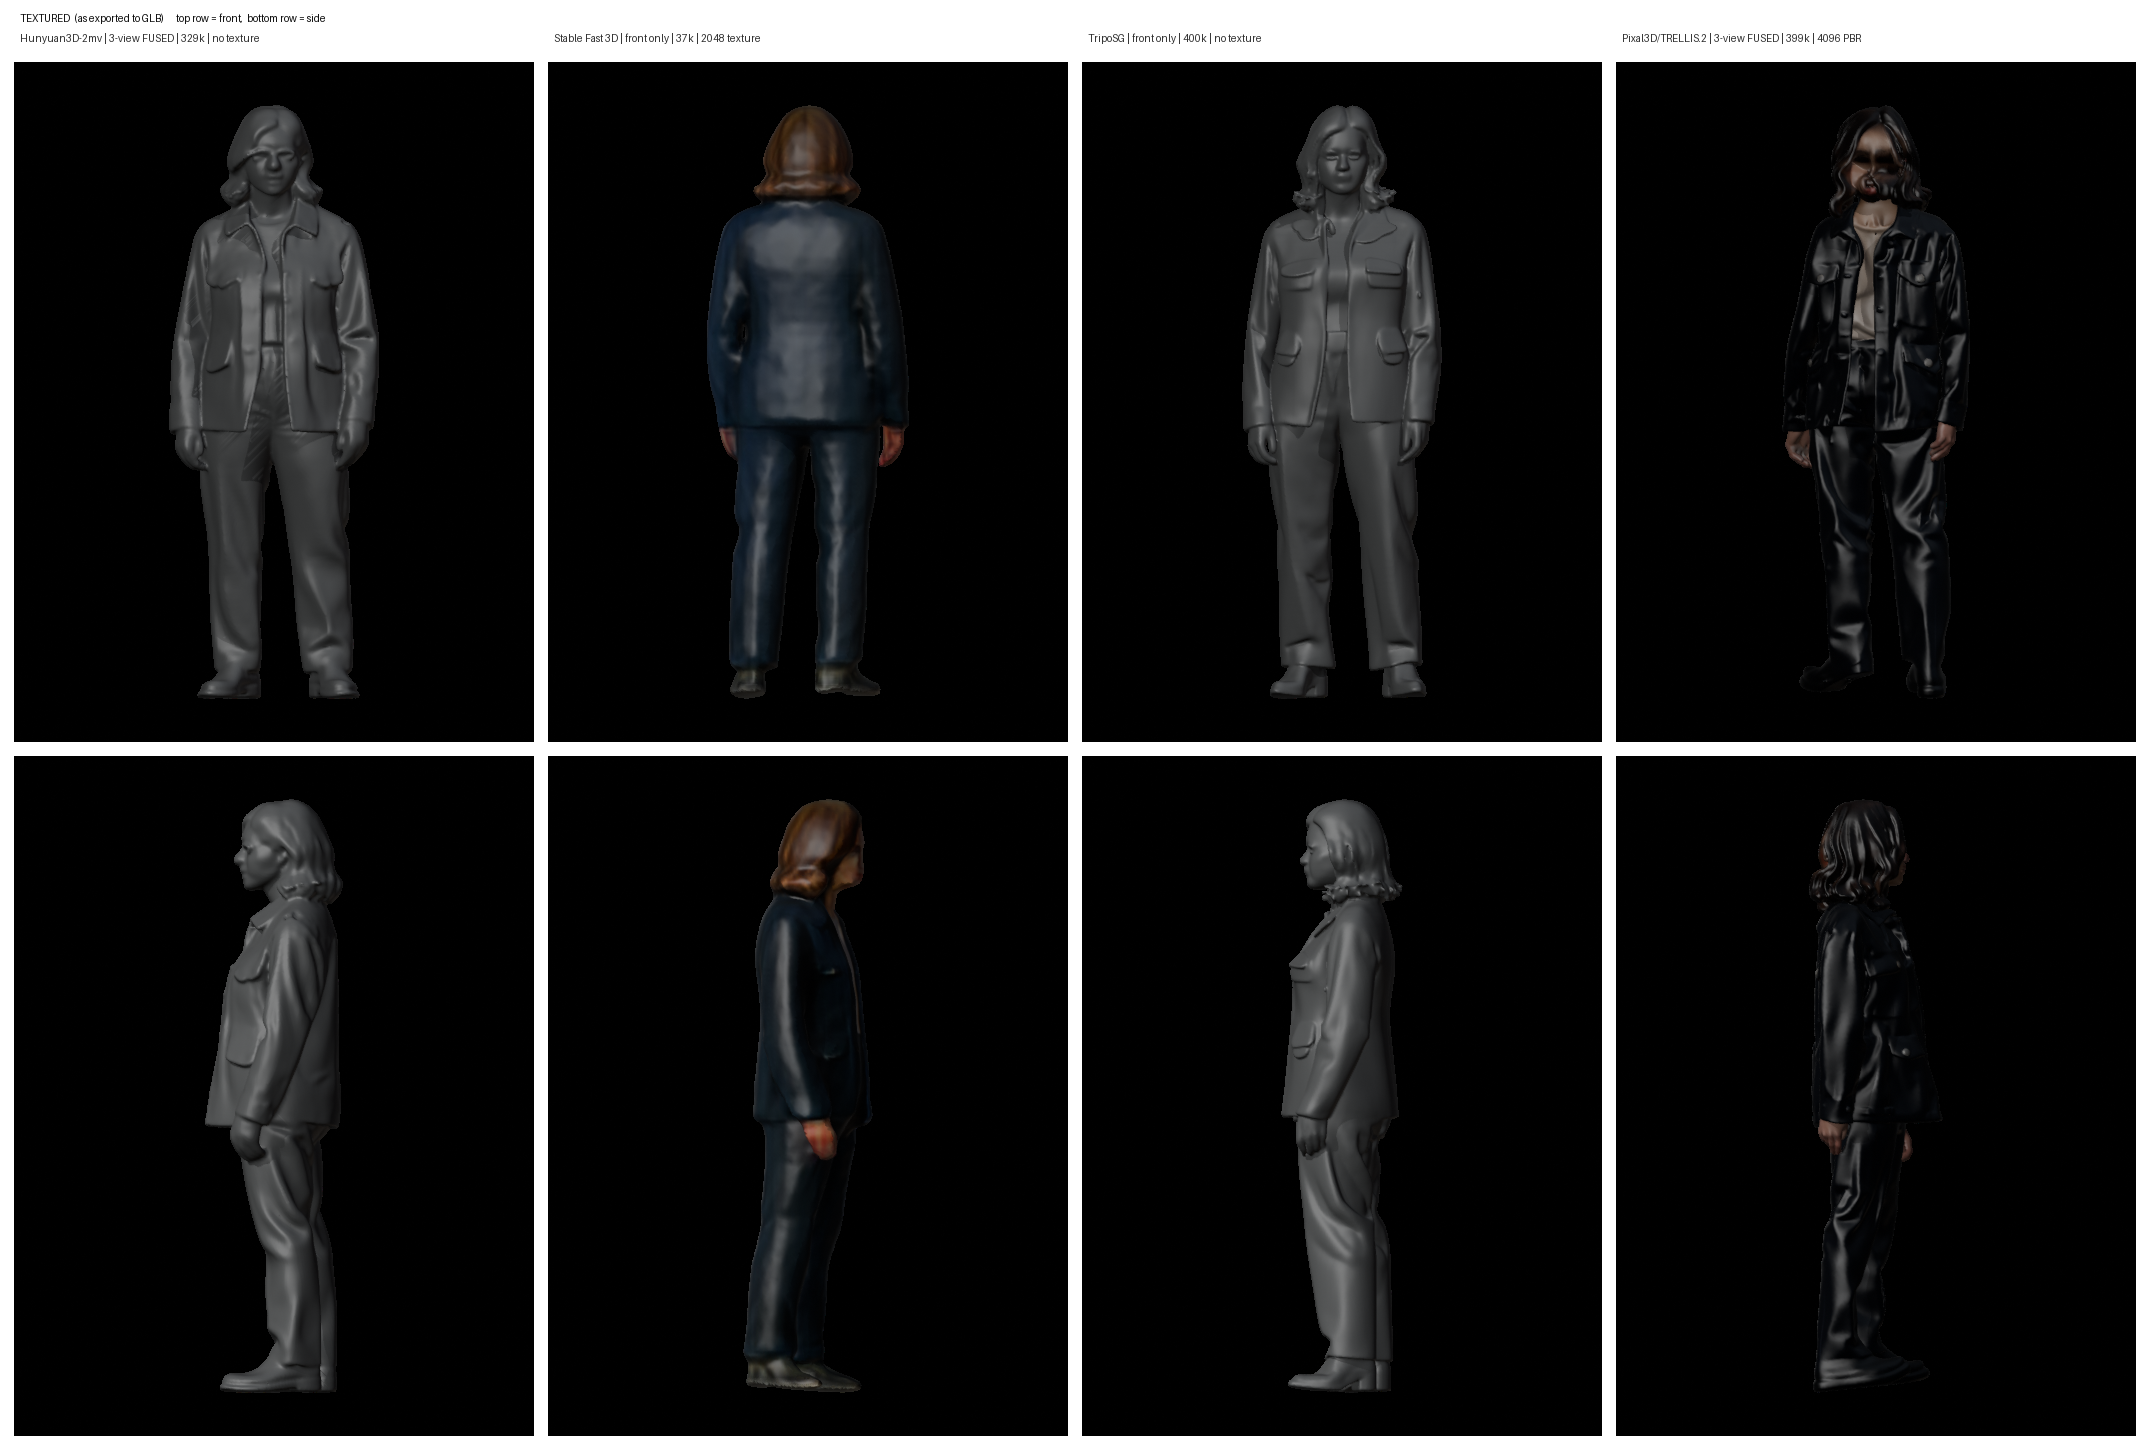
Geometry is the shape of the surface: the silhouette, the volume of a skirt, whether a sleeve is separate from the body. Texture is the colour image wrapped onto that surface. They are produced by different parts of each method, and two of the four workflows here save geometry without any texture.
Look at the untextured, solid-shaded shape first. An attractive texture can hide a poor silhouette, and a method should not be dismissed because its mesh has no colour. A texture can paint a pocket. Only geometry makes one.
Saved comparison sheets
Click to enlarge, then zoom in on each method’s column. These sheets were made in an earlier session, and their letter labels follow an older order (A Hunyuan3D, B Stable Fast 3D, C TripoSG, D Pixal3D). The downloadable files use A TripoSG, B Hunyuan3D, C Stable Fast 3D, D Pixal3D. Identify each column by its method name, not its letter.
Check the result
- Side and back volume look believable from every angle, not only the front
- No holes, fins or collapsed areas
- Arms and sleeves are separate from the body where they should be
- Garment volume matches the input views
- For separate reconstructions: compare the three meshes and note where they disagree about the hidden sides
If a shape looks wrong, check the background removal first. Most odd shapes come from the input, not from the settings.
These meshes are useful for volume studies and concept turntables. They are not sewing patterns or proof of fit.
Download the workflow
- A_TripoSG_MultiView.jsonThe TripoSG workflow used on this page
Click a filename to download it, or right-click it and choose Save link as. Keep the .json ending. Then drag the file onto the ComfyUI canvas, or use Workflow → Open.
Comparison workflows (optional)
These three files made the comparison results above. Each needs its own models, which are listed in the Model Information note inside the file.